Creating a blog was out of the question for a long time for me, as measuring everything in the kitchen was like biting into an eggshell. I enjoy cooking and don’t want to waste even a slightest bit of enjoyment in that small world of mine. But little did I know that everything will change, when my husband came home with the Oscar nominated film ‘Julie and Julia’( a real life story) where Julie Powell (part played by Amy Adams) challenged herself to make all the 524 recipes from Julia Child's cook book ‘Mastering the Art of French Cooking’ and blogging all her experiences (The Julie/Julia Project). It was an inspiring movie. A few days later when we were discussing this casually with a friend of ours over tea…everything changed dramatically…..” How about you making at least half of it in one year? Not French but your own. 262 recipes that will inspire others and present it as a blog?” For a minute my mind traveled faster than light… With an experience as a helper in my mother in laws kitchen for 6 years followed by a three year everyday struggle to satisfy the palate of my foodie husband, if I cannot do it then why should I cook? But on the other side with an experience in English literature extending no more than expanding outline stories in English grammar class when I was 18 and two small kids that come in handy at times, will a commitment for the next one year work? Anyway my ‘cook's ego’ didn’t allow me to say no...

So my friends …here I am opening my recipe book, trying to perfect and present 262 recipes in the coming 365 days….A Challenge that will of course tastes good. Come.. Have a walk with me along my journey.. Cheering and inspiring….Forgiving and tolerating…Testing and tasting….for ‘A Tasty Challenge’

Search This Blog

Thursday, May 20, 2010

Chicken Sandwich (ANN’S Style)

Recipe No: 9
Back in the days when I was a college student the week after the second Saturday used to be the most extravagant week. As hostel inmates we were allowed to go home only once in a month and that was the second week of every month. After spending the weekend at home we all will be back on that Monday with the pocket money for the whole of next month. So to ‘celebrate’ the short living richness once in that week we will go out to eat from ‘Ann’s’ which was the most expensive bakery around there. Most of us will have a chicken sandwich for Rs 10 and a mango juice for Rs 5. So the extravagant eating will make us 15 Rupee poor. But as the month progresses the ‘richness’ will deteriorate slowly but steadily. Once more during that time we will go out …But where? To 'Best Bakery'...one of the less expensive ones and will have a chicken puffs for Rs2:50 and lemonade for Rs 1:50, a total being 4 rupees.

Apart from all these, we all enjoyed those days and the thoughts alone bring a bunch of bliss in life, together with a sadness of reality that those days will never come back. Even though the days have gone by, the tastes haven’t. Here is my take on that ‘Ann’s Sandwich’ which was once an extravagance in life.
Posted by Picasa
Ingredients
  • Hot dog buns………………12 no.
  • Chicken roasted and shredded…..2 cups
 (Roast whole chicken breast rubbed with salt, pepper and oil in an oven at 350°F/180C
till done about 20 to 25 minutes. You can also use leftover Rotisserie chicken. I don’t prefer boiled chicken as it doesn’t have so much flavor)
  • Cabbage shredded……………………..2 cups
  • Carrot shredded…………………………1/4 cups
  • Onion chopped into small pieces….2 tablespoons
  • Tomato chopped………………………..1/2 medium (remove seeds if you can)
  • Mayonnaise……………………………….1/3  to ½ cup (Depending on your taste)
  • Crushed black pepper………………….1/2 teaspoon
  • Salt……………………………………………as per taste
  • Butter ……………….As needed
  • Wax/ Parchment paper and toothpicks for presentation.
Method of Preparation
  1. Mix together Chicken, Cabbage, Carrot, Onion, Tomato, Mayonnaise and crushed pepper.
  2. Taste and if it needs salt add it. As mayonnaise contains a lot of salt, don’t add salt in the first place.
  3. Open the hot dog buns taking care not to separate it. Apply butter on both sides.
  4. Put as much filling as you want and wrap a small strip of wax or parchment paper around it as secure with a toothpick.
  5. Serve at room temperature.
Notes: This is a good recipe to use the left over Rotisserie chicken.
It’s very good for outdoor entertaining and picnics.
You can make the filling hours or even a day before and assemble it when needed.


Make it, enjoy the deliciousness and 
serve it to your family with love….


Posted by Picasa

Tuesday, May 18, 2010

Beef Stuffed Buns

Recipe No: 8
As I mentioned in the Bread Sticks recipe, there are a lot of ways to use the bread stick dough. Here is one among them. Although it can be stuffed with whatever filling you want, beef is my favorite.
Posted by Picasa
Ingredients
  • Bread Stick dough…….one recipe
  • Egg……………………………1
  • Water……………………….1 Tablespoon
  • Sesame seeds………….1 Tablespoon
  • Melted butter…………..1 Tablespoon

For the filling
  • Beef…………………………..1 pound
  • Salt…………………………….1/2 teaspoon
  • Turmeric powder……….1/2 teaspoon
  • Oil……………………………….2 Tablespoons
  • Onion chopped………….1 ½ cups
  • Green Chilly (chopped)…2
  • Ginger garlic paste…………1 teaspoon
  • Tomato (diced)……………..1 small
  • Garam Masala powder…..3/4 teaspoon
  • Dark Soy Sauce……………….1 to 2 Tablespoons
Method of Preparation

To make the filling:
  1. Cut, wash and cook the beef with turmeric powder, salt and half a cup of water on a stove top. Once the water is evaporated and the meat is cooked, mince it fine and keep for later use.
  2. On a shallow saute pan on medium heat add oil followed by onion, green chilly and ginger garlic paste.  Add a pinch of salt to speed up the procedure.
  3. When the onions are translucent add diced tomatoes and mix for a minute.
  4. Add minced beef followed by garam masala and soy sauce.  Mix everything properly and check for seasonings. If it needs more seasoning add at this stage.
  5. If the mixture is too dry add one or two tablespoons of water. Mix once more, switch off the stove and let it cool.

To make the Stuffed Buns:
  1. Make the bread dough as it is mentioned in bread sticks.
  2. After doubling divide the dough into 16 equal portions.
  3. Roll out each ball four inches in diameter.
  4. Place a heaping tablespoon of filling in the middle of the dough. Lift the sides of the dough and pinch it together.
  5. Place the seam side down on a baking sheet (the smooth side facing up) and proceed with the same procedure for all the 16 portions of dough.
  6. Cover the buns with a damp kitchen towel and keep aside for 15 minutes for a final rise or proofing
  7. Preheat the oven to 375°F/190°C with an oven proof dish filled with 2 cups of water in the lowest rack.
  8. Beat the egg with 1 tablespoon of water. This is also called egg wash.
  9. Brush the top of the proofed buns with the egg wash and sprinkle the sesame seeds. The egg wash will give the top of the bread a beautiful color and also helps the seeds stick.
  10. Bake in the middle rack of the oven until the top of the bun is light brown. Don’t over bake. This will take around 12 to 15 minutes.
  11. When the bun comes out of the oven brush it with melted butter. Serve hot.
Notes:
  • Please read the steps that I followed while baking the Bread Sticks (Especially keeping a tray of water in the oven while baking) All those are applicable here too.


Make it, enjoy the deliciousness and 
serve it to your family…with love….

Posted by Picasa

Monday, May 17, 2010

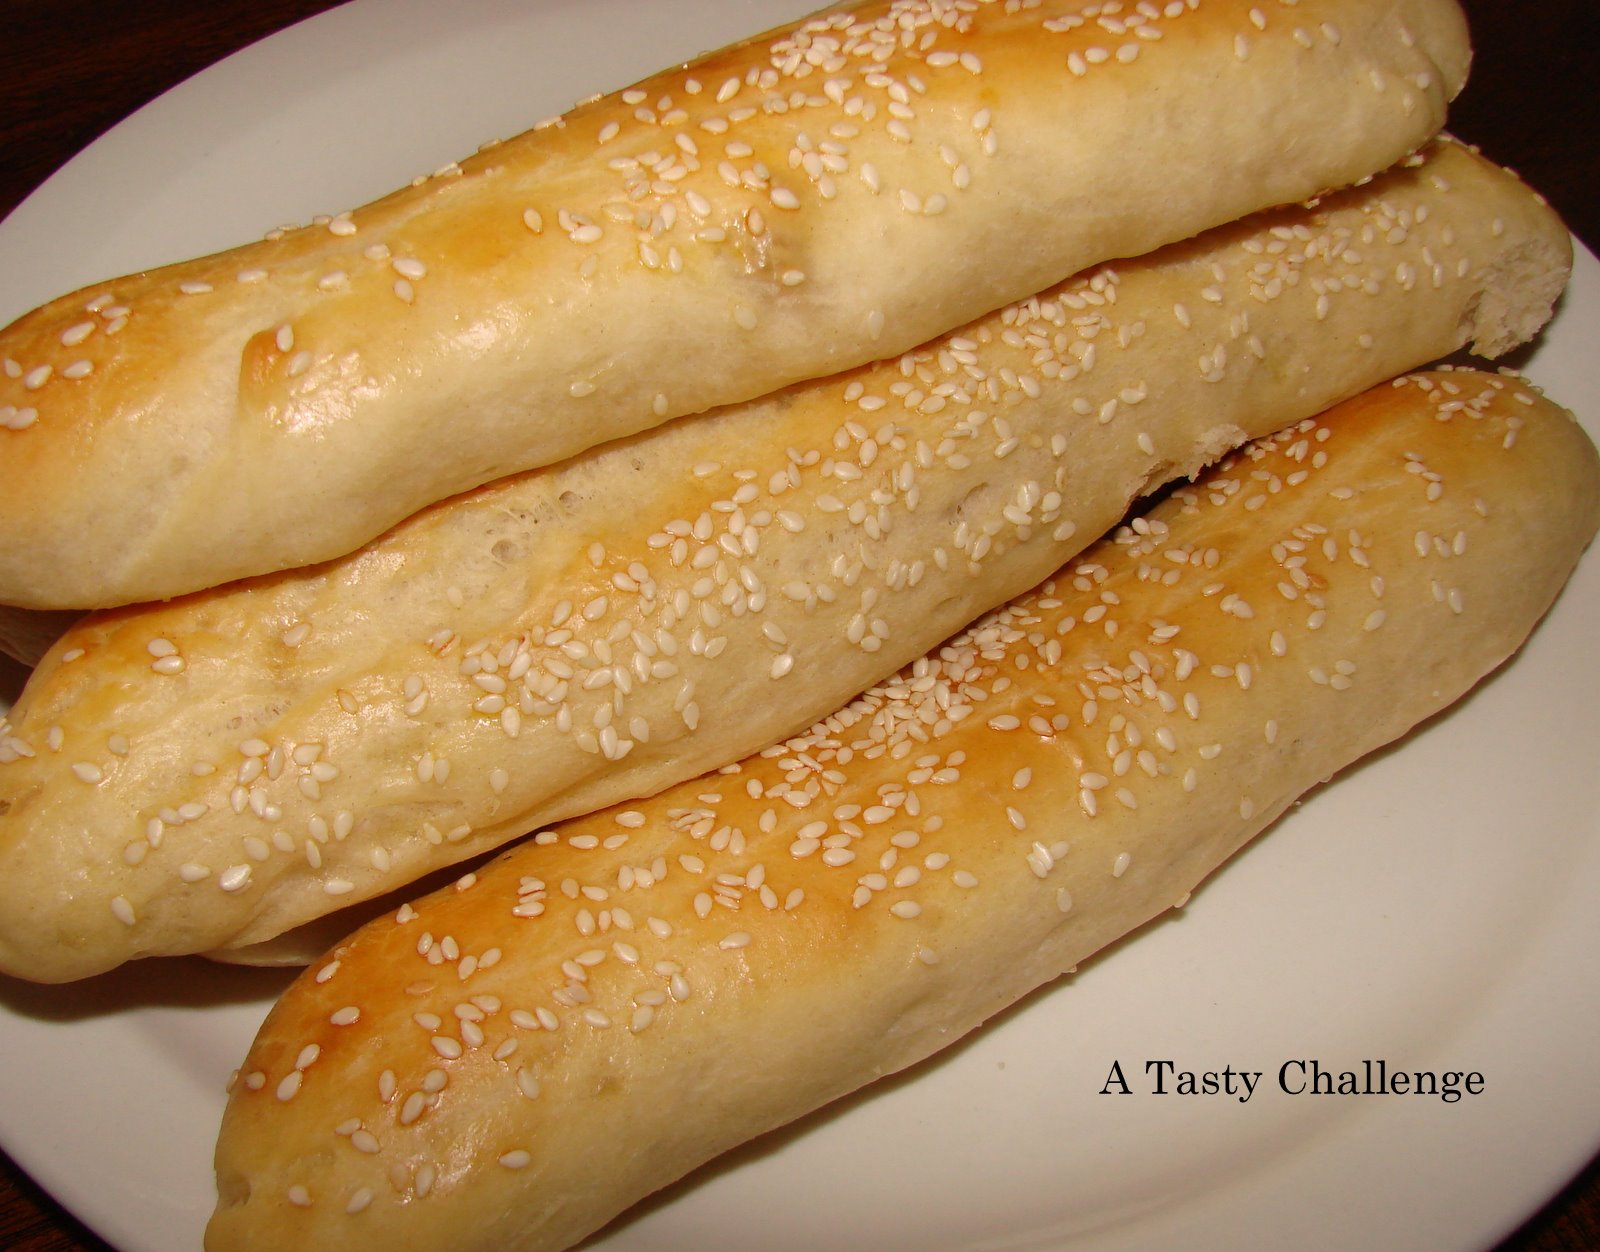
Bread sticks

Recipe No: 7

For me there is nothing more enticing as the smell of fresh bread baking in the oven. Even though I make breads often, the thought of that warm end piece of fresh bread slathered with butter makes my mouth water. I started baking breads after I realized that how much my husband loves fresh baked breads. I found this recipe in an old, yellow page of a bread recipe book. I was amazed when I felt the texture of this bread when I first made this. It became one of my favorites fast…. Just like many others!! Now I use this basic recipe in a number of different ways.
Posted by Picasa

Ingredients
  • Yeast……………………2 teaspoons
  • Warm water………..2/3 cup
  • Salt……………………...3/4 teaspoon
  • Sugar....................1 Tablespoon
  • All purpose flour….2 cups
  • Shortening…………..1/4 cup
  • Oil…………………………A few drops
  • Egg……………………….1
  • Water…………………..1 Tablespoon
  • Sesame or Poppy seeds…2-3 Tablespoons
  • Melted butter……………1 Tablespoon
Method of Preparation
  1. In a big mixing bowl, dissolve yeast and sugar in warm water. Cover and keep aside for 5 minutes for the yeast to activate. (If the mixture is frothy after 5 minutes then you are ready to proceed)
  2. To the yeast mixture, add salt, shortening, and 1 cup flour. Mix it till smooth.
  3. When it is mixed well add the rest of the flour and mix.
  4. Dump it onto a floured board or a clean counter top and knead until smooth about 5 minutes. If you have a stand mixer it works perfect.
  5. Add a few drops of oil in a large bowl and put the kneaded dough, turning once so that the whole dough is covered lightly with oil.
  6. Cover the bowl with a damp cloth n keep in a warm place till the dough doubles in size. (This depends on the atmospheric temperature. I keep it inside the oven and it will double in size in about 11/2 to 2 hours)
  7. When the dough is doubled, punch it down and divide it into eight to ten portions.
  8. Shape each of them into 6 inches long stripes.
  9. Place it on an oiled baking sheet. Cover it again with a moist kitchen towel allow to rest for 10 -15 minutes. It will rise a bit during this process which is also called proofing.
  10. Arrange two racks in the oven, one in the middle and one two rows below that.
  11.  Place a small oven proof bowl filled with 2 cups of water in the lower rack of the oven.
  12. With the water dish inside preheat the oven to 375°F or 190°C.
  13. Beat the egg with 1 tablespoon of water. This is also called egg wash.
  14. Brush the top of the proofed bread sticks with the egg wash and sprinkle the sesame/ poppy seeds. The egg wash will give the top of the bread a beautiful color and also helps the seeds stick.
  15. Bake in the middle rack of the oven until the top of the bread is light brown. Don’t over bake. This will take around 18 minutes. (The inside temperature of the bread should be 190°F)
  16. When it comes out of the oven, brush the top with melted butter. Serve warm or at room temperature.
Notes: Keeping the pan with water inside the oven throughout baking is important, as it gives a nice texture to the crust of the bread while keeping the inside soft.


Make it, enjoy the deliciousness 
and serve it to your family with love....

Posted by Picasa

Chicken Fry

Recipe No: 6

This is a modified version of the chicken fry recipe that was given to me by my co sister. It’s always a winner at ours. Thanks to my sister for this easy wonderful recipe.
Posted by Picasa

Ingredients                                                           Serves 6
  • Chicken………………………………..1 Kg (Remove the skin, cut and washed)
To marinate the chicken
  • Curd………………………………….1/2 cup
  • Ginger garlic paste………………2 Tablespoons
  • Red Chilly powder………………1½Tablespoons
  • Coriander powder……………….1½ Table spoons
  • Turmeric powder………………..1’2 teaspoon
  • Black pepper powder…………..1/2 teaspoon
  • Garam Masala powder……….3/4 Tablespoon
  • Lime Juice…………………………2 Tablespoons
  • Salt…………………………………….As per taste
To Saute
  • Coconut oil…………………….……………….4 Tablespoons
  • Red Onion cut into long thin slices…4 cups
  • Tomato washed and sliced...………….1 big
  • Curry leaves…………………………………….2-3 sprigs

Method of preparation
  1. Marinate the chicken with all the ingredients mentioned in the marinade section and keep aside for 30 minutes.
  2. Add half a cup of water and cook. Put it on a high flame and once it is boiled, lower the heat to medium and cook till all the water is evaporated.
  3. While the chicken is cooking saute the onions and 2 sprigs of curry leaves with oil on a wide shallow nonstick pan till it starts to brown.
  4. Add the tomato and cook for a minute.
  5. Add the cooked chicken and on medium heat fry everything for 20 to 25 minutes stirring occasionally taking care not to break the chicken pieces.
  6. When it is done tear some curry leaves on top and serve hot.
Make it, enjoy the deliciousness and serve it to your family with love….

Garam Masala Powder

Posted by Picasa 


Ingredients 
  • Fennel Seeds…1/2 cup
  •  Whole Star Anise…2
  •  Whole Cardamom… 10 no
  •  Whole Cloves……….1 teaspoon
  •  Cinnamon……………..3 two inch pieces
Method of preparation 
  1. On a dry pan on medium heat add Star Anise, Cardamom, Cloves and Cinnamon and fry till cardamom seeds swells for about 2 minutes. If the cloves start to pop, proceed to the next step.  
  2. Add the fennel seeds and fry till the fennel seeds start to pop.  
  3. Turn off the flame and transfer the contents to a plate and allow it to cool.  
  4. Grind it in a coffee grinder till it is of powder consistency.  
  5. Store it in an air tight container.

      Posted by Picasa

      Sunday, May 16, 2010

      Nan Katta

      Recipe No: 5
      This is a very easy yet delicious item that can be served both as a snack or a dessert.
      Posted by Picasa

      Ingredients
      • All purpose flour/ Maida……1 cup
      • Butter……….........................1/2 cup (at room temperature)
      • Sugar……….........................4 ½ Tablespoons
      • Cashew nuts ….. .................18no. (lightly toasted)
      • Powdered sugar for rolling (I used the regular sugar as it was fine)

      Method of preparation
      1. Preheat the oven at 350°F/180°C
      2. Mix butter and sugar till fluffy with a wooden spoon.
      3. Add flour and knead into a soft ball.
      4. Divide the kneaded ball into 18 to 20 small portions.
      5. Place a cashew in the middle of each portion and roll into a ball.
      6. Place all the balls one inch apart on a baking sheet lined with greased parchment paper.
      7. Bake it in the middle rack of the oven for 18 to 20 min.
      8. Cool it completely and roll in finely granulated/powdered sugar. 
      Notes:
      1. Do add one or two tablespoons more Flour and make the dough tight or it may spread in the oven. (If all depends on how you measure the Flour; if really packed you may not need this but take care to make the dough tight.)


      Make it, enjoy the deliciousness and
      serve it to your family with love…..


      Posted by Picasa

      Saturday, May 15, 2010

      Red Chilly and Soy Chicken/ Chicken 007!!!

      Recipe No:4


      When I came first to US some of my husband’s friends made a request to make a spicy chicken dish. So I made this spicy red chilly and soy chicken that I used to see my mother in law make. Accidentally it was a bit too spicy then but because of the taste most of them ate to their stomach full! They called this dish ‘Chicken 007’ and so do me from then onwards!!!
      Posted by Picasa
      Ingredients                                             Serves 6
      • Chicken (without skin) cut, washed and drained…1 kg
      To marinate the Chicken
      • Red Chilly powder…….3/4 teaspoon
      • Turmeric powder……..!/2 teaspoon
      • Salt……………………………3/4 teaspoon
      To saute
      • Onion cut into thin long slice………4 cups
      • Red Chilly powder……1 ½ -2 teaspoons
      • Ginger-Garlic paste….3 Tablespoons
      • Dark Soy Sauce…………3 Tablespoons
      • Garam masala powder...1 teaspoon
      • Vegetable Oil...............6-7 Tablespoons

      Method of preparation
      1. Marinate the chicken with the ingredients given in the marinade section and keep aside for 1/2 hour.
      2.  In a large pan add 2 Tablespoons of oil and saute the Onions till it gets golden brown. (Instead of this you can also use fried onions.) Remove it from the pan and keep it aside.
      3. In the same pan on high heat, add 3 tablespoons of oil and fry (shallow fry) the chicken pieces. (If you are using a good nonstick pan then you won’t need more than 3 Tablespoons of oil. If not you may need a bit more oil) you don’t have to fry it till done. A small brown color will do.
      4. Remove the fried chicken pieces from the pan and keep it aside.
      5. Put the heat on low and to the same pan add 1 Tablespoon of oil and add red chilly powder. Saute it till the raw smell goes and fried a bit, taking care not to burn.  
      6. Add the ginger-garlic paste to the chilly powder and saute again till the raw smell goes.
      7. When the raw smell is gone add the fried chicken, fried onions and two cups of water and let the chicken cook till done and the gravy is thickened for about 30 to 40 min. Make sure the heat is on medium.
      8. When the Chicken is cooked add soy sauce and homemade Garam masala. Check the seasoning at this point and adjust the salt. Let it boil for another minute or two and then switch off the stove.
      This goes well with any sort of white rice, Pulav or Roties. Frying the chicken and onions can be done ahead of time and stored in the fridge till you are ready to do the rest. As everything is fried, it will stay good outside the fridge for a long time. This makes it very good for taking on outside gatherings or tours,if you prefer homemade food.


       Make it, enjoy the deliciousness and 
      serve it to your family with love…..

      Posted by Picasa