Creating a blog was out of the question for a long time for me, as measuring everything in the kitchen was like biting into an eggshell. I enjoy cooking and don’t want to waste even a slightest bit of enjoyment in that small world of mine. But little did I know that everything will change, when my husband came home with the Oscar nominated film ‘Julie and Julia’( a real life story) where Julie Powell (part played by Amy Adams) challenged herself to make all the 524 recipes from Julia Child's cook book ‘Mastering the Art of French Cooking’ and blogging all her experiences (The Julie/Julia Project). It was an inspiring movie. A few days later when we were discussing this casually with a friend of ours over tea…everything changed dramatically…..” How about you making at least half of it in one year? Not French but your own. 262 recipes that will inspire others and present it as a blog?” For a minute my mind traveled faster than light… With an experience as a helper in my mother in laws kitchen for 6 years followed by a three year everyday struggle to satisfy the palate of my foodie husband, if I cannot do it then why should I cook? But on the other side with an experience in English literature extending no more than expanding outline stories in English grammar class when I was 18 and two small kids that come in handy at times, will a commitment for the next one year work? Anyway my ‘cook's ego’ didn’t allow me to say no...

So my friends …here I am opening my recipe book, trying to perfect and present 262 recipes in the coming 365 days….A Challenge that will of course tastes good. Come.. Have a walk with me along my journey.. Cheering and inspiring….Forgiving and tolerating…Testing and tasting….for ‘A Tasty Challenge’

Search This Blog

Wednesday, December 8, 2010

Chilly Potato

Recipe No: 137
Ingredients                                Serves 4
  • Potato…………………….2 Big (Slice into long big pieces or 3 Cups)
For the Marinade
  • Corn Starch………………2 Tablespoons
  • Soy Sauce…………………1/2 Tablespoon
  • Salt………………………....3/4 Teaspoon
  • Red Chilly Powder……..1/2 Teaspoon
  • Egg………………………….1 small beaten (Vegans use water instead)
To Saute
  • Oil………………………..1 Tablespoon
  • Garlic minced…………2 ½ Tablespoons
  • Spring Onion……….…3 (slice and keep Whites and Greens separately)
  • Onion…………………....1 ½ Cups (Cut into cubes)
  • Green Capsicum……..1 small (Cut into cubes)
  • Indian Green Chilly...1 (Chopped)
  • Sambal Oelek………….1 teaspoon (If not use Red Chilly paste or even Red chilly flakes)
  • Chilly Garlic sauce.....1 ½ Teaspoon (Red)
  • Tomato Ketchup….…2 Tablespoons (or tomato sauce)
  • Dark Soy Sauce………2 Tablespoons
  • Vinegar……………..….1 Teaspoon
  • Water…………………...1/4 Cups
  • Corn Starch…………..1 Teaspoon (Dilute with 1 Tablespoon Water)
  • Salt…………………..….as needed
Method of Preparation
  1. Add enough cold Water to the Potatoes so that the water will stay above the level of the Potatoes and boil. Once boiled off the flame, drain the Potatoes, wash it in cold water and pat it dry.
  2. Mix all the ingredients to make the Marinade and marinate the Potatoes.
  3. Heat at least two inches of Oil in a pan on high heat and deep fry the Potatoes.
  4. When the Potatoes attain a golden color and are cooked  take it out of the Oil and drain the excess Oil on a paper towel.
  5. In another pan heat a tablespoon of Oil on high heat and saute the Garlic and Spring Onion Whites.
  6. When it starts to brown, add Onion, Green Chilly and Capsicum and saute for a minute.
  7. Add Sambal Oelek and fry for 30 seconds and add Chilly Garlic Sauce, Ketch up, Soy Sauce, Vinegar and Water.
  8. Once it starts to boil add the Potatoes and mix well.
  9. Once boiled, add Corn Starch diluted in water and mix well.
  10. Add Salt if needed followed by the Spring Onion Greens and off the heat.
  11. Serve hot with rice or Chappati.
Notes:
  •  While boiling the Potatoes don't overcook it. If you do, it will disintegrate when you cook them later. Once boiled, wash it in cold water to prevent further cooking.
  • Deep fry the Potatoes in batches to prevent overcrowding. When you drop the Potatoes into the Oil try to drop it one by one to avoid them sticking together and try to separate them if they clump.
  • For those who want to reduce the intake of Oil, broil the Potatoes under the Broiler in the Oven.
  • Sambel Oelek is Dry Red Chilly made into a paste with Vinegar and is available in most of the stores that sells Asian groceries or the Asian section of the supermarkets.
  • Red Chilly Garlic Sauce and Dark Soy Sauce (I use Ching’s secret Dark Soy Sauce) are available in most of the Indian stores.
  • Add Salt only towards the end as the sauces contains a lot of Salt. 
  • This dish is only mildly hot, but if you want to make it hotter and more of Sambal Oelek or Chilly Garlic sauce.


Make it, enjoy the deliciousness and
serve it to your family with love...

Monday, December 6, 2010

Broccoli- Green Gram (Cherupayar) Thoran/Stir Fry with Coconut

Recipe No: 136
Back in California, every Sunday after Church we used to have dinner… which was such a nice time to mingle with others, that indeed gave an awesome feeling of being in a Community, especially when you have no one from your family around. On one such night someone brought this Broccoli and Green Gram thoran. The first thing you notice about this dish is that it doesn’t have that characteristic strong taste of Broccoli which many people especially the kids hate. So when I tried it, my kids were just unaware of what they were eating… I decided to share it so that it may help some people who are desperately trying to make their kids eat Broccoli with constant failure, just like I used to, at times. Thanks to the one who made that dish that night in the Church……..
Ingredients                                    Serves 6
  • Dry Green Gram…………...1/3 Cup
  • Broccoli chopped finely….2 heaping cups
  • Oil………………………….…..2 Tablespoons
  • Mustard Seeds……………..1/2 Teaspoon
  • Dry Red Chilly………..……1 or 2 (broken into two)
  • Shallots sliced thin…….…2
  • Curry Leaves………….…...2 Sprigs
    To Grind
    • Grated Coconut…………..1/3 Cup
    • Indian Green Chilly..……2 no
    • Garlic………………….……..1 Big
    • Shallots sliced…..…………1/3 Cup
    • Turmeric Powder…………1/4 Teaspoon
    • Salt…………………………….as needed
    Method of Preparation
    1. Wash the Green Gram, add 1 cup Water and boil till it is ¾th cooked.(Once boiled lower the heat and let it cook)  It shouldn’t be overcooked, but if it is under cooked we can definitely cook it together with Broccoli. If there is extra water, drain it.
    2. Grind all the ingredients given in the 'to grind' section to a coarse consistency.
    3. Heat Oil in a pan on medium heat and splutter the Mustard Seeds.
    4. Add Dry Red Chilly, Shallots sliced and Curry leaves and saute till it is golden brown.
    5. Add the chopped Broccoli and saute for a minute.
    6. Make a well in the middle and put the ground Coconut mixture and cover it with the Broccoli.
    7. Add the Green Gram on top and cover the pan. If needed, add one or two tablespoons of water (or the excess water from  cooking Green Gram). Lower the heat to minimum and let the Broccoli and Green Gram cook completely.
    8. Once cooked uncover the pan and saute till it is completely dry.
    9. Serve hot with Rice.
    Notes:
    • I chopped Broccoli finely in a food processor so that it will not be recognized easily by the kids. But if you want to see the pieces then you don't have to chop that finely. 
    • If you are using the stem parts that are near to the florets, please do take the skin off before chopping.
    • Be gentle when you stir it in the end. Vigorous stirring and over cooked Green Gram will make the dish mushy.


      Make it, enjoy the deliciousness and 
      serve it to your family with love…

      Sunday, December 5, 2010

      Lamingtons (Coconut coated Chocolate covered Yellow Cakes)

      Recipe No: 135
      This is a recipe from my Mother in Law's old cook book. I tasted it for the first time when she made it and I became an instant fan and so was my husband. So I used to make this now and then and many of my friends loved it. This is a real treat for those who love that Chocolate- Coconut combination.         
      Ingredients                                              Makes 35 pieces
      For the Cake
      • All Purpose Flour/ Maida…..1 1/3 Cup
      • Custard Powder………………..1 Tablespoon
      • Sugar……………………………...1 Cup
      • Milk………………………………..1/2 Cup
      • Baking Powder………………….1 Teaspoon
      • Salt………………………………….1/4 Teaspoon
      • Unsweetened Butter………....1/4 Cup (Avoid Salt if you are using Salted Butter)
      • Egg……………………………….…2
      • Vanilla Essence…………………1/2 Teaspoon
      For the coating
      • Cocoa Powder……………………1/2 Cup
      • Icing/ Powdered Sugar.........1 ½ Cup
      • Boiling Water…………………...3/4 Cup
      • Desiccated Coconut……………2 Cups (Unsweetened)
      Method of Preparation
      To make the Cake
      1. Preheat oven to 350˚F/ 180˚C.
      2. Butter and Flour (or use a cooking spray or line the bottom with Parchment/ Butter paper and Oil it) a 13/ 9 inch baking pan.
      3. Sift together Flour, Baking Powder, Salt and Custard Powder and keep it aside till ready to be used.
      4. Cream together Butter, Vanilla Essence and Sugar really good and add Egg one at a time and beat till light and fluffy.
      5. Add Flour in 3 additions alternating with Milk, starting and ending with Flour.
      6. Once mixed well, pour this into the prepared cake pan and bake for 20-25 minutes or till a tooth pick inserted in the middle comes out clean and the top is slightly browned.
      7. Allow the Cake to cool completely and then cut it into 35 equal sized pieces. Discard the edges if you don’t like that portion.
      To make the Lamington
      1. Mix  Cocoa Powder, Powdered/ Icing sugar and Boiling Water till the Sugar is melted thoroughly and the Cocoa powder is well mixed. Allow it to cool completely.
      2. In another shallow plate keep the Unsweetened Desiccated Coconut ready.
      3. Dip each Cake piece in the Chocolate mix and then roll in the Desiccated Coconut.
      4. Repeat this process with all the 35 Cake pieces and serve them at room temperature.
      Notes:
      • Don’t over mix the cake batter once the Flour is added, as it will develop the Gluten (a fibrous substance) in the Flour making the Cake tough.
      • Don’t dip the cake pieces in the Chocolate for long as it will absorb a lot of Chocolate Syrup. So dip the cake pieces only for just enough time to have a very thin  and even coating. Roll immediately in Coconut.
      • If desiccated Coconut is not available, then dry some finely grated fresh Coconut either in Sun or in the Oven.


      Make it, enjoy the deliciousness and 
      serve it to your family with love…

      Mushroom Tart

      Recipe No: 134
      Nearly 2 years ago my husband bought me a Stand Mixer, which later became my best friend in the kitchen. The instruction booklet that came with it happened to have some recipes with some captivating pictures. One such picture that attracted me the most was of this Mushroom Tart and decided to give it a try. Here is the result of my trial… the recipe had changed a bit so that I can make it with the ingredients that are easily available in my household. The crust is same as that in the booklet but if Cream Cheese is not available in your household please use the recipe for the Pot Pie crust to make this Tart shell.
      Ingredients                                              Makes 12
      For the Crust
      • Cream Cheese……………………..4 Oz/ ½ Cup (At room Temperature)
      • Butter…………………………………2 Tablespoons (At room temperature)
      • All Purpose Flour/ Maida……..3/4 Cup
      • Salt…………………………………....1/3 Teaspoon
      For the Filling
      • Oil……………………………………...1 Tablespoon
      • Mushrooms sliced.........……….8 Oz
      • Onion chopped…………………….1/2 Cup
      • Egg…………………………………….1 Beaten (Optional If you are not using egg use ¼ cup more Cheese)
      • Shredded Mozzarella Cheese…1/2 Cup
      • Salt and Pepper to taste
      Method of Preparation
      To make the Crust
      1. Mix all the ingredients to make the crust into a soft dough. If the ingredients are at  room temperature there is no need to add water.
      2. Make it into a ball, wrap in a plastic wrap and keep in the refrigerator till ready to be used.
      To make the filling
      1. Heat Oil in a pan on medium heat and saute Onion and Mushroom with Salt and Pepper till the Mushrooms are nicely browned. Once browned, off the heat and let it cool down.
      2. Once cooled, mix Egg and Cheese into the Mushroom mixture.
      To make and bake the Tart
      1. Preheat the oven to 375˚F/ 191˚C.
      2. Spread a thin layer of Butter or Oil on a Muffin pan.
      3. Divide the chilled dough into 12 equal pieces; roll and make the pieces smooth.
      4. Roll out each piece of dough into 4 inches in diameter.
      5. Press it onto the bottom and sides of a  cup on the Muffin pan. Repeat this process with all the portions.
      6. Divide the filling into 12 equal portions and place it on each of the dough lined Muffin cups.
      7. Place this on the 2nd rack from the bottom of the oven and bake for 12 minutes. Then place it in the middle rack of the oven and bake for another 8-10 minutes or till the crust is lightly browned and the filling is puffed up and golden brown on top.
      8. Serve hot after sprinkling with a few thin slices of spring onion greens.
      Notes:
      • Adding Salt at the beginning while sauteing the Mushrooms will draw the water out and it is a must to let it dry up because if there is moisture in the filling it will make the Tart shell soggy.
      • Placing the Tart on the bottom  rack will help the bottom of the Tart Shell cook fast without becoming soggy and transferring it to the top later will keep it from burning.
      • If Cream Cheese is not available, please use the recipe for Pot Pie crust to make the Tart Shell. Roll out small portions of the Pot Pie crust dough (for recipe click 'here') and press it onto the bottom and sides of the Muffin and continue with the other steps as mentioned above.


      Make it, enjoy the deliciousness and
       serve it to your family with love…

      Friday, December 3, 2010

      Kanava Thoran (Stir fried Squid with Coconut)

      Recipe No: 133
      Ingredients                                  Serves 5
      • Squid cut into small pieces….....2 Cups
      • Coconut Oil…………………………..2 Tablespoons
      • Mustard Seeds………………………1/2 Teaspoon
      • Shallots sliced……………………….1/3 Cup
      • Curry Leaves………………………..2 Sprigs
      • Kokum/ Kudampuli………………3 small pieces
      • A bit of Coconut Oil and a sprig of Curry leaf to put on top.
      To Grind
      • Onion chopped……………………….1/4 Cup
      • Garlic…………………………………….2 big cloves
      • Ginger…………………………………...1 small piece
      • Grated unsweetened Coconut…..3/4 Cup
      • Indian Green Chilly…………….…..2 (Cut into small pieces)
      • Turmeric powder…………………….1/2 Teaspoon
      • Salt……………………………………....3/4 Teaspoon
      • Red Chilly powder…………………..1/2 Teaspoon
      • Uluva/ Fenugreek powder………..1/8 Teaspoon
      Method of Preparation
      1. Grind all the ingredients in the ‘to grind’ section to a course consistency and keep aside till ready to be used.
      2. In a  pan (Manchatti- an earthen cookware preferred) on medium high heat, add Coconut Oil and let it become hot. Swirl the pan so that the Oil spreads all over the base of the Pan.
      3. Add Mustard seeds and let it splutter. Add sliced Shallots and Curry leaves and saute till it is golden brown in color.
      4. Add Squid, Kokum (Kudampuli) and the ground Coconut mixture, mix well, add two tablespoons of Water and close the pan. Let it cook on medium low heat till all the water is evaporated and the Squid is cooked through. This will take only around 10 minutes.
      5. Taste for Salt and add more if needed.
      6. Pour a bit of Coconut Oil and tear some Curry Leaves on top and close the lid. Switch off the flame and let it sit for 10 minutes before serving hot with rice.
      Notes:
      • A lot of water will ooze out of Squid while cooking. So it is not necessary to add more water while cooking.
      • I happened to have some cleaned big squid tubes in the refrigerator with which I made this dish. If you get the small ones cut it into rounds which will give that signature look of Squid thoran.


      Make it, enjoy the deliciousness and 
      serve it to your family with love…

      Thursday, December 2, 2010

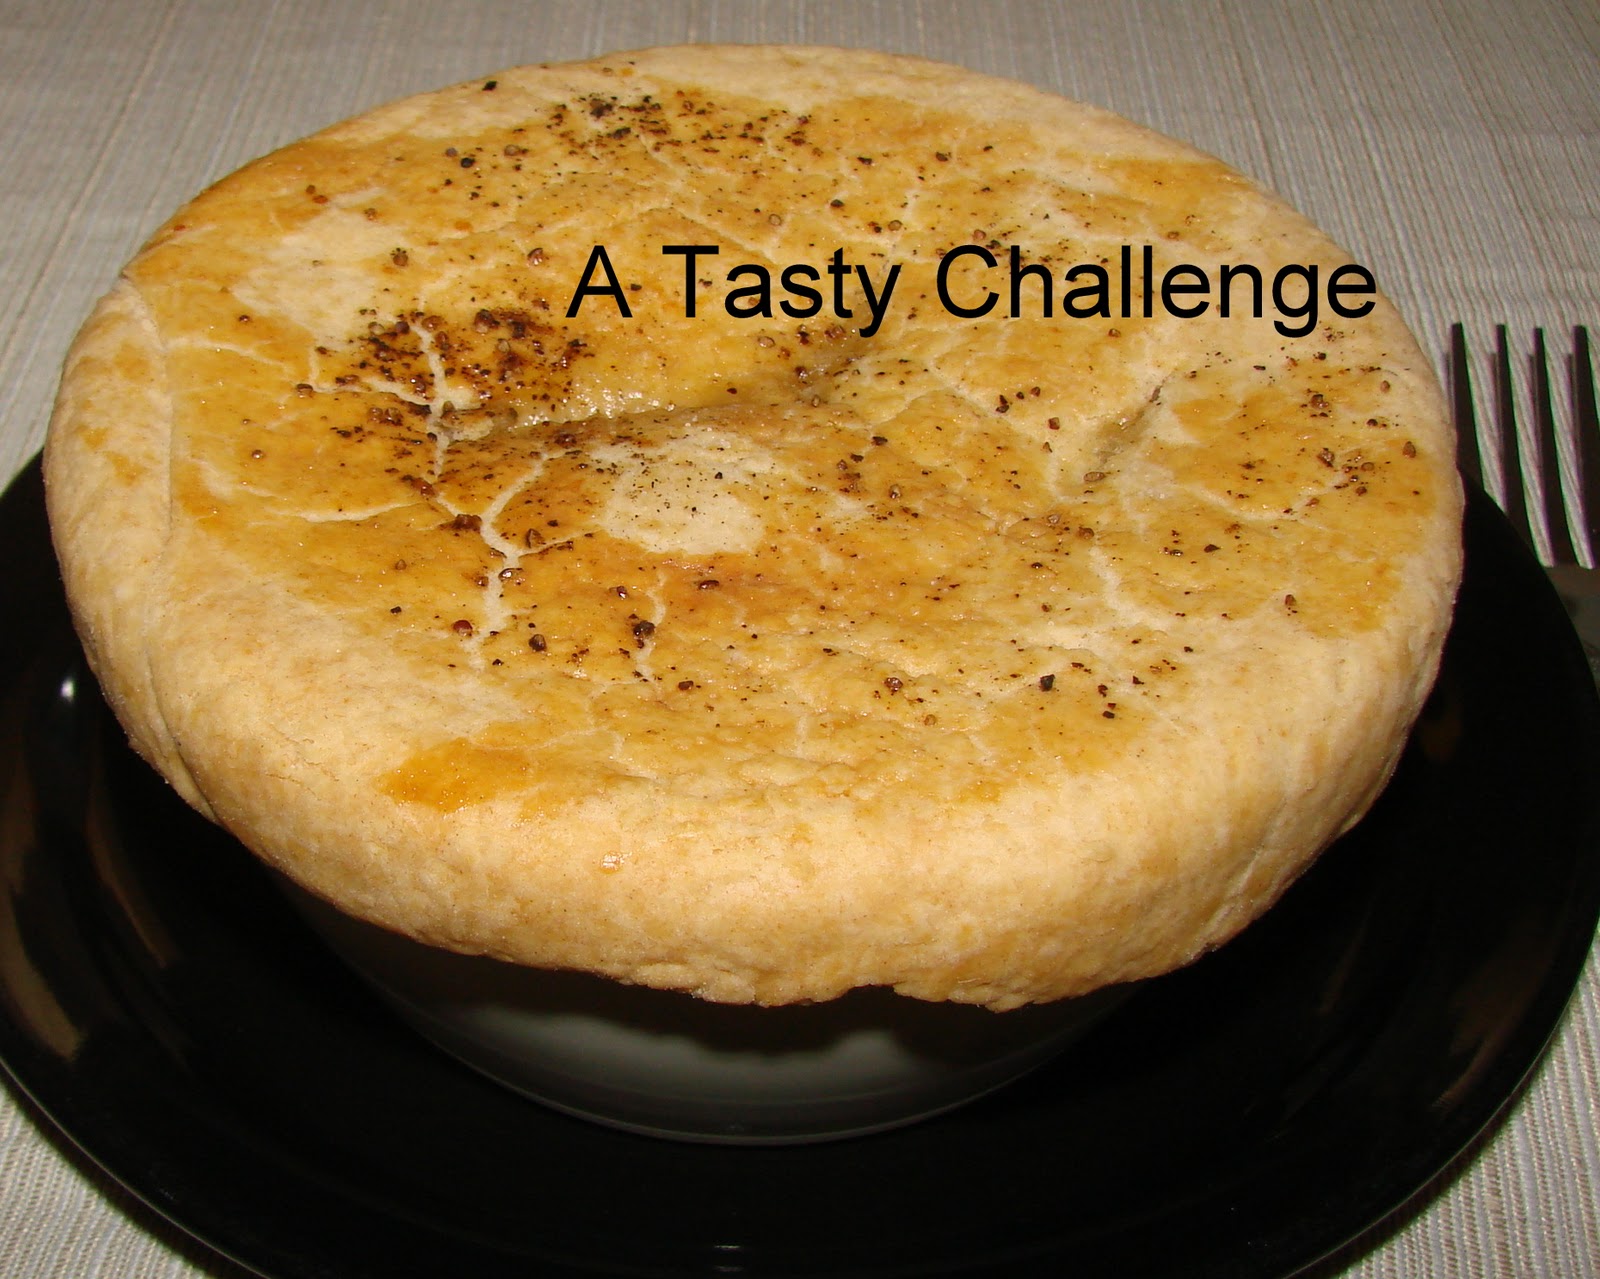
      Turkey/ Chicken Pot Pie

      Recipe No: 132
      This recipe is same for both Chicken and Turkey. I am doing it with Turkey here as I want to use the leftover Turkey from the Thanksgiving. Except for the slight taste difference of these two proteins, there is not much of a difference between the two dishes.
      Ingredients                           Serves 3
      For the Filling
      • Butter/ Oil………………..........3 Tablespoons
      • All Purpose Flour/ Maida…..3 Tablespoons
      • Milk…………………………….….3 Cups
      • Salt……………………………..….1 Teaspoon
      • Pepper Powder………………...1/3 Teaspoon
      • Carrots……………………………1/2 Cup (Cut into small cubes)
      • Fresh Green Peas……………..1/2 Cup
      • Cooked Turkey Cubed……….2 Cups
      For the Crust
      • All Purpose Flour/ Maida….1 ½ Cups
      • Baking Soda……………….……1/8 Teaspoon
      • Salt…………………………...……1/4 teaspoon
      • Cold Butter ……………………..6 Tablespoons (Cut into cubes)
      • Cold Water…………………..….6 Tablespoons
      Other Ingredients
      • Egg wash (Mix 1 Egg with 1 Tablespoon of water) for brushing
      • Salt and Pepper to sprinkle on top.
      Method of Preparation
      To make the Crust
      1. Mix together Flour, Salt and Baking Soda really well.
      2. If you have a Food Processor (or a stand mixer), put Flour mixture and Cold Butter into it and pulse a few times till Butter is evenly distributed in the Flour with a course consistency. If you don’t have food processor, rub Butter into the Flour to get a course consistency. Whatever method you use don’t let the Butter melt completely into the Flour, but it should remain as small pieces.
      3. Mix in the cold water to make a very dry, crumbly dough.
      4. Dump it onto a floured surface, pat it into a ball (don't knead), wrap in plastic wrap and keep in the refrigerator till ready to be used.
      To make the filling Part
      1. In a thick bottomed pan on medium heat, melt 3 Tablespoons of Butter and add 3 Tablespoons of Flour and fry till the raw smell is gone. This will take at least a minute, so please be patient and take care not to burn the Flour.
      2. Mix in the cold milk and stir really good to dissolve all the lumps and let it cook till it is thickened. Stir constantly.
      3. Add the Carrots and Peas and allow boiling. Do stir now and then.
      4. Once boiled, add the cubed cooked Turkey and mix well.
      5. Mix Salt and Pepper and switch off the flame.
      To assemble and cook the Pot Pie
      1. Preheat the oven to 400˚F/ 204˚C
      2. Divide the Turkey in the White sauce mixture between three oven proof bowls.
      3. Roll out the chilled dough into ¼ of an inch in thickness and cut out rounds with an inch more circumference than that of the top round of the bowl you are using.
      4. Brush the sides of the bowl with Egg wash. This will help the dough to stick to the sides of the bowl.
      5. Place the cut out dough on top of the bowl and press it to the sides to the bowl.
      6. Brush the top of the dough with the Egg wash and sprinkle  a pinch of Salt and Pepper.
      7. Make two or three small slits on top of the dough and bake it in the middle of the oven for 30-40 minutes or till the crust becomes golden in color and the inside is bubbly.
      8. Serve it hot.
      Notes:
      • Keeping the butter cold is very important because when the heat from the oven hits the cold Butter , the vapor formed will help the dough rise, giving it the flakiness. (we are using only a very small amount of Baking Soda)
      • If you don’t use a thick bottomed pan the white sauce may stick to the bottom of the pan and may burn.
      • Cutting the dough with a bigger circumference will aid in easy sticking of the dough to the sides of the bowl.
      • The slits on top if the dough, will prevent it from bursting in the oven due to the pressure that builds up because of the vapor.
      • An easy alternative to homemade dough is Puff Pastry. If you are using it instead of the dough, cut out rounds and bake them separately before putting it on top of the baked filling. If Puff Pastry is placed directly on top of the filling, there are chances that it may touch the filling and become soggy giving an uncooked appearance. 
      • Left over Rotisserie Chicken is good for making Chicken Pot Pie.


      Make it, enjoy the deliciousness and
      serve it to your family with love...

      Wednesday, December 1, 2010

      Whole Roasted Turkey and Gravy

      Recipe No: 131
      Thanksgiving is far over and I was not able to give my whole roasted Turkey recipe before  it, but I think this may help someone next year… I love to give an Indian twist to this with a marinade made with our spices. The gravy makes this dish, but unfortunately, while busy talking to everyone in the party, I just forgot to take its picture. (But was able to dig one from the previous year.) But still I think the description will help anyone out there who try this recipe.
      Ingredients                                      Serves 15-18
      • Turkey………………………..1 (Weighing around 14 pounds)
      For the Marinade
      • Ginger Garlic Paste….......1 ½ Tablespoons
      • Red Chilly Powder…….....1 Teaspoon
      • Garam Masala Powder….1/2 Teaspoon
      • Vinegar/ Lemon Juice....1 Tablespoon
      • Salt………………………….…2 Tablespoons
      • Pepper Powder………….…1 Teaspoon
      • Oil…………………………..…1/4 Cup
      For the Gravy
      • Butter/ Oil……………….…3 Tablespoons
      • Flour……………………..….3 Tablespoons
      • Turkey drippings diluted with 3 cups of Water or Chicken Stock
      • Salt and Pepper to taste
      Method of Preparation
      To Marinate the Turkey
      1. Thaw the Turkey really well in the refrigerator. This will take at least 2 days.
      2. Take the Giblets out of the cavity. The Neck and the Gizzard will be in the stomach cavity and Liver and Heart will be in the neck cavity. Make sure you remove both. Wash the Turkey well and take off remaining feathers if any. Wipe and dry it as much as possible and remove excess fat if you wish.
      3. Mix all the ingredients to make the marinade.
      4. With your hand carefully lift the skin from the breast as much as possible  without tearing and spread some marinade inside. This will help the spices to sweep into the meat and also will make the skin crispy.
      5. Spread the remaining Marinade all over the Turkey and massage into the skin for a few minutes. Make sure you spread the marinade in all nooks and corners of the Turkey.  Keep the marinated Turkey for at least 48 hours in the lowest rack of the refrigerator.
      To cook the Turkey
      1. Preheat the oven at 350˚F/180˚C.
      2. Keep the Turkey in the middle of the oven on a wire rack over a dripping pan. A roasting pan is most helpful as it will crisp the Turkey up from the underside too. It is important as it is not possible to turn the Turkey over while cooking due to its weight.
      3. Roast for 2 ½ to 2 ¾ hours or till the juices runs clear or the Meat Thermometer inserted into the middle of the breast meat reads 165˚F/ 84˚C.
      4. If you want vegetables cut into big pieces and put in the bottom of the roasting pan when half way through cooking.
      5. Once cooked, take the Turkey out of the roasting pan, cover with a foil and let it rest for at least 20 minutes before carving.
      To make the gravy
      1. From the Turkey drippings separate the Oil if possible and discard it or use it as the Oil component to make the Gravy.
      2. Pour Chicken Stock or Water to the pan with the Turkey drippings and let the stuck on drippings get loose. Scrape  the drippings lightly with a spatula if needed and keep it aside till ready to be used.
      3. In a pan on medium heat melt Butter/ Oil/ Fat oozed from the Turkey ; add the Flour and let it fry for a minute or till a roasted smell comes.
      4. Add the dripping with the Water/ Stock into the Flour and stir really good so that all the flour is dissolved well without any lumps.
      5. Add Salt and Pepper and let the gravy begin to boil stirring continuously.
      6. Once thickened, remove from heat, strain to remove any big particles if any and serve with Turkey.
      7. Pour a small portion of the gravy on the Turkey before carving and serve the rest on the side.
      Notes:
      • This recipe does not include stuffing. So if you stuff the cavity of the Turkey, the total time for roasting will be go up by at least 30 more minutes and the middle of the stuffing should read 160˚F/ 71˚C on meat thermometer.
      • To let the Turkey rest after cooking is important. While cooking, the juices from inside will be traveling towards the periphery (on its way to evaporate), so when you cut it while hot, the juices will simply ooze out and the remaining meat will be dry. But when allowed to rest the juices will distribute back in the meat and will not escape while cutting, making it more moist and juicy.


      Make it, enjoy the deliciousness and 
      serve it to your family with love...