Creating a blog was out of the question for a long time for me, as measuring everything in the kitchen was like biting into an eggshell. I enjoy cooking and don’t want to waste even a slightest bit of enjoyment in that small world of mine. But little did I know that everything will change, when my husband came home with the Oscar nominated film ‘Julie and Julia’( a real life story) where Julie Powell (part played by Amy Adams) challenged herself to make all the 524 recipes from Julia Child's cook book ‘Mastering the Art of French Cooking’ and blogging all her experiences (The Julie/Julia Project). It was an inspiring movie. A few days later when we were discussing this casually with a friend of ours over tea…everything changed dramatically…..” How about you making at least half of it in one year? Not French but your own. 262 recipes that will inspire others and present it as a blog?” For a minute my mind traveled faster than light… With an experience as a helper in my mother in laws kitchen for 6 years followed by a three year everyday struggle to satisfy the palate of my foodie husband, if I cannot do it then why should I cook? But on the other side with an experience in English literature extending no more than expanding outline stories in English grammar class when I was 18 and two small kids that come in handy at times, will a commitment for the next one year work? Anyway my ‘cook's ego’ didn’t allow me to say no...

So my friends …here I am opening my recipe book, trying to perfect and present 262 recipes in the coming 365 days….A Challenge that will of course tastes good. Come.. Have a walk with me along my journey.. Cheering and inspiring….Forgiving and tolerating…Testing and tasting….for ‘A Tasty Challenge’

Search This Blog

Tuesday, November 15, 2011

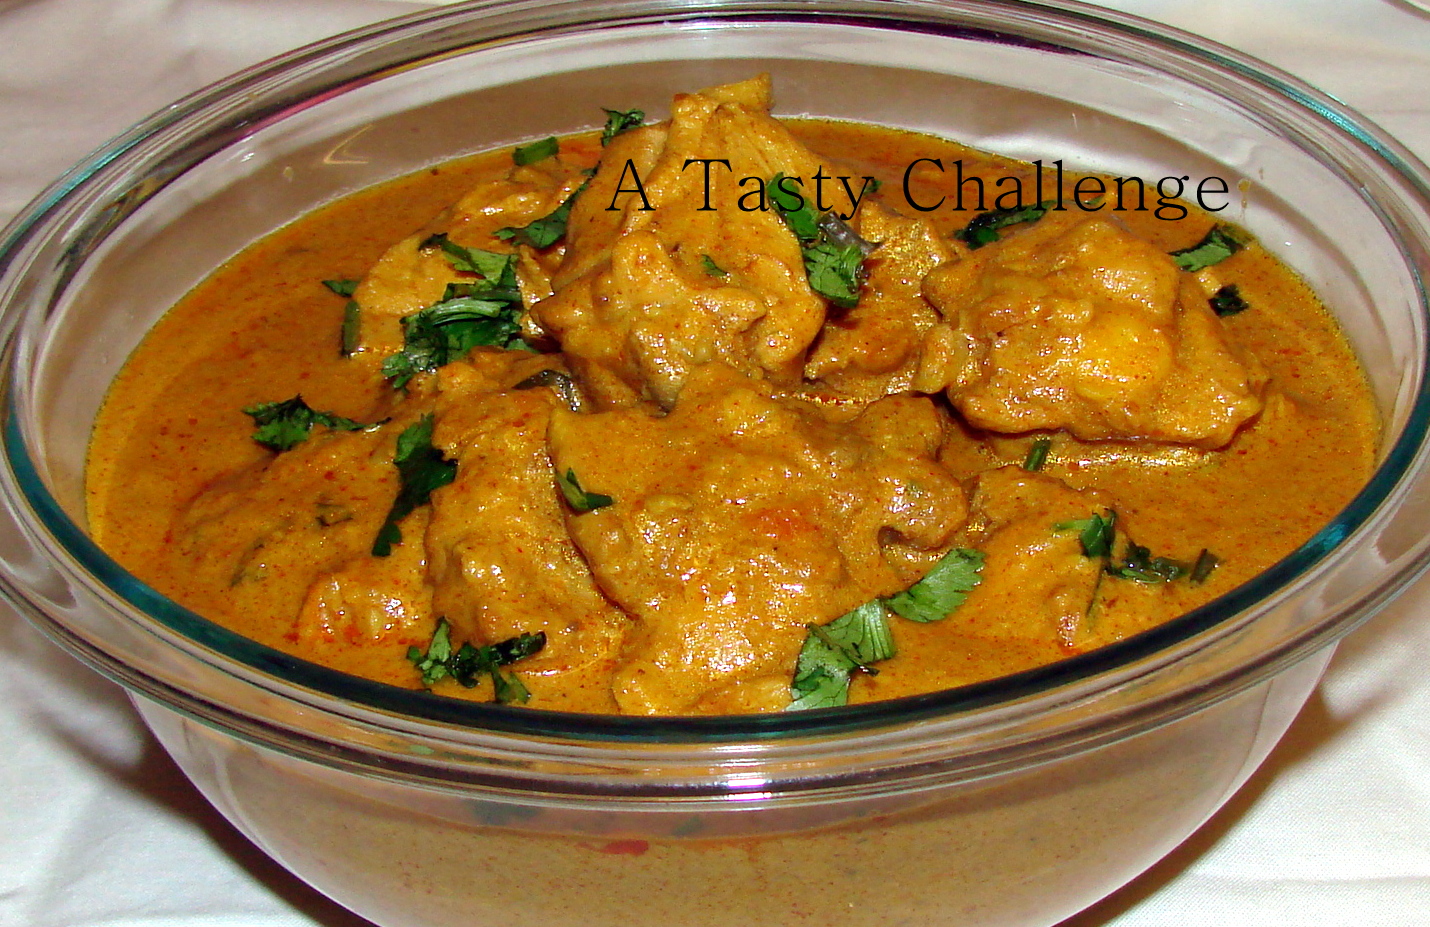
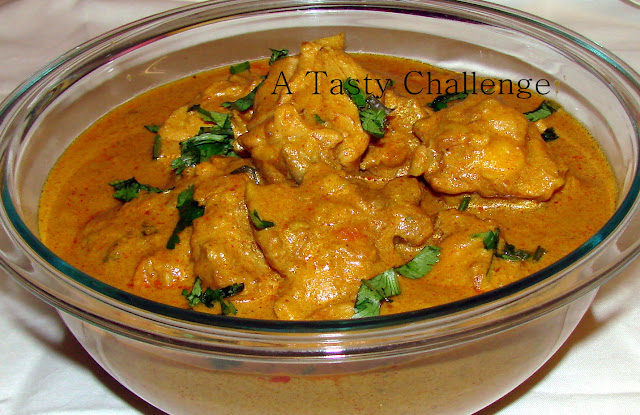
Chicken in Roasted Cashew-Peanut Gravy

Recipe No: 272
I had already posted the vegetarian version of this recipe with Cauliflower. Now this is the non-vegetarian version of the same. The basic ingredients and the method of preparation are the same but the amount changes to suit the taste of Chicken.
Ingredients                                        Serves 6
  • Chicken………………............….2 lb/900 grams (Cut into medium sized pieces, washed and drained)
  • Oil…………………………………...3 Tablespoons
  • Peanuts…………………………….1/3 Cup
  • Cashew nuts………………….....1/3 Cup
  • Onion Chopped finely………..2 Cups
  • Ginger-Garlic paste……….….1 ½ Tablespoons
  • Red Chilly powder………..…..2 Teaspoons
  • Coriander Powder…………….4 Teaspoons
  • Turmeric powder……….…….1/2 teaspoon
  • Garam Masala Powder..…..1 Teaspoon
  • Tomato chopped…………..….1 large
  • Cream or milk….….…………..1/4 Cup
  • Coriander leaves chopped...2 Tablespoons (optional)
  • Salt to taste
Method of Preparation
  1. Heat Oil in a pan on medium heat and fry the Peanuts and the Cashew nuts until golden brown.
  2. Remove it from the Oil and when slightly cooled, grind it into a smooth paste using only just enough water. (Up to 1/2 cup will be good)
  3. To the rest of the Oil in the pan, add chopped Onion together with Salt and saute till it starts to brown along the edges.
  4. Add Ginger Garlic paste and continue sauteing till the raw smell is gone.
  5. Adjust the heat to low and add Red Chilly powder, Coriander powder, Turmeric powder and Garam Masala powder; saute till the raw smell is gone for about a minute or two.
  6. Add chopped Tomato and the ground Peanut-Cashew paste; saute till the Oil oozees out. (Do stir continuously.) This step is very important as it determines the taste of this dish. As we are not using too much of Oil, we will only be able to see small droplets of Oil  towards the sides of the mixture. (By this time all the Water from the Masala will be evaporated.)
  7. Add 2 cups of water to dilute the gravy and add the Chicken pieces; mix well; close the pan and let it boil on high heat.
  8. Once boiled, lower the heat to medium and continue cooking till the Chicken is cooked thoroughly; the level of the gravy is reduced and Oil starts to float on top of the curry for about 30 – 40 minutes.
  9. Add Cream and Coriander leaves (if adding), mix well and let it start to boil along the edges. Add more Salt if needed.
  10. Switch off the heat, close the pan and let it sit for 15 minutes before serving.
Notes:
  • You can reduce the amount of Chicken in this recipe and add Cauliflower and Potatoes to fill that place.
  • Since there are nuts in the gravy, chances are there it may stick to the bottom of the pan. So stir it now and then.


Make it, enjoy the deliciousness and 
serve it to your family with love…

Thursday, November 10, 2011

Pavakka/ Bitter Guard/ Karela Fry

Recipe No: 271
Ingredients                               Serves 3
  • Pavakka/ Karela……….250 grams (1 big/ 2 small)
  • Onion sliced thin……….1/3 Cup
  • Coconut sliced thin……1/4 Cup
  • Green Chilly slit………..1-3
  • Curry Leaves……………1 Sprig
  • Salt………………………….1/3 – ½ Teaspoon
  • Oil for deep frying
Method of Preparation
  1. Wash and dry the Bitter Guard/ Pavakka. Cut it lengthwise into two; discard the seeds and the fibrous portions inside.
  2. Slice them horizontally into very thin pieces. (Make it as thin as possible.)
  3. Add Salt to the pieces and keep it aside for 10 minutes. By then some liquid will be oozing out of the Bitter Guard pieces. Squeeze the pieces as hard as possible and discard the juices.
  4. Heat at least an inch of Oil in a deep pan until really hot.
  5. Put the Bitter Guard pieces into the hot Oil and fry on high heat until half done.
  6. Halfway through frying add sliced Onion, Coconut, Green Chilly and Curry Leaves.
  7. When the Bitter Guard pieces, Onion and Coconut slices attain a golden brown color take them out with a slotted spoon after draining most of the Oil. Let the excess Oil drain on a paper towel.
  8. Serve hot with cooked Rice.
Notes:
  • Salt helps to pull the bitter liquid from the Bitter Guard and squeezing the liquid off  will reduce its bitterness. If you are planning to skip this procedure, please reduce the amount of Salt added.
  • There will be a lot of splattering while frying if there is Water content in the Bitter Guard pieces.
  • If you try to deep fry all the ingredients together in the first place, the Onion will burn before the Bitter Guard pieces are fried. So give the Bitter Guard a head start and add the rest of the ingredients half way through the frying.
  • Don't overcrowd the pan while deep frying; this may result in the over absorption of Oil. Do let the Bitter Guard pieces immerse fully in the Oil to ensure even frying.


Make it, enjoy the deliciousness and
serve it to your family with love….

Monday, November 7, 2011

Fish Manjurian

Recipe No: 270
This is another one of my quick and easy recipe that goes well with Flat breads, Fried Rice or even plain boiled Basmati Rice. With its unique 'Indo-Chinese' touch, this is a bit different from the usual Fish preparations but very tasty and perfect for people who search variety in Fish dishes. Enjoy…
Ingredients                                                     Serves 4
To marinate
  • Fish………………....................1 lb/ 425 grams (bones removed and cut into bite size cubes; I used Salmon but any Fish with thick flesh will do.)
  • Corn Starch…......................2 Tablespoons (commonly called Corn Flour in India)
  • All Purpose Flour/Maida….1 Tablespoon
  • Rice Flour……………………….1 Tablespoon
  • Egg………………………………...1/2 (Beaten well)
  • Soy Sauce…………………….....1/2 Teaspoon
  • Red Chilly Powder………......1/4 Teaspoon
  • Salt as needed
To Saute
  • Oil…………………………..........3-4 Tablespoons
  • Spring Onion…………..........5 stalks (chopped; white and green portions separated)
  • Garlic chopped………..........2 Teaspoons
  • Onion cubed………….......….1 ½ Cups (make slightly big cubes)
  • Sambal Oelek……………......1 Teaspoon (If not available use Red Chilly paste/ sauce)
  • Vinegar…………………..........1/2 Teaspoon
  • Soy Sauce……………….........1 Teaspoon
  • Tomato ketch up…………...2 Tablespoons
  • Coriander Leaves…………..2-3 Tablespoons (chopped)
  • Salt as needed
  •  Oil for deep frying
Method of Preparation
  1. Make a batter with all the ingredients mentioned in the ‘to marinate’ section except the Fish. Marinate the Fish with the batter and let it sit for 10 minutes.
  2. Heat at least an inch of Oil in a deep pan and deep fry the Fish on high heat till they are golden brown. The time for frying depends on the size of the Fish pieces and so, please do adjust accordingly.
  3. Drain the Fish and let the excess Oil drain on a paper towel. Keep it aside till ready to be used.
  4. In another pan (or the same pan with the Oil removed), heat 3-4 Tablespoons of Oil on high heat and saute Spring Onion Whites and Garlic till fragrant for about 30 seconds. (Please don’t brown them.)
  5. Add the Onion and saute for 3-4 minutes or till it is slightly translucent. (It shouldn’t go brown. In fact I like it when the Onion is slightly crunchy.)
  6. Add Sambal Oelek, Soy Sauce, Ketchup and Vinegar; mix well.
  7. Add the fried Fish, Chopped Coriander Leaves, Spring Onion Greens and more Salt (if needed); mix well and serve hot.
Notes:
  • Sambal Oelek is Red Chilly paste in Vinegar and are available in most of the Indian and Asian stores.
  • If Sambal Oelek is not available use any Red Chilly paste and if you can’t find that use either Red Chilly flakes or even Red Chilly powder or half of both. But adjust according to the taste and heat of the Chilly. Red Chilly Garlic sauce works fine too and these are available in the Indian stores as well.
  • I used dark Soy Sauce (Ching’s dark Soy), which is available in most of the Indian stores.
  • While deep frying, it is better to use enough Oil for the Fish pieces to immerse fully to ensure even cooking. Don’t overcrowd the pan while deep frying and if there are more, please do fry them in batches.
  • Once the Fish is fried, all the other processes will be done in minutes, so please do all the prep work before you start sauteing.
  • If you want a bit of gravy for this dish, dissolve ½ teaspoon Corn starch in ½ Cup Water and add to the dish towards the end. Make sure the sauce boils before switching the flame off. (But I prefer without the gravy.)
  • If you like Capsicum cut it into cubes and add it along with the Onion.
  • As most of the sauces have Salt in it, add extra Salt only at the very end.


Make it, enjoy the deliciousness and 
serve it to your family with love…


Thursday, October 20, 2011

Salmon and Egg Rice

Recipe No: 269
This is one easy yet very delicious Rice dish that will be ready to serve in a matter of minutes, making it an excellent after work dinner or a lazy late afternoon lunch. 
Ingredients                                   Serves 3
  • Basmati Rice…………….........1 1/2 Cups (Washed and drained)
  • Hard boiled Eggs………….....2 (cut each into 4 pieces)
To cook the Salmon
  • Salmon……………………….......300 Grams (clean and wash; but don’t cut)
  • Salt…………………………......….1/2 Teaspoon
  • Pepper Powder………….........1/2 Teaspoon
  • Water…………………………......2 Cups
To make the Rice
  • Oil……………………………….......2 Tablespoons
  • Cumin seeds……………….........1/3 Teaspoon
  • Onion chopped……………........1/2 Cup
  • Ginger Garlic Paste…………....1 Teaspoon
  • Coriander Powder……………...1 ½ Teaspoons
  • Turmeric Powder……………….1/4 Teaspoon
  • Garam Masala Powder………3/4 Teaspoon
  • Coconut Milk……………………..1 Cup (medium thickness)
  • Salt……………………………………as needed (I used around ¾ Teaspoon)
  • Chopped Coriander Leaves….2 Tablespoons
Method of Preparation
  1. Soak the washed and drained Rice in warm water for about 20 minutes. Drain well.
  2. Combine all the ingredients in the ‘to cook the Salmon’ section in a deep pan and boil on high heat. (It is good if the Fish is immersed fully in the Water otherwise, turn it over half way through cooking.)
  3. Once boiled, lower the flame to medium low and cook for 5 minutes. (By this time Fish will be fully cooked.)
  4. Take the fish out of the Water and keep aside. Once slightly cooled, tear it into big bite size pieces with the help of a fork. (As Salmon is delicate it will be a bit difficult to cut them into small pieces, but you are more than welcome to do so if you want. But I preferred irregular pieces. If your husband or guests ask why, tell them that it is 'rustic'!!)
  5. Measure the remaining cooking liquid and add more Water to make it up to 2 cups.
  6. Heat Oil in a wide pan on medium high heat and splutter the Cumin seeds.
  7. Add the Onion and saute till translucent for about a minute or two.
  8. Add Ginger Garlic paste and cook till the raw smell is gone.
  9. Lower the heat to low and add Coriander Powder, Turmeric Powder and Garam Masala Powder; saute for 30 seconds.
  10. Add the drained Rice and fry it for about 3 minutes on medium high heat.
  11. Once fried, add the Fish cooking liquid (the one that we added Water to make 2 cups), Coconut Milk and the Salt (consider the fact that the Fish cooking liquid has Salt). Mix well, cover and let it boil.
  12. Once boiled, reduce the heat to minimum and let it cook.
  13. Once the Rice is half cooked, add the Fish; mix gently and let it cook covered till all the liquid is absorbed and the Rice is cooked perfectly.
  14. Once cooked, switch off the heat; sprinkle the Coriander Leaves and mix gently.
  15. Serve hot topped with Egg.
Notes:
  • If you are squeezing fresh Coconut Milk, do combine 1st and the 2nd milk to make a cup for this preparation.
  • The Salt for this dish should be adjusted in such a way that the Rice should have Salt if eaten without any curries.
  • Cumin seeds in this dish can be substituted with Black Cumin seeds too.
  • I like this dish a lot with Salmon and hence too stubborn to try with others.


Make it, enjoy the deliciousness and 
serve it to your family with love…

Monday, October 10, 2011

Brinjal/ Eggplant/ Aubergine with Ketchup and Tamarind

Recipe No: 268
Ketchup and Tamarind… What sort of a combination is that? If this is what you are thinking… well, I don’t have an exact answer... but… come on…. Who cares as long as the dish is tasty? It will not make you lose your sleep, but may be at the end of the day you might think… that was one tasty dish and I am not sure but, I am slowly beginning to like Brinjal! Come on give it a try… it will be ready to eat in a matter of minutes…
Oh I forgot to mention… this is my take on a Brinjal dish that was made by a member from our Indiana church for a prayer meeting… Ahh, even though it was a crowd around 30-35, I ended up eating half of that dish… (shhh... please keep it a secret...)
Ingredients                                               Serves 3
  • Brinjal…………………………….250 grams (cut into medium sized pieces)
  • Oil…………………………………..2-3 Tablespoons
  • Onion……………………………..1/2 cup (cut into cubes)
  • Ginger Garlic paste………….3/4 Teaspoon
  • Red Chilly Powder……………1/2 Teaspoon
  • Coriander Powder…………...1/2 Teaspoon
  • Cumin Powder………………..1/8 Teaspoon
  • Turmeric Powder…………….1/4 Teaspoon
  • Tomato Ketchup………………2 Tablespoons
  • Tamarind juice……………….1/3 Cup (from a small marble sized Tamarind; depending on your taste)
  • Coriander Leaves.................1 Tablespoon (chopped)
  • Salt as per taste
Method of Preparation
  1. Heat 2 Tablespoons of Oil in a pan on high heat (wait till it is really hot) and fry the Brinjal pieces with Salt until it is slightly brown here and there. Take it out of the pan and keep aside till ready to be used.
  2. Add a bit more of Oil if needed and saute the Onion on medium heat for a minute or till it starts to wilt. (Doesn’t have to brown)
  3. Add Ginger Garlic paste and saute till the raw smell is gone.
  4. Reduce the heat to minimum and add Red Chilly Powder, Coriander Powder, Turmeric Powder and Cumin Powder; saute for 30 seconds.
  5. Add Ketchup and Tamarind juice; mix thoroughly and add the fried Brinjal pieces.
  6. Cover the pan and cook for a minute or two. (The Brinjal pieces shouldn’t be overcooked and mashed. If fried properly, this step will take only a minute.) Do a taste test and add more Salt if needed.
  7. Sprinkle the Coriander Leaves; mix properly and serve hot with Chappathi or Rice.
Notes:
  • I used Chinese Brinjal. It is okay to use the skin of Indian and Chinese Brinjal, but if it is American Eggplant, do take the skin off as it is slightly on the bitter side.
  • You can use a bit more Oil (up to 1 tablespoon more), but don’t add too much as Brinjal is like a sponge and will absorb a lot of Oil if you put more. So it is better to stick to the described amount.
  • The amount of Tamarind used should be according to your taste. (I am not too much of as sour person; so mine is less) Make pulp and add slowly, tasting in between.Don't use more than 1/3 cup Water or the gravy may become loose.
  • If the Brinjal has a lot of seeds do wash by slightly squeezing them in a Colander so that the seed will escape through its holes.
  • If you cut the Brinjal a bit ahead of time, do put it in Water to prevent oxidation and the discoloration that follows.
  • If you wash or put the Brinjal pieces in Water prior to cooking, do squeeze the Water properly and dry it with a kitchen towel to take the extra moisture out.
  • Shallow frying the Brinjal pieces in very high heat is important. It will release all the Water and start boiling rather than frying if low heat is used.


Make it, enjoy the deliciousness and 
serve it to your family with love…

Monday, October 3, 2011

Vegetable Biriyani

Recipe No: 267
A few months back, I made this for a party catering order as a vegetarian option along with Chicken Biriyani. When the vegetarians failed to appear for the so called 'Bachelor's party' in which most of the attendees are married, this Vegetable Biriyani was passed down to the female folks, may be as an appreciation for opening their apartment doors when they turn up way past midnight without waking up the neighbors! To my surprise it was a hit among them and so I decided to write it out in my blog… in case someone else want to try it out...
Ingredients                                         Serves 5
  • Vegetables.........................…..3 Cups (Cut into big cubes; I used Carrot, Beans, Potato, Cauliflower and Fresh Frozen Green Peas)
  • Fried Paneer cubes………...….200 Grams/4 oz
  • Oil…………………………….........2 Tablespoons
  • Turmeric Powder……….........1/2 Teaspoon
  • Salt………………………....….......1 Teaspoon
  • Curd…………………….……........1/4 Cup
  • Tomato sliced…………………...1 Large
  • Lemon Juice……………..……...1 1/2 Tablespoons
  • Coriander leaves /Cilantro...3 Tablespoons chopped
  • Mint leaves chopped………....2 Tablespoons
  • Garam Masala Powder……...3/4 Teaspoon (homemade preferred)

To Grind
  • Ginger Roughly chopped......2 Tablespoons
  • Garlic roughly chopped........6 big ones or 10 small ones
  • Indian Green Chilly…...........5 (chopped; adjust depending on your taste)
  • Onion roughly chopped…....2 Cups
  • Shallots……………………………5
To make the rice
  • Ghee………………………….......2 Tablespoons
  • Whole Garam Masala……..8 Cardamom, 12 Cloves, 1 one inch Cinnamon stick and 1 Star Anise broken into pieces
  • Rice…...................................2 Cups
  • Salt……………………...............1 ½ Teaspoons
  • Water………………………........3 ½ Cups (Boiling)
To Blend
  • Almonds………………..…........6 (not necessary to take off the skin)
  • Coconut Milk (thick)………..1 Tablespoon
  • Turmeric Powder…………....1/4 Teaspoon
  • Saffron…………………….........A Small pinch
  • Water……………………………..1/4 Cup
To Garnish
  • Cashew nuts…………….........4 tablespoons
  • Raisins……………………........2 Tablespoons
  • Fried Onion………...............3 Tablespoons
Method of Preparation
  1. Grind together all the ingredients (I used a food processor) given in the ‘to grind’ section into a course consistency and keep aside.
  2. Blend all the ingredients given in the ‘to blend’ section except two Tablespoons of Water  into a smooth consistency and keep aside. Use the left over Water to rinse the blender and mix it along with the blended ingredients.
  3. Wash and soak the rice in warm water for 20 minutes and drain.
To make the Vegetable Masala
  1. Heat the Oil in a pan and saute the ground Onion mixture together with Salt and Turmeric powder on a medium high heat till it is almost brown. Add more Oil if needed.
  2. Add the Vegetables and Curd along with 1/2 cup of water; lower the heat to medium low (once it is boiled); close the pan and  cook  for 8- 10 minutes.
  3. Once the Vegetable are almost cooked add the Paneer cubes, Tomato and Lemon juice; let the Vegetables finish cooking.
  4. Once cooked, add chopped Coriander Leaves, Mint leaves and Garam Masala Powder; mix well taking care not to break the Paneer cubes. Do a taste test and add more Salt if needed. (At this stage the Masala should be a bit on the sour side. Take care about the amount of Salt as it should not be less at this stage or it will affect the final taste of the Biriyani.)
  5. When almost dry switch off the flame and keep it aside till ready to be used.
To make the Rice
  1. Start to boil 3 ½ cups of water.
  2. To a wide pan on medium heat, add the Ghee and fry Cashew nuts followed by Raisins (for garnishing) till the Cashew nuts are slightly brown and the Raisins are plump. Take them off and keep aside till ready to be used.
  3. To the remaining Ghee on medium high heat add the whole Garam Masala and fry till fragrant.
  4. Add the soaked and drained Rice and fry it (constantly stirring is advised) until the Rice on the bottom of the pan starts to move on its own.
  5. Add the boiling water and 1 ½ Teaspoons of Salt; stir well; lower the flame to minimum; cover the pan and cook till all the Water is absorbed and the rice is cooked. Stir gently once or twice in between.
  6. Once cooked,  switch off the flame and keep the pan open till ready to be used.
To assemble and bake the Biriyani 
  • Preheat the oven to 350˚F/180˚C.
  • In an oven proof dish layer almost half of the rice evenly on the bottom. Sprinkle some almond-turmeric water on top and then layer the prepared Vegetable Masala. Layer the rest of the Rice on top.
  • Once layered, drizzle the rest of the almond- turmeric water and sprinkle fried Onions, Cashew nuts and Raisins.
  • Cover this with an Aluminum foil or a damp cloth.
  • Bake this for 30 minutes in the preheated oven and let it stand for at least 15 minutes before serving.
  • Serve it hot with Raita and Pappadam.
Notes:
  • It is very easy to fry Paneer with less amount of Oil if we cut it into slabs; shallow fry in a flat pan and then cut into pieces rather than deep frying Paneer cubes. This is shown in Mattar Paneer recipe.
  • While cooking the Masala, dont cook the Vegetables till it starts to fall down. It should be just cooked, so that it will withstand the final layering and baking without breaking. 
  • It is important that you salt the Rice while cooking as it is very essential to bring the flavor of the Rice. Since this is a Vegetable Biriyani, imparting as much flavor into the rice is very essential.
  • Drizzle the yellow Almond Water on top  so that it will give some of the Rice that signature yellow color of the Biriyani (without using any artificial color), while some others remain white.
  • If you don't have Saffron, please add a bit more of Turmeric, but take care not to skip this step because that additional moisture will prevent the Biriyani from drying out during baking,
  • If you don’t have an oven, you can make it on stove top itself. Assemble everything in a pan, cover with an airtight lid and put it on a minimum flame and cook for 30 minutes. Take care not to burn the bottom.You can also use a flat pan/ Thawa on the bottom of the Biriyani pan (Biriyani pan placed on the Thawa which is placed on the flame) to give that indirect heat while cooking on stove top.


Make it, enjoy the deliciousness and 
serve it to your family with love…

Tuesday, September 20, 2011

Chicken Veyichathu

Recipe No: 266
I have vague memories of my paternal Grandmother making Chicken Veyichathu and keeping it in ‘Uri’ (rope that is hanged form roof in the old days to keep ‘Chatti’ (earthen cooking vessel) with cooked  food). As this is made by sauteing everything really nice without any added water, it will stay good for many days even without refrigeration.
Ingredients                                                 Serves 4

  • Chicken…………………......600 Grams (Bone in, cut into small pieces, washed and drained)
  • Oil………………………….....3-4 Tablespoons
  • Coconut pieces………......1/2 Cup (sliced thin; theengakothu)
  • Onion sliced thin…….…..1 Cup
  • Shallots sliced thin……...1/2 Cup (If not available, add the same quantity Onion)
  • Ginger sliced thin………..1 Tablespoon
  • Garlic sliced thin………...1 Tablespoon
  • Curry Leaves……………...2 Sprigs
  • Red Chilly Powder……...1 Teaspoon
  • Coriander Powder……....2 Teaspoons
  • Turmeric Powder………..1/2 Teaspoon
  • Garam Masala Powder…3/4 Teaspoon
  • Pepper Powder…………….1/4 Teaspoon
  • Tomato chopped………….1 Small
  • 1/4 Teaspoon Garam Masala Powder, ½ Teaspoon Coconut Oil and a Sprig of Curry Leaf to sprinkle on top
Method of Preparation
  1. Wash and drain the Chicken pieces thoroughly.
  2. Heat Oil in a pan on medium high heat and saute the Coconut slices till lightly brown.
  3. Once the Coconut is browned, add Onion, Shallots, Ginger, Garlic and Curry Leaves; saute till it is golden brown and crisp. Add Salt at the beginning of sauteing to fasten the process.
  4. Once golden brown, lower the heat to low and add Red Chilly Powder, Coriander Powder, Turmeric Powder, Garam Masala Powder and Pepper Powder; saute for 3-4 minutes, stirring constantly (stirring is important or the spices will burn). This step is very important as it determines the color as well as the taste of the dish.
  5. Add the chopped Tomato and saute till it is mashed thoroughly.
  6. Add the Chicken pieces and Salt if needed (we did add some Salt while sauteing the Onion) ; mix thoroughly; adjust the heat to medium low; close the pan and let it cook for around 10 minutes. By this time Water will be oozing out of the Chicken.
  7. Once the Water has oozed out of the Chicken, lower the heat to low and let it cook for 50 minutes to 1 hour. (Don’t add water; let it cook in its own liquid.) Do stir now and then. If a lot of liquid remains in the Chicken after it is cooked, do keep the dish open and let it evaporate. Add more Salt if needed.
  8. Once the Chicken is cooked thoroughly; the liquid content is reduced and Oil starts to separate (The oozing Oil is the best sign of 'doneness' in this dish.), off the heat; sprinkle 1/4 teaspoon Garam Masala Powder, 1/2 teaspoon Coconut Oil and a sprig of Curry Leaf (tear the leaves for better flavor) on top and let it sit for 30 minutes before serving. (Keep the lid closed if you can keep the leftovers in the refrigerator and keep it uncovered (to prevent the vapor form falling back into the Chicken) if it is going to be at room temperature for longer period of time.)
  9. This dish is best when served warm with hot boiled Rice and Kachiya Moru.
Notes:
  • As excess Water is not so good in this preparation, do drain the Chicken properly after washing.
  • Do take care to cut the Chicken into small pieces as it will reduce the cooking time.
  • Once the other ingredients are added, Coconut slices won’t change much color, so saute it till the color you prefer in the first place itself. I like it light brown as the toasted Coconut slices taste better than white 'not toasted' ones.
  • The stage to which the Onion and Shallots are to be browned require special mention. It should reach a thorough brown color as we do the Onion for Biriyani garnish. At this stage it will be crispy too. This is very important as this browning helps this dish stay good for a long time. Any stages before that can reduce the ‘shelf life’ of Chicken Ularthiyathu. Do stir often at this stage otherwise the Onion will brown in an uneven manner.
  • Do look for the oozing Oil to know the 'doneness' of this Chicken dish.
  • Chicken Ularthiyathu tastes the best when made with Coconut Oil, but if you are making it with any other Oil, please dont forget to drizzle some Coconut Oil at the end, as its aroma makes the dish very inviting.
  • As this Chicken Veyichathu stays good at room temperature for a longer period of time, it is an excellent dish to carry while traveling.


Make it, enjoy the deliciousness and 
serve it to your family with love…