Creating a blog was out of the question for a long time for me, as measuring everything in the kitchen was like biting into an eggshell. I enjoy cooking and don’t want to waste even a slightest bit of enjoyment in that small world of mine. But little did I know that everything will change, when my husband came home with the Oscar nominated film ‘Julie and Julia’( a real life story) where Julie Powell (part played by Amy Adams) challenged herself to make all the 524 recipes from Julia Child's cook book ‘Mastering the Art of French Cooking’ and blogging all her experiences (The Julie/Julia Project). It was an inspiring movie. A few days later when we were discussing this casually with a friend of ours over tea…everything changed dramatically…..” How about you making at least half of it in one year? Not French but your own. 262 recipes that will inspire others and present it as a blog?” For a minute my mind traveled faster than light… With an experience as a helper in my mother in laws kitchen for 6 years followed by a three year everyday struggle to satisfy the palate of my foodie husband, if I cannot do it then why should I cook? But on the other side with an experience in English literature extending no more than expanding outline stories in English grammar class when I was 18 and two small kids that come in handy at times, will a commitment for the next one year work? Anyway my ‘cook's ego’ didn’t allow me to say no...

So my friends …here I am opening my recipe book, trying to perfect and present 262 recipes in the coming 365 days….A Challenge that will of course tastes good. Come.. Have a walk with me along my journey.. Cheering and inspiring….Forgiving and tolerating…Testing and tasting….for ‘A Tasty Challenge’

Search This Blog

Thursday, January 5, 2012

Stove top Whole Chicken with Vegetables and Caramelized Onion

Recipe No: 278
‘Mom, are you happy that our break is going to be over? You know, we still get time to annoy you in the evening’. 
My dear daughter was having a conversation with me yesterday… Even though I put a sad face to satisfy her,  inside I was like… 
'When and where did my sweet little daughter study this mind reading technique?'  
Yes, the winter break is over, I have time to breath and yes of course, some time for blogging… I didn’t get a chance to write about our Christmas lunch yet… so here is the main dish, a whole Chicken made entirely on the stove top…
Many whole roasted Chicken recipes call for cooking in an Oven, which may be a bit difficult, to at least some of us sometimes, so I decided to go entirely on stove top and the only thing needed is a big pan/ wok/ Chenachatti. So here it is…..
Ingredients                            Serves 6-8
  • Chicken…………....…...1 (1 ½ - 1 ¾ Kg; without the skin)
  • Oil………………………...2-3 Tablespoons
  • Boiling Water….……..1 ½ Cups
  • Cubed Vegetables…..4 Cups (I used Potato, Carrot and Cauliflower; Green Beans are also good for this)
  • Onion sliced thin…....2 Cups
  • Sugar……………….……1/2 Teaspoon
  • Salt to taste; Coriander Leaves for garnish
To marinate the Chicken
  • Red Chilly Powder……….1 Teaspoon
  • Coriander Powder…….....1/2 Teaspoon
  • Turmeric Powder……......1/2 Teaspoon
  • Pepper Powder…………….1/4 Teaspoon
  • Garam Masala Powder...1/2 Teaspoon
  • Fennel Powder………….…1/2 Teaspoon (Peringeerakam Podi/ Anise seed Powder)
  • Ginger Garlic Paste……...1 Teaspoon
  • Salt………………………….....2 Teaspoons
  • Vinegar…………………..…..1 ½ Teaspoons
Method of Preparation
  1. Mix all the ingredients in the ‘to marinade’ section into a thick paste (Can use a bit of Water if needed, but keep it on the dry side; the residual Water from the Chicken will make it thin later.) and keep aside till ready to be used.
  2. Wash and clean the Chicken; remove the giblets from the inside and wipe it dry with a paper towel. (Make it as dry as possible.)
  3. Spread the marinade on the Chicken (inside the cavity also) as even as possible; keep aside for at least 2 hours. (Overnight in the refrigerator is better.) Tie the legs of the Chicken together (I used kitchen twin and don't forget to take it off before serving) and tuck the tips of the wings (if using; I didn't) behind the neck.
  4. Boil the Vegetables in Water till just cooked. Drain and keep aside till ready to be used. (Alternatively you can also steam the Veggies; this can be done while the Chicken is cooking.)
  5. Heat 1-2 Tablespoons of Oil in a pan on medium low heat and saute the sliced Onion, a pinch of Salt and Sugar till caramelized. We are not looking for crispy fried Onion, but slightly brown, sweet and nicely wilted Onion. This will take 20-25 minutes, but can be done while the Chicken is cooking. Keep aside till ready to be used.
  6. Heat 2-3 Tablespoons of Oil in a deep pan on high heat. Swirl the pan so that the Oil spreads evenly on all sides (even the edges).
  7. Place the Chicken in the pan and fry till slightly brown on all the four sides.
  8. Once browned on all the sides, place the Chicken, breast side down and add 1 ½ cups of boiling Water. (Cold Water not allowed as it reduces the temperature as a whole.)
  9. Shake the pan once; close it and let it cook for 3o minutes on medium low heat. (The liquid should be visibly simmering at all times; adjust the temperature accordingly.)
  10. After 30 minutes, turn the Chicken once so that the breast side is up and let it continue cooking for another 20 minutes, covered. It is advised to shake the Chicken once in a while to avoid sticking at the bottom.
  11. Once the Chicken is cooked, (the leg meat will pull up and look as if it is gonna fall off) carefully remove the Chicken to a plate and let the gravy reduce on high heat. Usually I used to reduce it till I can see the bottom of the pan clearly when I stir the gravy. (The thickness is according to your preference; I like it on the thicker side.)
  12. Take 2-3 Tablespoons of the thickened gravy out and keep aside for later use (to coat the Vegetables). Reduce the heat to low; place the cooked Chicken in the pan with rest of the gravy; let the Chicken gets heated through and the gravy is coated well on all sides (turn once or twice in between, carefully).
  13. Remove the Chicken to a serving plate and slather it with the remaining gravy from the pan (if any). Garnish it with chopped Coriander Leaves and Caramelized Onion.
  14. To the same pan (which already has the gravy sticking), add the cooked Vegetables and the reserved gravy (2-3 Tablespoons). Mix, so that the vegetables are coated well with the gravy. Add more Salt and Pepper if needed.
  15. Once the Vegetables are heated through, serve it hot, garnished with some Caramelized Onion,along with Chicken. 
Notes:
  • As this recipe is made entirely on the stove top with the cooking liquid, the skin will not crisp up. So it is better to avoid skin in this preparation. (I usually remove the skin from a whole Chicken at home; it is not a painful process at all… try it if you can’t get a skinned Chicken.)
  • Don’t use regular/ cold Water while cooking Chicken as it reduces the temperature of the pan and the Chicken, which in turn increases the time of cooking.
  • Do swirl the Chicken now and then while it is cooking to prevent sticking on the bottom, especially if you are not using a non stick pan or a seasoned wok. Mine is a seasoned Carbon Steel Wok... well it doesn't have a pleasing look but it is well seasoned and acts almost like a non stick without any non stick coating!!! ( If you have a wok looking like this, dont even think about making it pretty by getting rid of all those brown color as it will take all its non stick/ seasoned nature with it.)
  • Don't cook the Vegetables too much or it will break apart when mixed in the pan later.
  • Cook the Vegetables and saute the Onion while the Chicken is cooking in order to save the time.


Make it, enjoy the deliciousness and 
serve it to your family with love….

Monday, December 19, 2011

Pazhutha Thakkali/ Ripe Tomato Curry

Recipe No: 277
Ingredients                                               Serves 4
To cook
  • Tomato…………….....2 Big/ 3 medium (cut into big pieces)
  • Onion sliced.………..2/3 Cup (cut into slightly big pieces)
  • Green Chilly slit…...2-3
  • Curry Leaves………..1 sprig
  • Water…………………..2/3 Cup
  • Turmeric Powder….1/4 Teaspoon
  • Red Chilly Powder...1/2 Teaspoon
  • Coriander Powder…1 ½ Teaspoons
  • Salt as needed
To Grind
  • Grated Coconut……..1/2 Cup (fresh preferred;  of course,unsweetened)
  • Garlic……………………2 Big/ 3 Small
  • Shallots…………………2
  • Ginger chopped….....1 teaspoon (1 small piece)
  • Cumin Powder……....1/4 teaspoon (can use Cumin seeds instead)
For Tempering
  • Coconut Oil……………1 Tablespoon
  • Mustard Seeds……….1/4 Teaspoon
  • Dry Red Chilly....……2 (broken into two)
  • Shallots sliced……..…1
  • Curry Leaves……….…1 Sprig
Method of Preparation
  1. Grind all the ingredients mentioned in the ‘to grind’ section into a smooth paste using ½ Cup Water. Keep it aside till ready to be used.
  2. Combine all the ingredients mentioned in the ‘to cook’ section in a ‘Chatti’ (an earthen cooking vessel) or a deep pan. Let it boil on high heat.
  3. Once boiled thoroughly, add the ground Coconut mixture and allow it to boil once more. Reduce the heat to medium low and let it continue cooking for 2-3 minutes or until the raw taste of the ground Coconut mixture is gone.
  4. Adjust the Salt and the level of gravy at this stage. If you add more Water, let the curry boil once more before switching it off.
  5. In another small pan prepare the tempering. Heat Coconut Oil on medium high heat and splutter the Mustard seeds.
  6. Add the broken Dry Red Chilly, sliced Shallots and Curry Leaves. Let it fry till the Shallots are golden brown.
  7. Switch off the heat and pour the tempering (Oil and all) on top of the prepared Tomato Curry.
  8. Mix well and keep the pan closed for 10 minutes before serving it hot with Rice.
Notes:
  • The Onion for cooking is sliced a bit big as it should hold its shape once the Curry is done. I like a bit of crispiness to the Onion slices in the prepared Curry. If you don’t prefer that, do slice it thin.
  • Don’t cook the Curry until the Tomato mashes up. Some of those Tomato pieces should be present in the Curry without disintegrating.
  • This gravy has a tendency to thicken as it cools down. So adjust the thickness accordingly. (Use only boiling Water to dilute the Curry if it went too thick.)


Make it, enjoy the deliciousness and 
serve it to your family with love…

Tuesday, December 6, 2011

Beef Veyichathu/ Ularthiyathu

Recipe No: 276
I have a lot to say about Irachi Veyichathu…, a dish that was prepared by my Mother and both of my Grandmothers… Well, I don’t know a single Christian household around my place that doesn’t have a recipe for this preparation. A lot of my friends asked me for this recipe… so for all of them… friends, here it is… enjoy…
Ingredients                                   Serves 6-8
To Pressure Cook
  • Beef……………….............900 Grams (cut into small pieces; washed and drained)
  • Salt………………..............1 Teaspoon
  • Pepper Powder…..........1/4 Teaspoon
  • Water………………...........1 Cup
To Saute
  • Oil……………………..............2-3 Tablespoons (Preferably Coconut Oil)
  • Mustard Seeds…...….........1/2 Teaspoon (Optional)
  • Coconut slices………..........1/2 Cup (Thengakothu; use more if you prefer)
  • Onion sliced thin……........1 Cup
  • Shallots sliced thin…........1/3 Cup (If not available, add the same quantity of Onion)
  • Curry Leaves…………........2-3 Sprigs
  • Ginger Garlic Paste.........1 ½ Tablespoons (Instead use a big piece Ginger and 10-12 Garlic; crushed)
  • Tomato sliced thin…........1 small (Optional)
  • Turmeric Powder…….......1/2 Teaspoon
  • Red Chilly Powder………..2 Teaspoons
  • Coriander Powder………..4 Teaspoons
  • Garam Masala Powder...1 Teaspoon
  • Vinegar……………………….a few drops
  • Salt as needed
  • ¼ Teaspoon Garam Masala Powder, 1 sprig Curry Leaf and ½ Teaspoon Coconut Oil to sprinkle on top
Method of Preparation
  1. Put all the ingredients given in the ‘to Pressure Cook’ section in a Pressure Cooker and cook till almost (don't cook till it falls off, as we cook them later) done. (I kept the cooker on high till the first whistle, then lower the heat to medium low and cooked for 10 minutes.) Once cooked, off the heat and let the Pressure subside.
  2. While that is happening, heat Oil in a pan on medium high heat and splutter the Mustard Seeds.
  3. Add Coconut slices and fry, stirring, till it is slightly brown.
  4. When the Coconut Pieces are brown, add ¼ teaspoon Salt followed by Onion, Shallots and Curry Leaves. Saute, stirring now and then, till the Onion is golden brown in color. (By golden brown, I mean it should be reduced considerably and attain a slightly crispy nature.) Do stir often to avoid uneven browning and burning.
  5. Add Ginger Garlic paste and saute till the raw smell is gone for a minute.
  6. Lower the heat to low and add Turmeric Powder, Red Chilly Powder, Coriander Powder and Garam Masala Powder. Fry on low heat for a minute to get rid of the raw smell. Do stir to avoid burning.
  7. Add the Tomato slices and stir till it mashes lightly.
  8. Add the cooked Beef together with the remaining liquid; stir well and add 1-1 ½ cup Water (depending on the Water left behind after cooking the Beef; Water should level the Beef pieces; don’t reduce the amount of Water at this stage as it helps to spread the Masala properly and cooking in so much gravy for some time will help the Beef absorb the flavors.)
  9. Increase the heat to high and let it boil. Once boiled, lower the heat to medium low; close the pan and let it simmer till most of the Water is absorbed and the gravy starts to coat the Beef pieces. (Oil will start to float at this stage too, but it depends on how much Oil you use and the amount of fat in the Beef; hence it is not a must.)
  10. Once the desired gravy level is achieved, do a taste test and add Salt if necessary (Don’t add it before as the Salt will concentrate when the gravy is reduced). At this stage if you need a bit more of sourness (and your Tomato was not able to give that) do add a few drops of Vinegar. (Believe me sometimes 2-3 drops of Vinegar do magic to your dish!!!)
  11. Mix well; off the heat; sprinkle some Garam Masala Powder, a sprig of Curry Leaf and some Coconut Oil on top; cover the pan and let it sit for at least 30 minutes before serving. (Oh... it taste better the second day) But if you are planning to take this for a trip or you want to keep this for sometime in the fridge, don’t close the pan at the end after sprinkling the Masala and Curry Leaves to avoid vapor from falling back into the meat which can reduce the life of the dish.
  12. Serve warm with Appam, Rice, Flat breads or Bread rolls. We love it with Rice and Moru Curry (A yogurt based Curry) and oh... how did I mange myself from mentioning Parotta while talking about Beef Veyichathu for such a long time!!!
Notes:
  • Mustard Seeds are optional in this recipe. Some people use it, some don’t. Anyway, I use it as I like it a lot.
  • Tomato was not used in olden days as it reduce the time this dish stays good at room temperature (There was no fridge then!!!). But as we have fridge now to keep the left overs and because I like thick gravy in this (Tomato increases the thickness) dish, I use them.
  • I used Kashmiri Chilly Powder (sometimes Piriyan Chilly Powder also) in this and most of the other recipes. If you are using that deadly hot Red Chilly Powder, please adjust the amount accordingly. But I think Kashmiri or Piriyan Chilly Powder gives that dark color without a lot of heat.
  • The time taken for cooking the meat depends on the type, age (cow's!!) of the Meat used and the efficiency of the Pressure Cooker. So adjust the time accordingly. If you don’t have a Pressure Cooker simmer it till done, but you may need to add some additional water. The Meat should be cooked but not falling off as we cook then later.


Make it enjoy the deliciousness and 
serve it to your family with love….


I am linking this post to the event
Christmas delicacies hosted by Julie of Erivum Puliyum

Wednesday, November 30, 2011

Dal/ Lentil/ Parippu

Recipe No: 275
I have to confess that I grew up in a house that doesn't use Coriander Leaves at all but married into a house which consider Coriander Leaves as a must in cooking. But why am I blabbering this now? Well, I consider this Dal as ‘the dish’ that made me fall in love with Coriander Leaves and as you know from my previous recipes, I use a lot of it now. Oh…by the way, this is my Mother in Law’s preparation and is a staple for dinner with Chappathi.
Ingredients                                            Serves 3
To pressure cook
  • Thoor Dal/ Thuvara Parippu…1/2 Cup (Other Dals like Kadala Parippu/ Split Chick Peas and Cherupayar Parippu/ Split Green Gram also can be used)
  • Water…………………………………...1 ½ Cups
  • Turmeric Powder…………………..1/8 Teaspoon
To Saute
  • Oil……………………………………..…1 Tablespoon
  • Mustard Seeds……………………...1/4 Teaspoon
  • Onion Chopped……………………..1/3 Cup
  • Green Chilly slit…………………….1-2
  • Tomato chopped……………………1 small
  • Chicken/ Meat Masala…………..1/2 Teaspoon (I used store bought)
  • Chopped Coriander Leaves…….2 Tablespoons
  • Salt to taste
Method of Preparation
  1. Wash the Lentils/ Dal really well (until the Water runs clear) and cook them with the all the ingredients mentioned in the 'to pressure cook’ section in a Pressure cooker till done. (After the first whistle, I lowered the heat to medium low and cooked for 5 more minutes.)
  2. Once cooked, off the heat and let it cool down.
  3. Heat Oil in a pan on medium high heat and splutter the Mustard Seeds.
  4. Once the seeds start to crackle, add the Onion and Green Chilly; saute till translucent about a minute or two.
  5. Add the Tomato and Salt; continue sauteing for another minute. (Tomatoes doesn’t have to be mashed. But if you don’t like to see them in pieces, please do wait till it mashes.)
  6. Add the Chicken/ Meat Masala powder, followed by the cooked Dal (including Water if any) and mix well.
  7. Add a cup of Water (add a bit more or less depending on your taste and the amount of Water left behind after cooking the Dal; but consider that this Curry tends to thicken a lot after cooling.) and let it boil. (Please refer the picture at the bottom for consistency.)
  8. Add Coriander Leaves; mix well and do a taste test to adjust the seasonings. (At this point you can add more Masala (up to ¼ teaspoon) if you prefer.)
  9. Serve hot with Chappathi.
Notes:
  • Using a bit of Oil while cooking Dal/ Lentil in a pressure cooker may reduce boiling over/ leaking out of the whistle.
  • The cooking time for the Lentil depends on your cooking conditions and the efficiency of the Pressure Cooker. So adjust the time accordingly.
  • Depending on the time taken by the Lentil to cook (especially if your Pressure Cooker has a long cooking time), it may require a bit more Water. Please adjust accordingly.
  • With Chicken/ Meat Masala, I mean only the spice powders that are used to cook them and it will not include Chicken/ Meat extracts (So okay for Vegetarians too). Instead of Chicken/ Meat Masala you can use a combination of Red Chilly, Coriander and Garam Masala Powder.
  • As Coriander Leaves play a major role in the taste of this dish, I will not recommend avoiding it.


Make it, enjoy the deliciousness and
serve it to your family with love…

Wednesday, November 23, 2011

Theengapalil Patticha Kozhi (Chicken cooked in Coconut Milk)

Recipe No: 274
How many Chicken recipes can you come up with? In fact... a lot… isn’t it? Of all those different types of Chicken dishes, I consider this as ‘the Chicken Curry’ for the laziest days… It sure is fast, easy and yes, the most important thing... tasty… With a prevailing taste of Coconut Milk, it  tastes somewhat like a stew but much easier than a stew. Go through the recipe; make it and you will see how easy it is…
Ingredients                                                                  Serves 4
  • Chicken…………..............750 Grams (cut into small pieces)
  • Shallots…………..............12 quartered
  • Ginger Garlic Paste…....1 ½ Tablespoons
  • Green Chilly chopped….3-5 (I used Indian; adjust according to your taste)
  • Crushed Black Pepper…1/2 – 1 Teaspoon (Adjust according to your taste)
  • Curry Leaves……………..2 Sprigs
  • Thick Coconut Milk…….1 Cup (If you are using Coconut cream do dilute it with some Water)
  • Crushed Whole Spices…1 inch Cinnamon piece, 6 cloves, 3 Cardamom pods and ½ of a Star Anise
  • Salt to taste
Method of Preparation
  1. Mix all the ingredients given in the ingredient list in a pan; mix well; close it and allow to boil on high heat.
  2. Once boiled, reduce the heat to medium low and let it cook for about 20-25 minutes or until all the liquid is evaporated and Oil starts to separate. (We don’t add any Oil but, it will separate from the Coconut Milk as it cooks down.)  Do stir now and then to avoid sticking at the bottom of the pan.
  3. Once Oil starts to separate, off the heat and serve it hot with Rice, Appam or Flatbreads.
Notes:
  • If you don't have Shallots or if you are too lazy to peel them, do use 1/2 cup cubed Onion. Well... did I ever mention that it is very easy to peel Shallots if you soak them in warm Water for a few minutes?
  • If you doesn’t want to use (or don’t have) whole spices, please do use ½ Teaspoon homemade Garam Masala powder or ¾ Teaspoon of a good variety store bought Garam Masala Powder instead.
  • If you are using thick Coconut Milk, do use 3/4 Cup diluted with 1/4 cup of Water.
  • It is very important that you have to cook the Chicken until the Oil separates as it decides the taste of the dish. I like it to be a bit moist but ha… you can even fry the Chicken a bit in the oozed out Oil if you want. But in that case make sure you use a good non stick pan.


Make it, enjoy the deliciousness and
serve it to your family with love…


I am linking this post to the event Christmas delicacies hosted by Julie of Erivum Puliyum


Monday, November 21, 2011

Bhindi/ Lady’s Finger/ Okra/ Vendakka fry

Recipe No: 273
One important thing that has to be mentioned while working with Okra is its sliminess if not cooked properly. But with some care it can be reduced to a greater extend and in this recipe it is not a problem at all… I bet this will be one of the best Okra dishes that you would have ever tasted. Enjoy…
Ingredients                                   Serves 3-4
  • Okra/Vendakka…….....200 Grams
  • Onion………………………1/4 Cup (cut into thin, long slices)
  • Red Chilly Powder……1/2- 1 Teaspoon (Depending on the taste)
  • Asafoetida Powder…..2 Dashes/ a pinch (Kayam Podi)
  • Curry Leaves…………..1 Sprig
  • Besan/ Kadalamavu…2 Tablespoons (Chickpea Flour)
  • Salt to taste
  • Oil for deep frying
Method of Preparation
  1. Wash and dry the Okra thoroughly. Cut them into thin long slices.
  2. Add sliced Onion, Red Chilly Powder, Asafoetida Powder, Curry Leaves and Salt to the Okra pieces; mix well and keep it aside for 10 minutes.
  3. Heat Oil for deep frying in a deep pan (a wok/ Cheenachatti works the best for this) on high heat. (At least a cup of Oil is needed)
  4. Sprinkle the Besan/ Kadalamavu/ Chickpea Flour to the seasoned Okra pieces and toss gently.
  5. Deep fry the tossed Okra in hot Oil till golden brown.
  6. Once golden brown, remove this from the Oil; drain the excess Oil on a kitchen tissue and serve hot with Rice.
Notes:
  • Washing and drying the Okra really good (Typically I do this part way in advance) sometime before using tends to reduce the sliminess a bit. In this recipe, Chickpea Flour also helps reduce it.
  • The moisture created by the Salt in the marinated Okra pieces will help the Besan stick to them. If some Flour is left behind, please do discard them. This is to prevent the loose Flour from burning in hot Oil. (Believe me... burnt Flour does not taste good!!!)
  • I never used shallow frying in this recipe and hence not so sure about the outcome.
  • Deep frying should be done only in plenty of Oil. Otherwise the Okra pieces will reduce the heat of the Oil resulting in heavy absorption of Oil by them.
  • As the Okra pieces are sliced thin, it will take only a few minutes for them to cook. So it is okay to fry these on high heat. Also high heat will reduce the absorption of Oil by Okra.
  • This recipe is loosely adapted from a recipe by Mrs. K.M Mathew.


Make it, enjoy the deliciousness and 
serve it to your family with love…

Tuesday, November 15, 2011

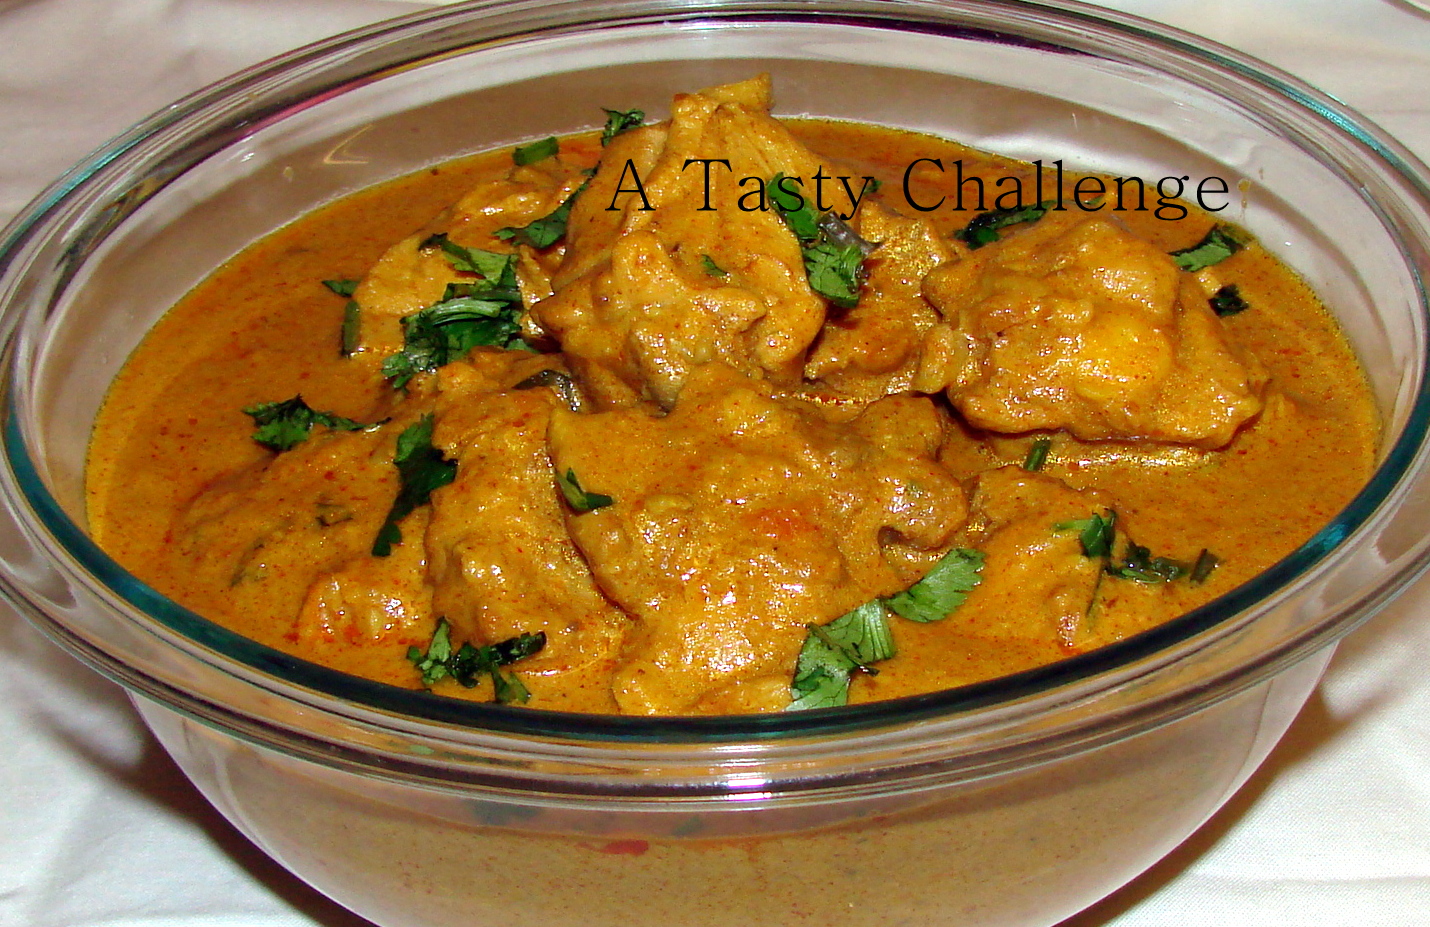
Chicken in Roasted Cashew-Peanut Gravy

Recipe No: 272
I had already posted the vegetarian version of this recipe with Cauliflower. Now this is the non-vegetarian version of the same. The basic ingredients and the method of preparation are the same but the amount changes to suit the taste of Chicken.
Ingredients                                        Serves 6
  • Chicken………………............….2 lb/900 grams (Cut into medium sized pieces, washed and drained)
  • Oil…………………………………...3 Tablespoons
  • Peanuts…………………………….1/3 Cup
  • Cashew nuts………………….....1/3 Cup
  • Onion Chopped finely………..2 Cups
  • Ginger-Garlic paste……….….1 ½ Tablespoons
  • Red Chilly powder………..…..2 Teaspoons
  • Coriander Powder…………….4 Teaspoons
  • Turmeric powder……….…….1/2 teaspoon
  • Garam Masala Powder..…..1 Teaspoon
  • Tomato chopped…………..….1 large
  • Cream or milk….….…………..1/4 Cup
  • Coriander leaves chopped...2 Tablespoons (optional)
  • Salt to taste
Method of Preparation
  1. Heat Oil in a pan on medium heat and fry the Peanuts and the Cashew nuts until golden brown.
  2. Remove it from the Oil and when slightly cooled, grind it into a smooth paste using only just enough water. (Up to 1/2 cup will be good)
  3. To the rest of the Oil in the pan, add chopped Onion together with Salt and saute till it starts to brown along the edges.
  4. Add Ginger Garlic paste and continue sauteing till the raw smell is gone.
  5. Adjust the heat to low and add Red Chilly powder, Coriander powder, Turmeric powder and Garam Masala powder; saute till the raw smell is gone for about a minute or two.
  6. Add chopped Tomato and the ground Peanut-Cashew paste; saute till the Oil oozees out. (Do stir continuously.) This step is very important as it determines the taste of this dish. As we are not using too much of Oil, we will only be able to see small droplets of Oil  towards the sides of the mixture. (By this time all the Water from the Masala will be evaporated.)
  7. Add 2 cups of water to dilute the gravy and add the Chicken pieces; mix well; close the pan and let it boil on high heat.
  8. Once boiled, lower the heat to medium and continue cooking till the Chicken is cooked thoroughly; the level of the gravy is reduced and Oil starts to float on top of the curry for about 30 – 40 minutes.
  9. Add Cream and Coriander leaves (if adding), mix well and let it start to boil along the edges. Add more Salt if needed.
  10. Switch off the heat, close the pan and let it sit for 15 minutes before serving.
Notes:
  • You can reduce the amount of Chicken in this recipe and add Cauliflower and Potatoes to fill that place.
  • Since there are nuts in the gravy, chances are there it may stick to the bottom of the pan. So stir it now and then.


Make it, enjoy the deliciousness and 
serve it to your family with love…