Creating a blog was out of the question for a long time for me, as measuring everything in the kitchen was like biting into an eggshell. I enjoy cooking and don’t want to waste even a slightest bit of enjoyment in that small world of mine. But little did I know that everything will change, when my husband came home with the Oscar nominated film ‘Julie and Julia’( a real life story) where Julie Powell (part played by Amy Adams) challenged herself to make all the 524 recipes from Julia Child's cook book ‘Mastering the Art of French Cooking’ and blogging all her experiences (The Julie/Julia Project). It was an inspiring movie. A few days later when we were discussing this casually with a friend of ours over tea…everything changed dramatically…..” How about you making at least half of it in one year? Not French but your own. 262 recipes that will inspire others and present it as a blog?” For a minute my mind traveled faster than light… With an experience as a helper in my mother in laws kitchen for 6 years followed by a three year everyday struggle to satisfy the palate of my foodie husband, if I cannot do it then why should I cook? But on the other side with an experience in English literature extending no more than expanding outline stories in English grammar class when I was 18 and two small kids that come in handy at times, will a commitment for the next one year work? Anyway my ‘cook's ego’ didn’t allow me to say no...

So my friends …here I am opening my recipe book, trying to perfect and present 262 recipes in the coming 365 days….A Challenge that will of course tastes good. Come.. Have a walk with me along my journey.. Cheering and inspiring….Forgiving and tolerating…Testing and tasting….for ‘A Tasty Challenge’

Search This Blog

Thursday, April 26, 2012

Stuffed Mushrooms

Recipe No: 293
This is the simplified vegetarian version of the Chicken Stuffed Mushrooms that I posted earlier. It is easy, delicious and perfect for an appetizer.
Ingredients                                                    Serves 3
  • Mushrooms…………......8 oz/ 227 Grams/ 12 small Mushrooms
  • Oil……………………………1 Tablespoon
  • Onion chopped………....1/3 Cup
  • Garlic chopped fine…..1 big clove
  • Cream Cheese…………..4 oz/ ½ Cup/ 125 grams (At room temperature)
  • Bread Crumbs…………..1/4 Cup
  • Butter……………………...1 Teaspoon
  •  Salt and Pepper to taste
Method of Preparation
  1. Clean the Mushrooms and remove the stems taking care not to break the caps.
  2. Chop the stems finely and keep aside till ready to be used.
  3. Heat Oil in a pan on medium high heat and saute the Onion and Garlic till slightly translucent.
  4. Add the chopped Mushroom stems and saute till it is cooked for about 2 minutes.
  5. Add necessary Salt and pepper and switch off the heat. Let this mixture cool to a room temperature.
  6. Once the mixture is cooled, mix in Cream Cheese and make sure the seasonings are on spot.
  7. Preheat the oven to 400˚F/ 205˚C.
  8. Lightly salt the Mushroom Caps and fill it with the Cream Cheese mixture. It is okay if some of the filling covers the top of the Mushrooms rims especially, if the space inside the Mushroom cap is very small. Repeat this with all the Mushroom and place them on a greased baking tray.
  9. In another bowl, melt Butter and mix it with the Bread crumbs.
  10. Sprinkle the Bread Crumbs over the stuffed Mushrooms and bake it in the preheated oven for 20 minutes or till the Bread crumbs are slightly brown and crispy.
  11. Once the Mushrooms are cooked, remove from the oven and serve hot.
Notes:
  • I used Baby Bella Mushrooms (with a brown cap) in this recipe but regular white button Mushrooms will be good.
  • To clean the mushrooms, I give it a light rinse and wipe it thoroughly to remove the Water. Don’t let the Mushrooms absorb too much Water while rinsing.


Make it, enjoy the deliciousness and 
serve it to your family with love…

Wednesday, April 25, 2012

Baked Yogurt

Recipe No: 292
I ate this once from Thiruvananthapuram Taj during our last visit to Kerala a couple of years ago. It was one among the long array of desserts in the dinner buffet but, the best in my opinion. It took a while for me to get this correct but it sure is different, easy and delicious. Here it goes…
Ingredients                                                 Serves 4
  • Greek Yogurt……….1 Cup (Substitute mentioned in ‘notes’)
  • Condensed Milk…..1/2 Cup (Sweetened; Milkmaid)
  • Saffron……………….a pinch
  • Sugar…………………1 Teaspoon
  • Cardamom…………3
Method of Preparation
  1. Take the seeds out of the Cardamom pods and crush it finely in a mortar and pestle (or something in which you can powder stuff in small amounts.).
  2. Add Saffron along with Sugar to the same Mortar with the crushed Cardamom seeds and crush finely.
  3. Mix the crushed mixture with Sweetened Condensed Milk and Yogurt; mix till incorporated evenly. Keep it in the fridge for 5-10 minutes so that the Saffron can infuse properly. (Adjust the sweetness by adding more Milkmaid at this stage depending on the sourness of the Yogurt.)
  4. Pour the Yogurt mixture equally into 4 Ramekins (small bowls that can withstand baking) and cover each of them with Aluminum foil.
To make Baked Yogurt in the Oven
  1. Preheat the oven to 325˚F/ 162˚C.
  2. Place the Ramekins in a big baking tray with hot Water till half way up the Ramekins.
  3. Place this in the preheated oven and bake for 15-17 minutes. Remove it from the oven; take the Ramekins out of the water (be sure to use kitchen mittens to avoid burning) and let it cool.
To make Baked Yogurt on stove top
  1. Heat some Water in a pan (that can fit the Ramekins) to a point just below simmering and place a small kitchen towel in the bottom (The kitchen towel will help to bake the Yogurt evenly.). Place the Ramekins on the towel; close the pan and let it cook for 15-17 minutes. Once cooked, take the Ramekins out of the Water and let it cool.
  2. Things to remember: If cooking on stove top please adjust the temperature of the Water so that it never boils but remains hot. I suggest heating the Water till it starts to form small bubbles on the sides; place the Ramekins and then reduce the temperature to low (not too low) and keep the Water hot throughout cooking. Higher temperature will spoil the texture of the Yogurt. (It will become grainier; but it will still be tasty.)
  3. The level of the Water should be till half way up the Ramekins. Once cooked, take the ramekins out of the Water and let it cool.
Chill the Yogurt for an hour in the Refrigerator. Serve Baked Yogurt in the same Ramekins or run the tip of a knife through the sides and turn it into another plate before serving.(The little yellow specks in the Yogurt is the Saffron.)

Notes:
  • Please use Yogurt with minimum sourness for this dish. But it is possible to use whole, low fat or fat free Yogurt in this recipe. I used plain fat free Greek Yogurt.
  • I made this dessert with regular yogurt too, but I like it the most when made with Greek Yogurt which is really thick and smooth. But in case Greek Yogurt is not available in your place hang the Yogurt and get rid of all the moisture before making.
  • A very easy way to get rid of the water content in the Yogurt is by the following method. Place a large strainer on top of a bowl so that the bottom of the strainer does not touch the bottom of the bowl (You should leave the space for the straining Water.) Place a cheese cloth (or a cloth with slightly large meshes) on the strainer and put the Yogurt on the cloth. Cover this and let it stand in the fridge for 3-4 hours. By this time most of the Water will be collected at the bottom of the bowl. Discard the Water and use the thickened Yogurt.
  • Saffron is used in this dish for the taste and color. So it is recommended not to use Saffron food color instead. However you can change the flavor of the dish by substituting Saffron and Cardamom with Vanilla extract or Rose Essence if you like.
  • Crushing Saffron along with the Sugar makes the crushing process easy.
  • This dessert should be served slightly cold. If you keep it for longer time in the Refrigerator it will become a bit hard. In that case either keep it at room temperature for sometime  or microwave it for 5-8 seconds to bring down the temperature before serving.


Make it, enjoy the deliciousness and 
serve it to your family with love…

Thursday, April 19, 2012

Chicken Pakora/ Pakoda/ Bhaji

Recipe No: 291
There is a small restaurant near our home, here in Alpharetta, which serves these awesome Pakoras. Whenever we go by that area we stop at this restaurant and amazingly kids will never ask ‘are we eating from outside today?’ We all know that we will have Chicken Pakoras at any time of the day, even if we just had our food. This is the result of my desperate attempt to recreate its taste… I will never say that it taste the same but it is pretty close… (I think... I hope...)
Ingredients                                      Serves 6
  • Boneless Chicken……......450 grams (thighs preferred; cut into bite (small) size pieces)
  • Oil for deep frying
To Marinate
  • Salt…………………………....1/2 Teaspoon
  • Pepper Powder………......1/4 Teaspoon
  • Lemon Juice…………….....1 Teaspoon
To Make the Batter
  • Besan/ Chickpea Flour….1/4 Cup (Kadala Mavu)
  • Maida………………………….2 Tablespoons (All Purpose Flour)
  • Rice Flour………………..…..2 Tablespoons
  • Baking Soda………………...1/4 Teaspoon
  • Red Chilly Powder………..1 Teaspoon
  • Salt……………………………..1/2 Teaspoon
  • Garam Masala Powder…1/2 Teaspoon
  • Ginger Garlic Paste……...1/2 Teaspoon
  • Curry Leaves ……………...1 Teaspoon (Cut into very small pieces; 6-8 leaves will do)
  • Coriander Leaves…….…..2 Teaspoons (Cut into very small pieces)
  • Lemon Juice………………..1 Teaspoon
Method of Preparation
  1. Wash the Chicken pieces and drain thoroughly. Wipe off the excess Water as much as possible with a kitchen tissue.
  2. Marinate Chicken with the ingredients mentioned in the ‘to marinate’ section and keep for at least 3-4 hours in the refrigerator. (If you don’t have so much time, please do keep it marinated for at least 1 hour at room temperature; but overnight in the fridge is the best.)  Pakora that we eat from the restaurant has added food color; so if you are using it, please do add along with the marinade.) Let the Chicken come to the room temperature before mixing with the batter.

  3. Mix all the ingredients to make the batter (adding a bit of Water if needed) and mix in with the marinated Chicken. (Don’t make the batter too thin as there will be some liquid in the marinated Chicken too. So if you feel it is too dry after mixing the batter with the marinated Chicken , do sprinkle some more Water.) Keep aside for 30 minutes at room temperature.
  4. Heat at least an inch of Oil in a frying pan on high heat. Once really hot, reduce the flame to medium or medium high (depending on your stove; too low heat will make the Chicken absorb too much Oil and too high heat will burn the Chicken without cooking) and deep fry the Chicken pieces. Do try to drop the pieces one by one to avoid clumping. Don't overcook and do stir now and then to ensure even cooking. If you are doubtful about the cooking time (which depends on size of the pieces and the heat of the stove), do take one piece out of the Oil and check.
  5. Repeat the process with all the Chicken pieces.
  6. Serve it hot with Ketch up or Mint or Tamarind Chutney.
Notes:
  • Adjust the amount of Salt, Coriander Leaves and Curry Leaves according to your taste.
  • If you dont have Maida, do use 4 Tablespoons of Rice Flour and vice-versa. 
  • Don’t overcrowd the pan while frying as it will decrease the temperature of the Oil resulting in over absorption of Oil by the Pakoras.
  • I served this with a Chutney made of some Mint Leaves, Coriander Leaves, Green Chilly, Ginger, Salt and Yogurt.


Make it, enjoy the deliciousness and
serve it to your family with love…

Friday, April 13, 2012

Vazhuthananga Pulincurry (Brinjal/ Aubergine in Tamarind Gravy)

Recipe No: 290
A few weeks before a good friend of mine gave me her Mother’s recipe for Prawn in Tamarind gravy (Konchu Puli pizhinjathu).  Even though I am not a big fan of 'sourness', I like the dish so much that I started experimenting the same with many vegetables and this is one of them. Since a vegetarian loving friend of mine asked for its recipe after tasting and I promised her that I will post it in the blog, I am doing this…
Ingredients                                               Serves 4
  • Oil………………………...2-3 Tablespoons (Coconut Oil preferred)
  • Ginger chopped…......1 teaspoon heap
  • Shallots………………....7-8 (Sliced big; about ½ cup)
  • Indian Green Chilly…2 (depending on the taste; I use long ones which are less spicy)
  • Curry Leaves…………..2 Sprigs
  • Tomato sliced………...1/2 medium
  • Brinjal…………………...2 medium (sliced into long medium sized pieces; about 2 cups)
  • Red Chilly Powder…..1 Teaspoon
  • Coriander Powder.….1 Teaspoon
  • Turmeric Powder……1/4 Teaspoon
  • Tamarind Water….…3/4 Cup (Squeeze a large Gooseberry sized Tamarind in hot Water)
  • Salt as needed
Method of Preparation
  1. Heat Oil in a ‘Chatti’ (an earthen cooking vessel) or a stainless steel pan (please refer the notes) on high heat and saute the chopped Ginger for 30 seconds.
  2. Add Shallots, Green Chilly, Curry Leaves and Tomato; saute till the Shallots turn translucent.
  3. Add the Brinjal (squeeze off the excess Water if any) and fry in the Oil for two minutes or till the Brinjal pieces changes its color slightly.
  4. Mix in the Chilly Powder, Coriander Powder and the Turmeric Powder; saute for a minute. Do stir often to prevent burning.
  5. Add the Tamarind Water, Salt and more Water if needed (I used ½ Cup more); mix well. Let it boil and then lower the heat to medium low and cook till Oil starts to float on top and the gravy level is reduced to a desired consistency. (This will thicken a bit when cools down.)
  6. Drizzle a bit of Coconut Oil and some Curry Leaves (Break it into pieces for a stronger smell) on top; switch off the heat and let it sit for 10 minutes before serving.
Notes:
  • The amount of Tamarind depends on your taste. So do taste in between adding rather than dumping everything at once.
  • Tamarind will sometimes be hard; so in that case use hot Water to squeeze the pulp and do discard the seeds (if present) and the hard fibrous parts after squeezing.
  • As Tamarind is extremely acidic, it can react with Aluminum and the non stick coatings; so please use a stainless steel pan or earthenware (the best) like the Chatti to make this curry. However, as prolonged contact of acid with steel is also not good, don’t store the leftovers in stainless steel containers.
  • It is necessary to wash and discard some seeds from the Brinjal if the ones available contains a lot of ripe seeds. In that case use a colander which will allow the seeds to flow out throw the holes while washing.
  • If you are not using Coconut Oil in the beginning, please do try to use it at the end for drizzling. This will give that appealing smell without using a lot of it.
  • A note regarding the two photos: Yes... They are both the same dish .The one on top gives the exact color of the dish when done, but for me the lighting was not so good and it came out a little blurry. The one below is over lighted (I am sorry for that) but not that blurry. So if you are looking for the color of the finished dish, do check the picture on top; but if you are looking for the size and shape of the pieces when done, do refer the picture below... I apologize for the inconvenience caused...


Make it, enjoy the deliciousness and 
serve it to your family with love…


Wednesday, March 28, 2012

My baby girl was born yesterday....but now she is 9!!!

My little girl celebrated her 9th birthday a few weeks before. Let me invite you guys to a small conversation that happened a few days before her birthday…
Me----- “Hey Leah, what do you want for your birthday?”
Leah--- “I can’t believe that you forget… You promised me that I can cook all by myself on my 9th birthday”
Me-----(In my mind) Yes, that promise happened a few months back… I said those words just to avoid her disturbing me in the kitchen while I was experimenting something… But I really thought that she will forget it until someone else, possibly her pesky little brother who selectively remembers and reminds everyone of anything that shouldn't be remembered and reminded, reminds her…
“Oh… are you sure that you want to do it? I will not help… I will not come near the kitchen… you will have to do everything by yourself…” (I have to make sure that I tried my best to make her drop the decision.)
Leah--- That’s exactly what I want… I don’t want anyone in the kitchen…. I want to cook by myself.
Me----O………….k…. (does that sound as unconvincing as I was then?)
So together we decided on the recipe… It is going to be a Brownie… from ‘A Tasty Challenge’. Together we made this Brownie a number of times in the past… But still I tried to impart a bit of hesitation in her mind…, mainly because I just can’t admit that my little girl has grown so much… I just can’t… It is not fair… she was born just yesterday…. I changed her diapers and put her to bed very recently… But as the conversation proceeded she convinced me that all these things happened 9 years ago…
Me----“So there is baking involved… you have to switch on the Oven… Will you do it?”
Leah---“Yes I will… You just stay there and see whether I am doing it right. That's it”
Me----O…..k… (I am still not sure about this whole idea; but it wont cost anything after all...)
Sure or not that day came and Leah was as determined as ever… And I have to say she pulled it off quite well…
I took a print out of my Brownie recipe and showed her where all the ingredients are…; left everything to herself and checked our smoke detector for proper functioning… you know.. just in case…)
I sat on the dining table, which is next to the kitchen and listened to Leah reading each and every sentence from the print out and making her own comment on the sentence as if she is 'The Next Food Network Star'… She even fired her little brother once, when he tried to sneak into the kitchen to swipe some Chocolate chips….
She measured, she mixed... I sat there at the table browsing....listening and smiling to the commentary from the kitchen....
She used a parchment paper on the bottom….
She poured the batter….
Her pesky brother volunteered to do the 'quality control'….
But I interfered when what started as a simple 'quality control' went wild….

After baking it came out good… But I was too skeptical about taking the brownies out of that pan… So I took a photo of it in the pan itself… I went back for more browsing while Leah let the Brownie cool down a bit….
But after sometime she came with this….
Then she cut it…; shared with her brother and us….
Oh forgot to mention… during this time, news went out that Leah is baking by herself and two of our friends with their families came to taste her Brownie… (Brownie tasting ended up in dinner and a long time of unlimited chatting!!!) Oh.. by the way....that painting on the table... Leah did it... I thought at least some of you would love to know...

Even though I started writing this post to portrait my daughter’s first attempt at cooking by herself, I would love you guys to sneak into her party too…

Usually we celebrate our kid’s birthday at home with some of our good friends, their kids, some home cooked food and a homemade cake of there preference… This time was also no difference…

For the first time in her life when Leah said she don’t want a Princess or a Fairy Tale character Cake, I realized with shock that my little princess is growing up… Her choice was a ‘swimming pool’ Cake... I sighed as she made her choice... she did not ask for a ‘High-Heeled Shoe Cake’ or a ‘Louis Vuitton Hand Bag’ Cake…. At least she is not a diva yet!!!


 It was a Rev Velvet Cale with a Cream Cheese filling and Butter Cream frosting... As you can see, I ended up covering the cake with fondant... Birthday Girl was more than happy to see my creation... and so were the guests...

Both of us were excited with the idea of an ‘all starters’ party’, as appetizers and soups being  her favorite… And this was the menu….

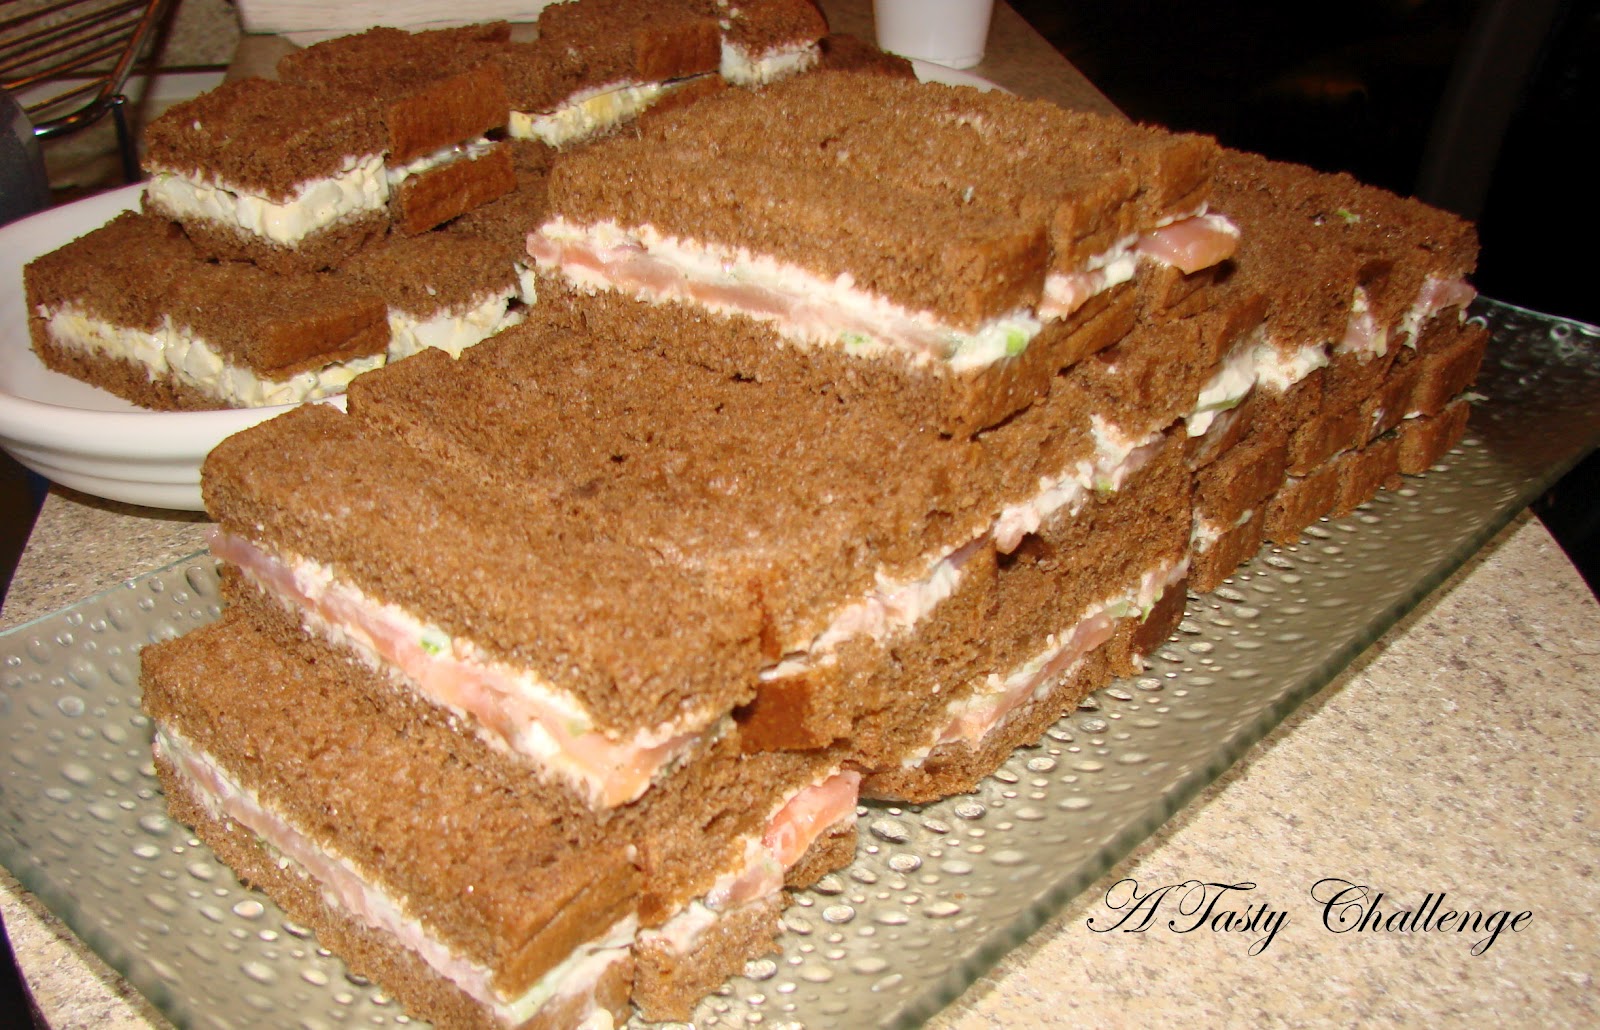
Smoked Salmon Tea Sandwiches and Egg Tea Sandwiches… (Most of our guests were not familiar with Smoked Salmon and hence we made an alternative too…)

   
Alligator Samplers… (It was actually fired Alligator with Indian spices…; It was my husband’s idea to incorporate something adventurous and he simply hated when I called them ‘Alligator Samplers’… he told everyone ‘Cheenkanni Varuthathu’!!!)
Amazingly it tasted just like Chicken and a four year old girl in the party went crazy (in a good manner) over it and ate right from the bowl where I kept it in bulk. (See, I got some good foodie friends!!)

Chicken Chilly…
Pav Bhaji…. (For easy handling I substituted Pav with Bread…)
Chemmeen Kozhukatta…

Salad with Vinegar, Salt and Pepper dressing... I think this goes well with Chicken Kebab

Chicken Kebeb
Fruit Trifle

If God allows, there will be more fabulous birthdays for my daughter, but I know I will never forget her 9th Birthday… when she convinced me that she can cook all by herself…

And I hope she will never forget it either…. Love you Leah... love you a lot....

Wednesday, March 14, 2012

Chicken Sliders

Recipe No: 289
This is a very easy and tasty appetizer that can be converted to a full meal with the addition of some Fries and a Salad. I made this with Chicken, but you can substitute it with any meat of your choice. With a hint of Chinese taste, this will satisfy any non vegetarian palate.
Ingredients                                            Makes 8
To make the Patties
  • Ground Chicken………...1 lb/ 450 grams (raw Chicken is a must)
  • Red Chilly Powder….....1/2 Teaspoon
  • Black Pepper powder...1/4 Teaspoon
  • Ginger Garlic Paste……1 Teaspoon
  • Coriander Leaves………1 Tablespoon (chopped fine)
  •  Salt to taste
To fry and make the sliders
  • Butter………………………2 + 2 Tablespoons
  • Oil…………………………..2 Tablespoons
  • Dinner Rolls………….…8 (I used Potato Rolls; but any small buns will do)
To make the Sauce
  • Onion chopped fine…..1/2 Cup
  • Garlic chopped fine…..2 big cloves
  • Ketchup…………………..2 Tablespoons
  • Chilly Garlic Sauce….1 Tablespoon (If not available, please use 1/2 Teaspoon Sambal Oelek.)
  • Worcestershire Sauce...1/2 Teaspoon
  • Dark Soy Sauce…….…..1 Teaspoon
  • Water……………………....1/4 Cup
Method of Preparation
  1. Mix all the ingredients to make the patties thoroughly. Divide it into 8 equal sized portions.
  2. Make each portion into a patty approximately the diameter of your buns. Keep them aside.
  3. In a wide pan on high heat, melt Butter and Oil together. Once heated, place the patties in a single layer and cook for 3-4 minutes or until the patties are nicely browned on one side.
  4. Turn them over and let the other side also brown for about 3 minutes. (By this time the patties will be mostly cooked through.)
  5. Once browned on both sides, remove the patties from the pan and keep them aside.
  6. To the remaining Oil (add a bit more if needed) add the chopped Onion and Garlic; sauté till slightly wilted.
  7. Add Ketchup, Chilly Garlic Sauce, Worcestershire Sauce, Soy Sauce and Water; mix well and slide the patties back into the sauce. (Add the liquid oozed out of the patties (if any) too.)
  8. Let it cook for a minute on both sides in the sauce or till the sauce is reduced considerably. (A bit of the remaining sauce is good.) 
  9. In the mean time, cut the dinner rolls horizontally into two, apply a light pat of Butter on the cut sides of both halves and toast them in another pan on high heat. (You have to toast them only on the cut sides.) Once slightly browned, take and keep them on a plate ready for the patties. Repeat this with all the Rolls.
  10. Place the patties on the bottom half of the Rolls and spoon the remaining sauce equally on top of the patties.
  11. Place the other half of the bun on top of the patty and serve hot.
Notes
  • Water is an enemy in making patties. So make the minced Chicken as dry as possible. (Meaning remove all the Water content with a kitchen tissue.)
  • The minced Chicken mixture is usually on the sticky side; so please rub your palms with Oil to reduce sticking.
  • The patties will be mostly cooked during frying itself, but by putting them in the sauce you can ensure that it is fully cooked. Before taking it off the stove, please check at least one patty for 'doneness'. The color of the meat will change from pink to almost white when fully cooked.
  • If you don't have  a pan to fry all patties at one time, please do it in batches.


Make it, enjoy the deliciousness and 
serve it to your family with love…

Tuesday, March 6, 2012

Devil’s Food Cake with Chocolate Ganache

Recipe No: 288
This was the cake I made for the Valentine’s Day… The Cake together with frosting has a deep, rich Chocolate flavor, but the cake alone is very mild and on the less sweet side. I personally prefer the Cake alone with a light dusting of Powdered Sugar on top but as it was for an occasion, I dressed it up with this Chocolate Ganache.
Ingredients                              Makes one 8 inch Cake
For the Cake
  • Cocoa Powder………………....1/4 Cup
  • Instant Coffee Powder……...1 Teaspoon
  • Boiling Water…………………..1 Cup
  • All purpose Flour/ Maida….1 Cup
  • Baking Powder…………………1/4 Teaspoon
  • Baking Soda…………………….3/4 Teaspoon
  • Salt…………………………………a pinch (Avoid if using salted Butter)
  • Unsalted Butter……………….1/2 Cup/ 1 Stick
  • Sugar………………………………1 ¼ Cup
  • Eggs……………………………..…2
  • Vanilla Essence………………..1 Teaspoon
For Chocolate Ganache
  • Semisweet Chocolate Chips…7 oz/ 1 cup
  • Instant Coffee Powder………..1/8 Teaspoon
  • Heavy Cream…………………….1/2 Cup
  • Vanilla Essence/ Extract…….1/2 Teaspoon
Method of Preparation
To Make the Cake
  1. Dissolve Cocoa Powder and Coffee Powder in the Boiling Water and keep aside till it cools to room temperature.
  2. Sift together Flour, Baking Powder, Baking Soda and Salt well; keep aside till ready to be used.
  3. Preheat the oven to 350˚F/ 180˚C.
  4. Keep an 8 inch baking pan (I used a heart shaped pan) ready by applying a light coating of Butter and dusting it with some Flour. Alternatively line the pan with parchment paper and apply a light coating of cooking spray.
  5. Beat Butter and Sugar together until creamy.
  6. Add Eggs one at a time, beating thoroughly after each addition and mix in Vanilla during the addition of the second Egg.
  7. Add the Flour mixture and the Cocoa- Coffee solution alternating with each other, starting and ending with the Flour.
  8. Pour the batter to the prepared pan; level the top and bake in the middle of a preheated oven for 30-35 minutes or till an inserted toothpick comes out clean.
  9. Once the Cake is out of the oven, let it cool in the pan for 5 minutes; take it out and finish cooling on a rack before icing.
To make the Ganache
  1. Heat Cream and Coffee Powder in a pan till it starts to simmer along the edges. (Do stir often to avoid skin from forming.)
  2. Pour this over the Chocolate Chips in a bowl and let it sit for 2 minutes. (Please be patient and let it sit. Stirring before that will make the Ganache grainy from partially melted Chocolate. If this happens accidentally, reheat it in a double boiler until smooth.)
  3. Stir to a make a smooth, glossy Ganache and mix in the Vanilla Essence.
  4. Let it refrigerate for 5-8 minutes before frosting.
To frost the Cake
  1. Spread the Ganache all over the Cake (I opted to spread it only on the top of the Cake.) and decorate it as you wish. (I used Powdered Sugar, some homemade sugar flowers and leaves and some store bought edible beads.)
  2. Serve it at room temperature. 
Notes:
  • The quality of Cocoa Powder is very crucial for this recipe. So use a Dutch Processed Cocoa Powder or a really good Natural Unsweetened Cocoa Powder. I used Natural Unsweetened Cocoa Powder from Scharffen Berger. (Unlike the Dutch processed variety, this is slightly acidic and when used in recipes calling for baking Soda, which is an alkali, reacts together to create a leavening effect. So if in case you are using the Dutch processed Cocoa (which is neutral) please increase the amount of baking Soda to 1 teaspoon.
  • As Water has a tendency to expand when heated, measure it only after boiling.
  • Beat the Flour only till it is mixed. Over beating can result in a tough Cake.
  • Sudden lowering in temperature can cause the Cake to fall, so open the oven only during the last stage of the baking. Touch the top of the cake to feel the doneness and insert the toothpick only if you feel that it is done. (If you feel it is still watery, please don’t take chance by inserting the toothpick.)
  • Over baking can result in a dry Cake, so please don’t do it.
  • Increase the amount of Heavy Cream for a thin Ganache that can be poured over the Cake.
  • Refrigerating the Ganache for longer time will make it hard. So be careful with the time. If in case it hardens warm it slightly to make it soft again. (Don’t use high heat in this case as it may separate the Chocolate.)
  • As this Ganache is made in a spreadable consistency (thicker than the normal Ganache), it will become very hard on refrigeration. So if you are using Ganache to decorate, please don't refrigerate the Cake. If you don't feel like finishing the Cake within a day or two, do refrigerate; but let it thaw well and come to the room temperature before serving.


Make it, enjoy the deliciousness and
serve it to your family with love…