Creating a blog was out of the question for a long time for me, as measuring everything in the kitchen was like biting into an eggshell. I enjoy cooking and don’t want to waste even a slightest bit of enjoyment in that small world of mine. But little did I know that everything will change, when my husband came home with the Oscar nominated film ‘Julie and Julia’( a real life story) where Julie Powell (part played by Amy Adams) challenged herself to make all the 524 recipes from Julia Child's cook book ‘Mastering the Art of French Cooking’ and blogging all her experiences (The Julie/Julia Project). It was an inspiring movie. A few days later when we were discussing this casually with a friend of ours over tea…everything changed dramatically…..” How about you making at least half of it in one year? Not French but your own. 262 recipes that will inspire others and present it as a blog?” For a minute my mind traveled faster than light… With an experience as a helper in my mother in laws kitchen for 6 years followed by a three year everyday struggle to satisfy the palate of my foodie husband, if I cannot do it then why should I cook? But on the other side with an experience in English literature extending no more than expanding outline stories in English grammar class when I was 18 and two small kids that come in handy at times, will a commitment for the next one year work? Anyway my ‘cook's ego’ didn’t allow me to say no...

So my friends …here I am opening my recipe book, trying to perfect and present 262 recipes in the coming 365 days….A Challenge that will of course tastes good. Come.. Have a walk with me along my journey.. Cheering and inspiring….Forgiving and tolerating…Testing and tasting….for ‘A Tasty Challenge’

Search This Blog

Wednesday, November 30, 2011

Dal/ Lentil/ Parippu

Recipe No: 275
I have to confess that I grew up in a house that doesn't use Coriander Leaves at all but married into a house which consider Coriander Leaves as a must in cooking. But why am I blabbering this now? Well, I consider this Dal as ‘the dish’ that made me fall in love with Coriander Leaves and as you know from my previous recipes, I use a lot of it now. Oh…by the way, this is my Mother in Law’s preparation and is a staple for dinner with Chappathi.
Ingredients                                            Serves 3
To pressure cook
  • Thoor Dal/ Thuvara Parippu…1/2 Cup (Other Dals like Kadala Parippu/ Split Chick Peas and Cherupayar Parippu/ Split Green Gram also can be used)
  • Water…………………………………...1 ½ Cups
  • Turmeric Powder…………………..1/8 Teaspoon
To Saute
  • Oil……………………………………..…1 Tablespoon
  • Mustard Seeds……………………...1/4 Teaspoon
  • Onion Chopped……………………..1/3 Cup
  • Green Chilly slit…………………….1-2
  • Tomato chopped……………………1 small
  • Chicken/ Meat Masala…………..1/2 Teaspoon (I used store bought)
  • Chopped Coriander Leaves…….2 Tablespoons
  • Salt to taste
Method of Preparation
  1. Wash the Lentils/ Dal really well (until the Water runs clear) and cook them with the all the ingredients mentioned in the 'to pressure cook’ section in a Pressure cooker till done. (After the first whistle, I lowered the heat to medium low and cooked for 5 more minutes.)
  2. Once cooked, off the heat and let it cool down.
  3. Heat Oil in a pan on medium high heat and splutter the Mustard Seeds.
  4. Once the seeds start to crackle, add the Onion and Green Chilly; saute till translucent about a minute or two.
  5. Add the Tomato and Salt; continue sauteing for another minute. (Tomatoes doesn’t have to be mashed. But if you don’t like to see them in pieces, please do wait till it mashes.)
  6. Add the Chicken/ Meat Masala powder, followed by the cooked Dal (including Water if any) and mix well.
  7. Add a cup of Water (add a bit more or less depending on your taste and the amount of Water left behind after cooking the Dal; but consider that this Curry tends to thicken a lot after cooling.) and let it boil. (Please refer the picture at the bottom for consistency.)
  8. Add Coriander Leaves; mix well and do a taste test to adjust the seasonings. (At this point you can add more Masala (up to ¼ teaspoon) if you prefer.)
  9. Serve hot with Chappathi.
Notes:
  • Using a bit of Oil while cooking Dal/ Lentil in a pressure cooker may reduce boiling over/ leaking out of the whistle.
  • The cooking time for the Lentil depends on your cooking conditions and the efficiency of the Pressure Cooker. So adjust the time accordingly.
  • Depending on the time taken by the Lentil to cook (especially if your Pressure Cooker has a long cooking time), it may require a bit more Water. Please adjust accordingly.
  • With Chicken/ Meat Masala, I mean only the spice powders that are used to cook them and it will not include Chicken/ Meat extracts (So okay for Vegetarians too). Instead of Chicken/ Meat Masala you can use a combination of Red Chilly, Coriander and Garam Masala Powder.
  • As Coriander Leaves play a major role in the taste of this dish, I will not recommend avoiding it.


Make it, enjoy the deliciousness and
serve it to your family with love…

Wednesday, November 23, 2011

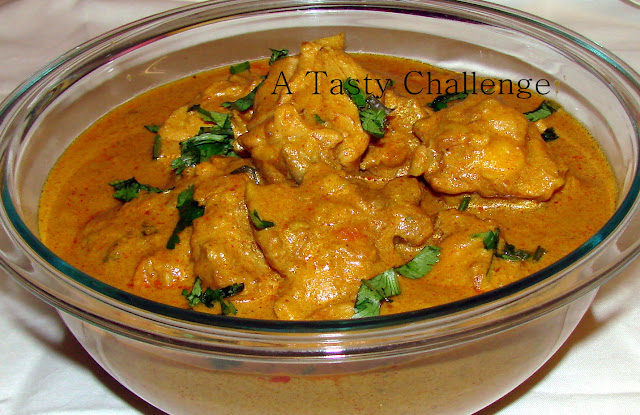
Theengapalil Patticha Kozhi (Chicken cooked in Coconut Milk)

Recipe No: 274
How many Chicken recipes can you come up with? In fact... a lot… isn’t it? Of all those different types of Chicken dishes, I consider this as ‘the Chicken Curry’ for the laziest days… It sure is fast, easy and yes, the most important thing... tasty… With a prevailing taste of Coconut Milk, it  tastes somewhat like a stew but much easier than a stew. Go through the recipe; make it and you will see how easy it is…
Ingredients                                                                  Serves 4
  • Chicken…………..............750 Grams (cut into small pieces)
  • Shallots…………..............12 quartered
  • Ginger Garlic Paste…....1 ½ Tablespoons
  • Green Chilly chopped….3-5 (I used Indian; adjust according to your taste)
  • Crushed Black Pepper…1/2 – 1 Teaspoon (Adjust according to your taste)
  • Curry Leaves……………..2 Sprigs
  • Thick Coconut Milk…….1 Cup (If you are using Coconut cream do dilute it with some Water)
  • Crushed Whole Spices…1 inch Cinnamon piece, 6 cloves, 3 Cardamom pods and ½ of a Star Anise
  • Salt to taste
Method of Preparation
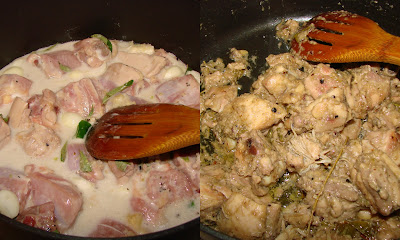
  1. Mix all the ingredients given in the ingredient list in a pan; mix well; close it and allow to boil on high heat.
  2. Once boiled, reduce the heat to medium low and let it cook for about 20-25 minutes or until all the liquid is evaporated and Oil starts to separate. (We don’t add any Oil but, it will separate from the Coconut Milk as it cooks down.)  Do stir now and then to avoid sticking at the bottom of the pan.
  3. Once Oil starts to separate, off the heat and serve it hot with Rice, Appam or Flatbreads.
Notes:
  • If you don't have Shallots or if you are too lazy to peel them, do use 1/2 cup cubed Onion. Well... did I ever mention that it is very easy to peel Shallots if you soak them in warm Water for a few minutes?
  • If you doesn’t want to use (or don’t have) whole spices, please do use ½ Teaspoon homemade Garam Masala powder or ¾ Teaspoon of a good variety store bought Garam Masala Powder instead.
  • If you are using thick Coconut Milk, do use 3/4 Cup diluted with 1/4 cup of Water.
  • It is very important that you have to cook the Chicken until the Oil separates as it decides the taste of the dish. I like it to be a bit moist but ha… you can even fry the Chicken a bit in the oozed out Oil if you want. But in that case make sure you use a good non stick pan.


Make it, enjoy the deliciousness and
serve it to your family with love…


I am linking this post to the event Christmas delicacies hosted by Julie of Erivum Puliyum


Monday, November 21, 2011

Bhindi/ Lady’s Finger/ Okra/ Vendakka fry

Recipe No: 273
One important thing that has to be mentioned while working with Okra is its sliminess if not cooked properly. But with some care it can be reduced to a greater extend and in this recipe it is not a problem at all… I bet this will be one of the best Okra dishes that you would have ever tasted. Enjoy…
Ingredients                                   Serves 3-4
  • Okra/Vendakka…….....200 Grams
  • Onion………………………1/4 Cup (cut into thin, long slices)
  • Red Chilly Powder……1/2- 1 Teaspoon (Depending on the taste)
  • Asafoetida Powder…..2 Dashes/ a pinch (Kayam Podi)
  • Curry Leaves…………..1 Sprig
  • Besan/ Kadalamavu…2 Tablespoons (Chickpea Flour)
  • Salt to taste
  • Oil for deep frying
Method of Preparation
  1. Wash and dry the Okra thoroughly. Cut them into thin long slices.
  2. Add sliced Onion, Red Chilly Powder, Asafoetida Powder, Curry Leaves and Salt to the Okra pieces; mix well and keep it aside for 10 minutes.
  3. Heat Oil for deep frying in a deep pan (a wok/ Cheenachatti works the best for this) on high heat. (At least a cup of Oil is needed)
  4. Sprinkle the Besan/ Kadalamavu/ Chickpea Flour to the seasoned Okra pieces and toss gently.
  5. Deep fry the tossed Okra in hot Oil till golden brown.
  6. Once golden brown, remove this from the Oil; drain the excess Oil on a kitchen tissue and serve hot with Rice.
Notes:
  • Washing and drying the Okra really good (Typically I do this part way in advance) sometime before using tends to reduce the sliminess a bit. In this recipe, Chickpea Flour also helps reduce it.
  • The moisture created by the Salt in the marinated Okra pieces will help the Besan stick to them. If some Flour is left behind, please do discard them. This is to prevent the loose Flour from burning in hot Oil. (Believe me... burnt Flour does not taste good!!!)
  • I never used shallow frying in this recipe and hence not so sure about the outcome.
  • Deep frying should be done only in plenty of Oil. Otherwise the Okra pieces will reduce the heat of the Oil resulting in heavy absorption of Oil by them.
  • As the Okra pieces are sliced thin, it will take only a few minutes for them to cook. So it is okay to fry these on high heat. Also high heat will reduce the absorption of Oil by Okra.
  • This recipe is loosely adapted from a recipe by Mrs. K.M Mathew.


Make it, enjoy the deliciousness and 
serve it to your family with love…

Tuesday, November 15, 2011

Chicken in Roasted Cashew-Peanut Gravy

Recipe No: 272
I had already posted the vegetarian version of this recipe with Cauliflower. Now this is the non-vegetarian version of the same. The basic ingredients and the method of preparation are the same but the amount changes to suit the taste of Chicken.
Ingredients                                        Serves 6
  • Chicken………………............….2 lb/900 grams (Cut into medium sized pieces, washed and drained)
  • Oil…………………………………...3 Tablespoons
  • Peanuts…………………………….1/3 Cup
  • Cashew nuts………………….....1/3 Cup
  • Onion Chopped finely………..2 Cups
  • Ginger-Garlic paste……….….1 ½ Tablespoons
  • Red Chilly powder………..…..2 Teaspoons
  • Coriander Powder…………….4 Teaspoons
  • Turmeric powder……….…….1/2 teaspoon
  • Garam Masala Powder..…..1 Teaspoon
  • Tomato chopped…………..….1 large
  • Cream or milk….….…………..1/4 Cup
  • Coriander leaves chopped...2 Tablespoons (optional)
  • Salt to taste
Method of Preparation
  1. Heat Oil in a pan on medium heat and fry the Peanuts and the Cashew nuts until golden brown.
  2. Remove it from the Oil and when slightly cooled, grind it into a smooth paste using only just enough water. (Up to 1/2 cup will be good)
  3. To the rest of the Oil in the pan, add chopped Onion together with Salt and saute till it starts to brown along the edges.
  4. Add Ginger Garlic paste and continue sauteing till the raw smell is gone.
  5. Adjust the heat to low and add Red Chilly powder, Coriander powder, Turmeric powder and Garam Masala powder; saute till the raw smell is gone for about a minute or two.
  6. Add chopped Tomato and the ground Peanut-Cashew paste; saute till the Oil oozees out. (Do stir continuously.) This step is very important as it determines the taste of this dish. As we are not using too much of Oil, we will only be able to see small droplets of Oil  towards the sides of the mixture. (By this time all the Water from the Masala will be evaporated.)
  7. Add 2 cups of water to dilute the gravy and add the Chicken pieces; mix well; close the pan and let it boil on high heat.
  8. Once boiled, lower the heat to medium and continue cooking till the Chicken is cooked thoroughly; the level of the gravy is reduced and Oil starts to float on top of the curry for about 30 – 40 minutes.
  9. Add Cream and Coriander leaves (if adding), mix well and let it start to boil along the edges. Add more Salt if needed.
  10. Switch off the heat, close the pan and let it sit for 15 minutes before serving.
Notes:
  • You can reduce the amount of Chicken in this recipe and add Cauliflower and Potatoes to fill that place.
  • Since there are nuts in the gravy, chances are there it may stick to the bottom of the pan. So stir it now and then.


Make it, enjoy the deliciousness and 
serve it to your family with love…

Thursday, November 10, 2011

Pavakka/ Bitter Guard/ Karela Fry

Recipe No: 271
Ingredients                               Serves 3
  • Pavakka/ Karela……….250 grams (1 big/ 2 small)
  • Onion sliced thin……….1/3 Cup
  • Coconut sliced thin……1/4 Cup
  • Green Chilly slit………..1-3
  • Curry Leaves……………1 Sprig
  • Salt………………………….1/3 – ½ Teaspoon
  • Oil for deep frying
Method of Preparation
  1. Wash and dry the Bitter Guard/ Pavakka. Cut it lengthwise into two; discard the seeds and the fibrous portions inside.
  2. Slice them horizontally into very thin pieces. (Make it as thin as possible.)
  3. Add Salt to the pieces and keep it aside for 10 minutes. By then some liquid will be oozing out of the Bitter Guard pieces. Squeeze the pieces as hard as possible and discard the juices.
  4. Heat at least an inch of Oil in a deep pan until really hot.
  5. Put the Bitter Guard pieces into the hot Oil and fry on high heat until half done.
  6. Halfway through frying add sliced Onion, Coconut, Green Chilly and Curry Leaves.
  7. When the Bitter Guard pieces, Onion and Coconut slices attain a golden brown color take them out with a slotted spoon after draining most of the Oil. Let the excess Oil drain on a paper towel.
  8. Serve hot with cooked Rice.
Notes:
  • Salt helps to pull the bitter liquid from the Bitter Guard and squeezing the liquid off  will reduce its bitterness. If you are planning to skip this procedure, please reduce the amount of Salt added.
  • There will be a lot of splattering while frying if there is Water content in the Bitter Guard pieces.
  • If you try to deep fry all the ingredients together in the first place, the Onion will burn before the Bitter Guard pieces are fried. So give the Bitter Guard a head start and add the rest of the ingredients half way through the frying.
  • Don't overcrowd the pan while deep frying; this may result in the over absorption of Oil. Do let the Bitter Guard pieces immerse fully in the Oil to ensure even frying.


Make it, enjoy the deliciousness and
serve it to your family with love….

Monday, November 7, 2011

Fish Manjurian

Recipe No: 270
This is another one of my quick and easy recipe that goes well with Flat breads, Fried Rice or even plain boiled Basmati Rice. With its unique 'Indo-Chinese' touch, this is a bit different from the usual Fish preparations but very tasty and perfect for people who search variety in Fish dishes. Enjoy…
Ingredients                                                     Serves 4
To marinate
  • Fish………………....................1 lb/ 425 grams (bones removed and cut into bite size cubes; I used Salmon but any Fish with thick flesh will do.)
  • Corn Starch…......................2 Tablespoons (commonly called Corn Flour in India)
  • All Purpose Flour/Maida….1 Tablespoon
  • Rice Flour……………………….1 Tablespoon
  • Egg………………………………...1/2 (Beaten well)
  • Soy Sauce…………………….....1/2 Teaspoon
  • Red Chilly Powder………......1/4 Teaspoon
  • Salt as needed
To Saute
  • Oil…………………………..........3-4 Tablespoons
  • Spring Onion…………..........5 stalks (chopped; white and green portions separated)
  • Garlic chopped………..........2 Teaspoons
  • Onion cubed………….......….1 ½ Cups (make slightly big cubes)
  • Sambal Oelek……………......1 Teaspoon (If not available use Red Chilly paste/ sauce)
  • Vinegar…………………..........1/2 Teaspoon
  • Soy Sauce……………….........1 Teaspoon
  • Tomato ketch up…………...2 Tablespoons
  • Coriander Leaves…………..2-3 Tablespoons (chopped)
  • Salt as needed
  •  Oil for deep frying
Method of Preparation
  1. Make a batter with all the ingredients mentioned in the ‘to marinate’ section except the Fish. Marinate the Fish with the batter and let it sit for 10 minutes.
  2. Heat at least an inch of Oil in a deep pan and deep fry the Fish on high heat till they are golden brown. The time for frying depends on the size of the Fish pieces and so, please do adjust accordingly.
  3. Drain the Fish and let the excess Oil drain on a paper towel. Keep it aside till ready to be used.
  4. In another pan (or the same pan with the Oil removed), heat 3-4 Tablespoons of Oil on high heat and saute Spring Onion Whites and Garlic till fragrant for about 30 seconds. (Please don’t brown them.)
  5. Add the Onion and saute for 3-4 minutes or till it is slightly translucent. (It shouldn’t go brown. In fact I like it when the Onion is slightly crunchy.)
  6. Add Sambal Oelek, Soy Sauce, Ketchup and Vinegar; mix well.
  7. Add the fried Fish, Chopped Coriander Leaves, Spring Onion Greens and more Salt (if needed); mix well and serve hot.
Notes:
  • Sambal Oelek is Red Chilly paste in Vinegar and are available in most of the Indian and Asian stores.
  • If Sambal Oelek is not available use any Red Chilly paste and if you can’t find that use either Red Chilly flakes or even Red Chilly powder or half of both. But adjust according to the taste and heat of the Chilly. Red Chilly Garlic sauce works fine too and these are available in the Indian stores as well.
  • I used dark Soy Sauce (Ching’s dark Soy), which is available in most of the Indian stores.
  • While deep frying, it is better to use enough Oil for the Fish pieces to immerse fully to ensure even cooking. Don’t overcrowd the pan while deep frying and if there are more, please do fry them in batches.
  • Once the Fish is fried, all the other processes will be done in minutes, so please do all the prep work before you start sauteing.
  • If you want a bit of gravy for this dish, dissolve ½ teaspoon Corn starch in ½ Cup Water and add to the dish towards the end. Make sure the sauce boils before switching the flame off. (But I prefer without the gravy.)
  • If you like Capsicum cut it into cubes and add it along with the Onion.
  • As most of the sauces have Salt in it, add extra Salt only at the very end.


Make it, enjoy the deliciousness and 
serve it to your family with love…