Creating a blog was out of the question for a long time for me, as measuring everything in the kitchen was like biting into an eggshell. I enjoy cooking and don’t want to waste even a slightest bit of enjoyment in that small world of mine. But little did I know that everything will change, when my husband came home with the Oscar nominated film ‘Julie and Julia’( a real life story) where Julie Powell (part played by Amy Adams) challenged herself to make all the 524 recipes from Julia Child's cook book ‘Mastering the Art of French Cooking’ and blogging all her experiences (The Julie/Julia Project). It was an inspiring movie. A few days later when we were discussing this casually with a friend of ours over tea…everything changed dramatically…..” How about you making at least half of it in one year? Not French but your own. 262 recipes that will inspire others and present it as a blog?” For a minute my mind traveled faster than light… With an experience as a helper in my mother in laws kitchen for 6 years followed by a three year everyday struggle to satisfy the palate of my foodie husband, if I cannot do it then why should I cook? But on the other side with an experience in English literature extending no more than expanding outline stories in English grammar class when I was 18 and two small kids that come in handy at times, will a commitment for the next one year work? Anyway my ‘cook's ego’ didn’t allow me to say no...

So my friends …here I am opening my recipe book, trying to perfect and present 262 recipes in the coming 365 days….A Challenge that will of course tastes good. Come.. Have a walk with me along my journey.. Cheering and inspiring….Forgiving and tolerating…Testing and tasting….for ‘A Tasty Challenge’

Search This Blog

Wednesday, March 30, 2011

Chakka Meen Kuzhachathu (Mashed Raw Jack fruit with Fish)

Recipe No: 230
The inspiration for this dish is from an old cookbook published by Vanitha. While reading an article in that magazine about good pairings, a recipe for this came through and suddenly remembered this old time favorite. Fortunately for me (and my family), we came across this frozen raw Jack Fruit in the Indian grocery store. So bought it, made it, and devoured it like a precious combination... and here is the recipe...
Ingredients                                     Serves 3
To cook the Fish
  • Fish………………………350 grams (I used whole Tilapia, but Mackerels are the best)
  • Salt………………………1/2 Teaspoon
  • Water…………………..1 ½ cups
  • Kokum………………...3-4 pieces (Kudampuli)
  • Curry Leaves………..2 Sprigs
  • Red Chilly Powder…1/2 Teaspoon
To make the Jack Fruit Mash
  • Jack fruit……………….450 grams (Cut into small pieces)
To grind
  • Grated Coconut……….3/4 Cup
  • Indian Green Chilly…3 (According to your tolerance)
  • Shallots…………………..3 big
  • Garlic………………….….2 big cloves
  • Ginger……………………1 small piece
  • Turmeric Powder……1/2 Teaspoon
  • Cumin Powder………..1/4 Teaspoon
  • Salt………………………..1/4 Teaspoon
  • Curry Leaves…………..3-4 Leaves
For Tempering
  • Coconut Oil…………....2 Tablespoons
  • Mustard Seeds……..…1/2 Teaspoon
  • Shallots sliced………..2 big
  • Curry Leaves…….……1 Sprig
  • Coconut grated………1/4 Cup
Method of Preparation
  1. Put all the ingredients to cook the Fish in a ‘Chatti’ (an earthen cooking vessel) or a pan and cook on medium heat for 8-10 minutes or till the Fish is cooked through.
  2. Once the Fish is done, remove the Fish from the cooking liquid; separate the flesh and discard the bones. Reserve the cooking liquid for making the Jack fruit.
  3. Grind all the ingredients in the ‘to grind’ section into a course consistency and keep aside till ready to be used.
  4. Put the Jack Fruit together with the liquid left over after cooking the Fish (I strained it to remove the Kokum) in a pan on medium heat; close the pan and cook till the Jack Fruit is done. (Add more Water only if necessary.)
  5. When a bit of Water is still remaining, put the ground Coconut Mixture in the middle of the cooking Jack Fruit and cover it with the Jack Fruit from the sides.
  6. Put the Fish over the Jack Fruit; close the pan; reduce the heat to low and let everything cook till the Water is thoroughly absorbed.
  7. Once the Water is absorbed, mash the Jack Fruit and mix everything really well; switch off the heat. Add more Salt if necessary.
  8. In another pan heat Coconut Oil on medium high heat and splutter the Mustard Seeds.
  9. Add the Shallots and Curry Leaves and fry till the Shallots are golden brown.
  10. Add the grated Coconut and continue frying till it is brown in color.
  11. Add the prepared tempering over the mashed Jack Fruit and Fish and keep the pan closed till serving time.
  12. Mix well and serve warm with Pickles or Chutneys.
Notes:
  • Even though all the bones are removed from the Fish, small bones may make it to the final dish; so please do take care while eating.
  • The cooking liquid in the Jack Fruit should come up to the level of the Jack Fruit itself. If the left over liquid from cooking Fish is not up to there, please do add more Water.
  • Mash the Jack fruit to a good mashed consistency so that the Fish will not be seen as such (since the Fish is soft it will be mashed fast) but its taste together with the taste of Kokum will be felt.
  • Don't avoid Kokum as it imparts a characteristic flavor, and they are available in most of the Indian stores.
  • The use of grated Coconut while tempering gives a very special flavor to the mashed Jack Fruit, so don’t avoid it.
  • If you want to avoid the Fish and make the simple mashed Jack Fruit, do skip the Fish part and follow the rest.


Make it, enjoy the deliciousness and 
serve it to your family with love…

Tuesday, March 29, 2011

Tharavu/ Duck Curry

Recipe No: 229
All of us at home loves breakfast and as weekday mornings are too busy for a Kerala style breakfast, I make those items mostly for dinner so that we can all sit around the table and eat comfortably, listening to that days adventures of our little ones. As I was having some Duck in the back of my freezer, I decided to make Duck Curry and Palappam. Come on ... Appam and Duck Curry… is there a better combination than that? Is there is anything worth to sit around the tables for?
Ingredients                                         Serves 4-5
To Marinate
  • Duck………………………...700 grams (cut into small pieces; include some skin too)
  • Salt…………………………..1 Teaspoon
  • Black Pepper Powder…1/3 Teaspoon
  • Vinegar…………………….1 Teaspoon
To Saute
  • Oil………………………….…..1 Tablespoon
  • Onion sliced thin………….1 Cup
  • Indian green Chilly………2 (slit)
  • Curry Leaves……………….2 Sprigs
  • Ginger Garlic Paste.........2 Tablespoons
  • Red Chilly Powder……….2 Teaspoons (I used Kashmiri Chilly powder)
  • Coriander Powder………..3 Tablespoons
  • Turmeric Powder………...1/2 Teaspoon
  • Garam Masala Powder…1 Teaspoon
  • Tomato…………………….…1 Big chopped
  • Thin Coconut Milk…..….2 Cups (Mix 1/2 Cup thick Coconut Milk with 1 1/2 Cups Water)
  • Thick Coconut Milk..……1 Cup
  • Potato cut into wedges…2 small/ 1 large
  • Salt to taste
For Tempering
  • Coconut Oil…………………1 Tablespoon
  • Mustard Seeds…………….1/2 Teaspoon
  • Shallots sliced thin………2
  • Curry Leaves……………….1 Sprig
Method of Preparation
  1. Marinate Duck with the ingredients mentioned in the ‘to marinate' section and keep aside for 15 minutes.
  2. Heat Oil in the pan of a pressure cooker and saute Onion, Green Chilly and Curry Leaves together with the Duck skin (if using).
  3. Add Ginger Garlic paste and saute till the raw smell is gone.
  4. Reduce the heat to medium low and add Red Chilly Powder, Coriander Powder, Turmeric Powder and Garam Masala Powder; saute till the raw smell is gone and the Powders are lightly toasted for about 3 minutes.
  5. Add the Tomato, followed by the marinated Duck pieces and saute on medium high heat for 5 minutes, stirring often.
  6. Add the thin Coconut Milk; mix well; cover the Cooker and cook for 3-4 whistles or till the duck is almost done. (Will finish cooking with the Potatoes later.)
  7. Once the pressure is gone, open the Cooker; add the Potatoes; put the heat on medium and let it cook, covered, till the Potatoes are done. (If the gravy is less add a bit more.) Add more Salt if needed.
  8. Once the Potatoes are cooked, add the thick Coconut Milk and let it simmer along the edges. Switch off the heat and pour the tempering on top.
To prepare the Tempering
  • Heat Coconut Oil in a pan on medium high heat and splutter the Mustard Seeds.
  • Add Shallots and Curry Leaves; fry  till the Shallots are golden brown in color. 
  • Pour the tempering on top of the Duck Curry and let it sit covered for 15 minutes before serving hot with Palappam. (Don't forget to mix thoroughly before serving.)
Notes:
  • I used 5 small pieces of skin that gave out the Oil necessary for sautéing, even though I used only very little Oil in the beginning. If you don’t want to use skin, do avoid it and use extra Oil.
  • Sauteing the Duck in the Masala before cooking is very essential as it takes away the ‘duckiness’ (The characteristic smell of Duck) of the Meat.
  • Add a pinch of Red Chilly Powder into the hot Oil while tempering before pouring it over the Curry if you want a vibrant red colored appearance for the Curry.
  • Tempering in Coconut Oil imparts a very good taste to the Curry, so don’t skip the process and please do it only at the end.
  • The resting time at the end is important as the old people call it ‘pathrapakam’ meaning the Curry should sit in its cooking vessel for some time to get the maximum taste.


Make it, enjoy the deliciousness and
serve it to your family with love…


Monday, March 28, 2011

Sweet and Sour Prawns and Mushrooms

Recipe No: 228
I have only vague memories of this dish that my Mother in Law made once, when we reached home after a long travel. I was not able to see her making it, but the taste lasted on my taste buds long enough to be recreated. But the real inspiration was the presence of small amounts of both Prawns and Mushrooms waiting to be used in the refrigerator and being a Saturday, I decided to make something special with it, that will make all of us happy.
I had already posted my recipe for Sweet and Sour Pork, but this is a slightly different version and I just want to show another way of preparing a sweet and sour dish.
Ingredients                                   Serves 3-4
To make the Prawn and Mushroom Balls
  • Prawns cleaned…………….150 grams (shelled and deveined; 15 big ones)
  • Mushroom……………………300 grams (10-12 big Button Mushrooms)
  • Soy Sauce…………………….1 Teaspoon
  • Spring Onion chopped…..2 Tablespoons
  • Salt……………………………...1/3 Teaspoon
  • Pepper Powder……………..1/4 Teaspoon
  • Ginger Garlic Paste……....1/3 Teaspoon
  • Corn Flour…………………...1 Teaspoon + extra to coat the balls
  • Oil for deep frying
To Saute
  • Oil……………………………….1 Tablespoon
  • Garlic chopped fine………2 Tablespoons
  • Celery chopped fine……..3 Tablespoons
  • Green Onion chopped…..2 (separate white and green portions)
  • Onion chopped…………….1/4 Cup
To Make the Sauce
  • Vinegar……………………....1 Tablespoon
  • Sugar………………………….1 Tablespoon
  • Soy Sauce……………………1 Teaspoon
  • Ketch Up………………….…2 Tablespoons
  • Corn flour…………………..3/4 Teaspoon
  • Water…………………………1/2 Cup
  • Pepper Powder……………1/8 Teaspoon
Method of Preparation
To make the Prawn and Mushroom Balls
  1. Wash and dry the Prawns really well.
  2. Clean the Mushrooms (No peeling necessary) and either steam for 10 minutes or drop it in boiling Water and boil for 5 minutes. Take it out and let it cool.
  3. Once cooled, squeeze and drain as much water as possible.
  4. Cut the drained Mushrooms and Prawns and grind them into a smooth paste using a food processor or a dry grinder.
  5. To the ground mixture, add Ginger Garlic Paste, Soy Sauce, Spring Onion, Salt, Pepper Powder and a teaspoon of Corn Starch; mix really well and make 15 equal sized balls.
  6. Roll the Balls in more Corn Flour and keep aside till ready to be used.
  7. Heat at least an inch of Oil in a frying pan on medium high heat and deep fry the Prawn and Mushroom Balls till golden brown. Drain the excess Oil on a paper towel and keep them aside till ready to be used.
To make the sauce
  1. Mix together all the ingredients in the ‘to make the Sauce’ section into a smooth sauce; keep aside till ready to be used.
To make Sweet and Sour Prawns and Mushroom
  1. Drain all the Oil except a Tablespoon from the pan after deep frying.
  2. To that pan on medium high heat, add Garlic and Celery and saute for 30 seconds before adding Green Onion Whites and Onion.
  3. Sauce for a minute and add the Prawn and Mushroom Balls followed by the prepared Sauce.
  4. Mix everything well and let the sauce boil and become thick. Add more Salt if needed at this stage.
  5. Boil for a minute; sprinkle the Spring Onion Greens; switch off the heat and serve hot with boiled White Rice.
Notes:
  • It is necessary to steam or boil the Mushrooms in order to get rid of the moisture.
  • Squeeze the Mushrooms  and dry the Prawns really well with paper towel to take away as much Water as possible since Water is an enemy in the making of Prawn and Mushroom Balls.
  • Don’t over crowd the pan while frying the Balls. Even though the Prawn and Mushroom balls are a bit on the softer side, it generally won’t break apart in the Oil. (Corn Flour binds it together as we are not using Egg.) But if it does, add a bit more Corn Flour to the ground mixture.
  • The Oil should be really hot when the balls are dropped and maintain the temperature on medium high. They will be cooked in 2-3 minutes; don’t rush the process by putting it on very high heat.
  • The Prawns and Mushroom Balls as such is an excellent appetizer if served with Ketchup or Mayonnaise.
  • Take care not to brown Garlic, Celery and Onion while sauteing.
  • The level of the Sauce can be adjusted according to your preference. I love to have some sauce if served with Rice. But it is also possible to make it dry and serve it as an appetizer. (Use a toothpick in that case for easy serving.)


Make it, enjoy the deliciousness and 
serve it to your family with love…


Sunday, March 27, 2011

Mushroom Thoran (Mushroom stir fried with Coconut)

Recipe No: 227
This is one of my Father’s favorite Mushroom preparations. Back in the days when Mushrooms were not available commercially, my Mother used to watch out for this in our backyard everyday during its season. Even if she got only 2 or 3, she used to make this Thoran with those precious ones.
Ingredients                                        Serves 5
  • Mushroom…………………….350 grams (12 oz/ 12 really big button Mushrooms)
To Grind
  • Grated Coconut……………..3/4 Cup (unsweetened)
  • Shallots………………………...3 big
  • Garlic……………………………1 big clove
  • Indian Green Chilly…….…4
  • Turmeric Powder………..…3/4 Teaspoon
  • Salt as needed
For Tempering
  • Coconut Oil…………………..2 Tablespoons
  • Mustard Seeds……………...1/2 Teaspoon
  • Dry Red Chilly……………...2 (broken into 2 pieces)
  • Shallots sliced……………....2 big
  • Curry Leaf…………………....1 sprig
Method of Preparation
  1. Peel the Mushrooms as I explained in Mushroom Curry (Read here) and tear it into small pieces with your hands. Wash it thoroughly and squeeze the Water out and keep it aside in a Chatti (an earthen cooking vessel) or a pan.
  2. Grind all the ingredients mentioned in the ‘to grind’ section and mix it with the prepared Mushroom with your hands.
  3. Pour ¼ Cup Water into the Mushroom Coconut mixture and cook it on high flame till it boils and then reduce the heat to medium low and cook till the Mushrooms are done and the Water is all evaporated. Keep it aside.
  4. In another pan heat Coconut Oil on medium heat and splutter the Mustard Seeds.
  5. Add Dry Red Chilly, Shallots sliced and Curry Leaves and fry till the Shallots are golden brown.
  6. Add the cooked Mushroom mixture into the pan with the tempering and mix well.
  7. Let the extra Water (if any) evaporate and let it saute for a minute.
  8. Switch off the heat and serve it hot with Rice.
Notes:
  • My mother never used to slice Mushrooms. She just tore it by her hands. Don't discard the stems. Take the outer skin off and cut it into pieces.
  • As Mushroom tends to absorb Water like a sponge, do squeeze the Water really well after washing.
  • The amount of Turmeric Powder used is a bit on the higher side for Mushrooms as it acts as an anti toxic agent (as said by the elders).
  • While cooking, Mushrooms will give out a lot of Water. This together with the Water added is essential for the Mushrooms to cook and let it evaporate completely before switching it off.
  • As Mushrooms tend to go bad fast, use it as fresh as possible. Old Mushrooms may cause stomach upsets.


Make it, enjoy the deliciousness and
serve it to your family with love…

Thursday, March 24, 2011

Whipped Cream Cake with Cardamom

Recipe No: 226
When I saw a Cake recipe in ‘Rose’s Heavenly Cakes’ using Heavy Whipping Cream instead of Butter and Oil, it suddenly caught my attention. I loved the idea and decided to give a try and did it with many flavors and some adjustments in the amount of Flour and Baking Powder. The best result was this heavenly light and soft Cake flavored with Cardamom, one of my all time favorite flavors. Above all, you don't have to wait for the Butter to come to a room temperature to make this Cake!!!
Ingredients                                         Makes 1 Cake
  • Sugar……………………………....1 Cup
  • Cardamom……………………....4 big ones (or 6 small ones)
  • Nutmeg Powder…………….....1/8 Teaspoon
  • All Purpose Flour/ Maida….1 ¾ Cup
  • Corn Flour……………………….2 Tablespoons
  • Baking Powder………………..1 ¾ Teaspoons
  • Salt…………………………………1/2 Teaspoon
  • Heavy Whipping Cream…..1 ½ Cups (Cold)
  • Eggs……………………………...3 Large (room temperature)
  • Vanilla essence……………….1 Teaspoon
  • Powdered Sugar for dusting at the end
Method of Preparation
  1. Preheat oven to 375˚F/190˚C.
  2. Grease a tube pan with Butter and dust lightly with Flour. (Can use a cooking spray instead.)
  3. Grind together Sugar, Cardamom and Nutmeg into a fine Powder and keep aside.
  4. Sift together Flour, Corn Flour, Baking Powder and Salt really well and keep aside.
  5. Whip cold Heavy Whipping Cream in a bowl until it forms stiff peaks. (When you take the beater up the peaks of the Cream should stand without falling.) Do this on maximum speed with a whip attachment, if you are using a hand or stand mixer.
  6. Lightly beat the Eggs and Vanilla Essence in another bowl and pour it slowly into the whipped Cream on a medium speed. Incorporate it well. At this stage the mixture will have a light Mayonnaise consistency.
  7. Add the Sugar mixture (on medium to low speed or you will be covered in Sugar!)  to the Cream- Egg mixture and let it combine well.
  8. Switch off the beater (if you are using) and combine the Flour mixture slowly in two additions with a rubber or wooden spatula into the Cream mixture. (The process should be gentle as we don’t want to deflate the Cream)
  9. Pour the batter into the greased pan and level the top. Tap it once or twice on the counter to get rid of big air bubbles that may be trapped in the batter.
  10. Bake it in the middle of the preheated oven for about 25-35 minutes or  till an inserted toothpick comes out clean.
  11. Let the Cake cool in the pan itself for 10 minutes before inverting into a serving plate. (Do run a pointed knife along the edges before inverting; the Cake will shrink away from the sides of the pan during cooling process.)
  12. Once cooled, dust the top of the Cake with powdered Sugar before serving it with a dollop of sweetened Whipped Cream.
Notes:
  • Nutmeg Powder will take away the ‘egg iness’ of the Cake. But if you don't have Nutmeg please ignore that part.
  • Corn Flour is a white soft Flour that is used to thicken Soups and Stews and is different from Corn Meal. It will lighten the All the Purpose Flour to a Cake Flour consistency which will in turn lighten the Cake. This is available in the baking section of your grocery store.
  • Cold Heavy Cream whips better and faster than the one at room temperature.
  • Powdering the Sugar will make it easy to combine with the Cream. Using ready made Powdered Sugar will decrease the sweetness of the Cake (or add a bit more).
  • Don't beat the batter too much after adding the Flour, for beating may develop Gluten in the Flour which in turn makes the Cake tough.
  • I used a fluted tube pan for this (pan with a tube in the middle) for an additional support in the middle of the Cake so that it can rise. In India, you will get a separate tube that can be placed in the middle of any pan.
  • As there is a tube in the middle, the Cake will be cooked from its middle too. So if you are using a regular pan without a tube support, it may take a bit more time for the Cake to be done in the middle. So adjust the time accordingly.
  • Don’t over bake the Cake.
  • Don't try to take the Cake out of the pan when hot, as  Cakes tend to stick to the pan more when hot.
  • Dusting of Powdered Sugar will be easy if you do it with a tea strainer.


Make it, enjoy the deliciousness and 
serve it to your family with love…

Wednesday, March 23, 2011

Paneer Peas Pie

Recipe No: 225
This is another recipe from my Mother in Law’s kitchen and don't be mislead by the name as the ingredient list shows its all Indian.  It is actually made with Paneer and Green Peas only, but as I was short on Green Peas I added some Potatoes too. So you can either use or avoid Potatoes as you wish.
Ingredients                                           Serves 4
For the Filling
  • Paneer……………………….....200 grams (Fried and cubed)
  • Oil………………………………..1 ½ Tablespoons
  • Onion chopped fine…….....1 Cup
  • Indian Green Chilly slit…..2
  • Ginger Garlic Paste………..2 Teaspoons
  • Turmeric Powder…………..1/4 Teaspoon
  • Red Chilly Powder…………3/4 Teaspoon
  • Coriander Powder………….1 ½ Teaspoons
  • Garam Masala Powder……3/4 Teaspoon
  • Tomato chopped…………….1/2 Large
  • Fresh Peas………………….....1 ½ Cups (or use ¾ Cup Peas and ¾ cup cubed Potatoes)
  • Coriander Leaves…………...2 Tablespoons (chopped)
  • Salt as needed
To Make the White Sauce
  • Butter/ Oil……………………...1 ½ Tablespoons
  • All Purpose Flour/ Maida…1 Tablespoon
  • Cold Milk…………………….….1 Cup
  • Grated Cheese………………...1 Tablespoon (I used Parmesan, but Amul Cheese will work fine)
  • Salt and Pepper powder to taste
To assemble the dish
  • Grated Cheese………………….1 Tablespoon
  • Bread Crumbs…………………1/2 Cup
  • Oil/ Butter………………..…….1 Tablespoon
Method of Preparation
To make the Filling
  1. Heat Oil in a pan on medium high heat and saute the Onion and Green Chilly till wilted.
  2. Add Ginger Garlic paste and saute till the raw smell is gone.
  3. Lower the heat and add Turmeric Powder, Red Chilly Powder, Coriander Powder and Garam Masala Powder; fry for a minute.
  4. Add Tomato and saute till mashed and then add the Green Peas (and Potatoes if using) and a cup of Water.
  5. Mix well, add Salt and let it cook on medium heat for 5 minutes before adding Paneer. Boil till all the Water is absorbed. 
  6. Add Coriander Leaves; mix well and switch off the heat. Keep aside till ready to be used
To make the White Sauce
  1. Heat Butter/ Oil in a pan on medium heat and add the Flour.
  2. Fry it stirring constantly till a roasted smell comes.
  3. Whisk in the cold Milk taking care to avoid lumps.
  4. Once mixed well, stir it constantly till the sauce thickens. (The Sauce will coat the back of the spoon and a line drawn through it will remain like that rather than flowing back)
  5. Switch off the heat and mix in Salt, Pepper Powder and Grated Cheese. Keep it aside till ready to be used.
To Assemble and bake the dish
  1. Preheat the oven to 350˚F/ 180˚C.
  2. Spread 2-3 Tablespoons of White Sauce in the bottom of an 8 ½ X 6 inch oven proof dish  evenly and sprinkle a bit of Cheese on top.
  3. Carefully layer the Whole Paneer Peas filling on top of this thin layer of White Sauce.
  4. Pour the rest of the White Sauce on top of the filling evenly followed by a sprinkling of the rest of the Cheese.
  5. Spread Crumbs on top of the Sauce evenly followed by a light drizzle of Oil.
  6. Bake it in the preheated oven for 40 minutes or till the dish is bubbly and the Bread Crumbs becomes  light brown.
  7. Serve warm with Bread.
Notes:
  • Instead of frying the Paneer after cutting it into cubes, cut it into slabs and shallow fry it in 2 tablespoon Oil on both sides. Cut it into cubes afterward, this not only reduces the use of Oil but makes the job much easier too.
  • If you are using dried Green Peas cook it partially before making this dish. But I prefer fresh frozen Peas in this recipe.
  • You can make the filling and the sauce in advance and assemble and bake the dish whenever needed.
  • If you try to serve the Pie piping hot, it may be a bit runny. But this will reduce as it cools.


Make it, enjoy the deliciousness and
serve it to your family with love…

Orange Marmalade

Recipe No: 224
Last week one of our friends came with a bunch of Oranges to see my 'sick husband'... As there were already some Oranges in my fruit basket, I decided to make some Marmalade, which my husband loves a lot.
Ingredients                                   Makes 2 pints
  • Orange…………………….1/2 Kg
  • Water……………………..4 Cups
  • Sugar………………………3 ½ Cups
  • Citric acid………………..3/4 Teaspoon
Method of Preparation
  1. Keep a plate in the freezer before starting the process so that it will be perfectly cold and ready to test the readiness of the Marmalade.
  2. Wash the Oranges thoroughly; cut them into two (I prefer to cut it lengthwise so that it is easy to take the tips off) and slice it as thin as possible.
  3. Boil the sliced Oranges together with Water in a non reactive pan on high heat till it boils and then reduce the heat to medium and boil it for another 20 minutes or till the Orange skin is a bit soft.
  4. Add the Sugar and Citric Acid to the cooked Oranges and boil it on high for 15 minutes.
  5. Skim off the form that appears on top of the cooking Oranges; lower the heat to medium and cook for another 10 minutes or till it is ready. Readiness of the Marmalade can be checked by pouring some liquid portion of the Marmalade on top of a chilled plate; wait for 10- 12 seconds and draw a line through the middle. If the divided halves are not flowing together again, then it is ready to be bottled.
  6. Transfer it into bottles and follow the canning process if you prefer (Please read my post on canning (here) if you are interested) and store it in a cool place.
  7. Serve it at room temperature on top of Breads, Crackers etc:
Notes:
  • As we use acid (Citric Acid) in this recipe, it is preferable to use a non reactive vessel like a Stainless Steel pan. It is good not to use Aluminum or Non Stick cook wares.
  • The Marmalade will look kind of runny when it is done, but it will harden up as it sits. Don’t over reduce it or it will become a bit hard to spread when cold.
  • The use of Citric Acid is very important as it provides an acidic medium for Pectin, a carbohydrate present in the cell wall of ripe fruits, which are capable of forming gels when dissolved in water in an acidic medium. (This is mostly made use in making Jams, Jellies and Preserves.) You can substitute this with Lime or Lemon Juice. But some sort of Acid is very important. (For more details please read my post on Strawberry Preserve here)
  • Citric Acid is readily available in most of the Indian stores. (A fine white powder)
  • This Marmalade will stay good outside in cool conditions for weeks, but if you are sure that it is not going to finish in one month, either can it or keep the extra in the refrigerator.
  • After opening a canned Marmalade use it within 2-3 weeks or keep the leftover in the refrigerator. (So I prefer to can it in small bottles.)


Make it, enjoy the deliciousness and 
serve it to your family with love…

Monday, March 21, 2011

Potato n Egg Curry

Recipe No: 223
Our Church here in Indiana is really amazing… a bunch of people with goodness in their hearts, values in their deeds, helping and supporting each other… from whom we can learn a lot… and look forward to... Yesterday after a prayer meeting, when all the chits and chats faded, my eyes wandered among the many cookbooks arranged neatly in a shelf of the host's house and suddenly hooked to one written by Mrs. K.M Mathew (I forgot the title of the book). While eagerly running my eyes through the many recipes in that book, I think I heard voices behind… ‘Don’t copy our recipes’, followed by a bunch of friendly laughter… 

Even though I forgot to borrow that book, one of those recipes lived in my mind long enough to withstand my efforts to recreate. I can’t exactly say recreate, as I was not able to remember the exact measurements, and I substituted some ingredients; but I should say , I followed the same procedure and it came out heavenly. We sat around the table on Sunday morning licking every bit of that delicious gravy. This is how I did…
Ingredients                                           Serves 3-4
  • Hard Boiled Eggs……………..4 (cut into two)
  • Oil…………………………………..1 1/2 Tablespoons
  • Onion sliced thin……………...1/2 cup
  • Ginger sliced thin…………….1 Tablespoon
  • Garlic sliced thin……………..2 Tablespoons
  • Indian Green Chilly slit...…2 Big
  • Tomato………………………..…1/2 medium
  • Potato…………………………….2 Small/ 1 big (cut into wedges)
  • Thin Coconut Milk……….….1 ½ Cups
  • Thick coconut Milk…….…...1/2 Cup
  • Salt to taste
To grind
  • Chilly Powder………………….1 Teaspoon
  • Coriander Powder…………...2 Teaspoons
  • Turmeric Powder…………….1/4 Teaspoon
  • Pepper Powder…………….….1/4 Teaspoon
  • Garam Masala Powder…….3/4 Teaspoon
  • Aniseed/ Fennel Powder.....1/2 Teaspoon (Peringeerakapodi)
  • Vinegar…………………………..1 Teaspoon
For Tempering
  • Coconut Oil…………………....1 Tablespoon
  • Mustard seeds……………..…1/2 Teaspoon
  • Shallots sliced………………..2 big
  • Curry Leaves…………..…….1 Sprig
Method of Preparation
  1. Grind all the ingredients in the ‘to grind’ section into a smooth paste using just enough Water and keep aside till ready to be used.
  2. Heat Oil in a pan on medium high heat and saute Onion, Ginger, Garlic, Green Chilly and Salt till wilted.
  3. Add the ground paste; lower the heat and saute till the raw smell is gone and Oil starts to ooze out. (As we are not using too much Oil, it may not ooze out in large quantities, but small droplets will be seen in the sides of the pan.) Do stir continuously at this stage.
  4. Add Tomato followed by thin Coconut milk and Potatoes; let it boil.
  5. Lower the heat; cover the pan and let the Potatoes cook.
  6. Add thick Coconut Milk and the Eggs; mix well; let it simmer along the edges. Add more Salt if needed.
  7. Switch off the heat and keep it covered till the tempering is done.
For Tempering
  1. Heat Coconut Oil in a small pan over medium heat and splutter the Mustard Seeds.
  2. Add Shallots and Curry Leaves and fry till golden brown.
  3. Pour this over the prepared Egg Curry and serve hot with Appam, Puttu, Idiyappam or any Flat Breads after mixing well.
Notes:
  • Grinding the Spice Powders will make the gravy really thick. So please don’t skip the process.
  • If you don’t have Fennel Powder at home, please use ½ teaspoon whole Fennel seeds while grinding. This extra amount of Fennel is very important in this recipe.
  • Don’t cook Potatoes till it disintegrates. Continue the next step once it is just cooked or the curry will taste like Potato Curry.
  • Please use good Coconut Milk (fresh, canned or reconstituted Coconut Powder) in this recipe. If squeezing fresh do combine 2nd and 3rd Milk together to make thin Coconut Milk; if using canned combine ½ Cup thick  Coconut Milk with 1 cup Water to make it thin. The Coconut Milk using at the end should be really thick.
  • Don't skip the tempering part; it gives a signature taste. Please don't do it in the beginning of the process too. (Should do only at the end.)


Make it, enjoy the deliciousness and 
serve it to your family with love…

Friday, March 18, 2011

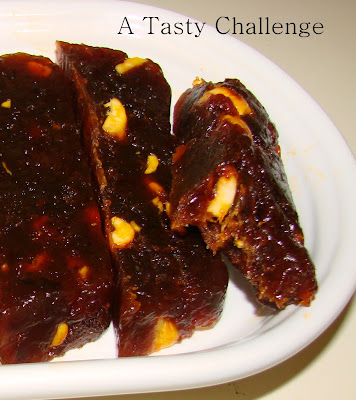
Kadala Parippu Pradhaman (Channa Dal Kheer with Jaggery)

Recipe No: 222
Ingredients                                           Serves 6
  • Channa Dal………………..3/4 Cup (Dry Split Chick Pea/ Kadala Parippu)
  • Ghee………………………….2 Tablespoons
  • Coconut Pieces…………..1 Tablespoon (sliced into very small pieces)
  • Cashew Nuts……………...12 (split into two)
  • Raisins/ Kismis...……….1 Tablespoon
  • Jaggery…………………….1 heaped cup (cut into small pieces)
  • Tapioca Pearls………….2 Tablespoons (Chavvari/ Sabudhana)
  • Thin Coconut Milk….....1 Cup (I used diluted low fat Milk)
  • Thick Coconut Milk……3/4 – 1 Cup (I used low fat Milk)
  • Cardamom Powder…….1/2 Teaspoon
  • Dry Ginger Powder…….1/4 Teaspoon (Chukku Podi)
Method of Preparation
  1. Wash and drain the Channa Dal; keep aside till ready to be used.
  2. Heat Ghee in a pan (pan of the pressure Cooker) on medium heat and fry the Coconut pieces. When it starts to brown, add the Cashew pieces and let it brown along the edges before adding the Raisins.
  3. When the Raisins plump up, remove everything from the Ghee and keep it aside till ready to be used. Leave the extra Ghee in the pan itself.
  4. To the remaining Ghee, add the Channa Dal and fry for 3-4 minutes.
  5. Switch off the heat; pour 2 1/4 cups Water and let the Dal soak for 30 minutes.
  6. Transfer it into a pressure cooker and cook till done. (I kept the cooker on high till 1 whistle and then lowered the heat to medium low and cooked for 15 minutes. After 15 minutes, raised the heat back to high for 2 whistles and switched off the heat)
  7. In another small pan boil Tapioca Pearls/ Chavvari. Once boiled, off the heat and keep it covered till ready to be used.
  8. In a big pan melt Jaggery with ½ cup Water. Once melted, strain it and pour it back to the pan on high heat.
  9. To the Jaggery on high heat add cooked Channa Dal and let it cook together for 6-8 minutes. At first stir only now and then, but as the Water content reduces, stir often. Continue this until the Water is almost absorbed and the Dal is nicely cooked with Jaggery.
  10. Add thin Coconut Milk (diluted regular Milk), fried Coconut Cashew mixture and the Tapioca Pearls (along with the cooking liquid); reduce the heat to medium and let it boil for 5 minutes stirring constantly.
  11. Add thick Coconut Milk (or regular Milk), Dry Ginger Powder and Cardamom Powder; mix well and let it start to boil along the edges.
  12. Switch off the heat and keep the pan covered for 30 minutes before serving.
Notes:
  • The Channa Dal should be cooked until a semi mashed stage. Once it is added to the Jaggery it will not mash up. So I prefer it to cook well. If it is not mashed when you open the cooker please mash it a bit with a spatula. But take care not to puree it!!! There should be some whole pieces, some half mashed pieces and some mashed pieces.
  • If you are making fresh Dry Ginger Powder, you may not need the amount given in the recipe. So adjust it accordingly.
  • As per this recipe the sweetness will be moderate (In my opinion that is optimum). So add more Jaggery if you need more sweetness.
  • If you use light brown Jaggery, then you may not get the traditional dark color for your Pradhaman.
  • I feel that the light brown Jaggery has let sweetness when compared to the darker variety. So adjust the amount accordingly. If in case your Pradhaman  is short on sweetness (according to your preference), do add some brown Sugar or regular Sugar at the end to compensate.
  • The 30 minutes resting time is very essential in this recipe. At the end of this time the Sabudhana/ Tapioca Pearls will swell and float to the top. It is also the time for 'Pathrapakam' which the elders refers to as the time the dish should sit in the pan it cooks to attain the maximum taste.


Make it, enjoy the deliciousness and 
serve it to your family with love…

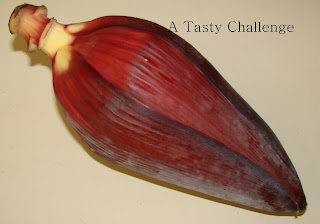
Koombu/ Vazhachundu/ Banana Blossom Cutlet

Recipe No: 221
This is a very simple basic recipe for a Cutlet using Banana Blossom. I have special interest in this as I can make my kids eat it without much fuss.
Ingredients                                          Makes 12 - 15
  • Banana Blossom cubed………….2 ½ Cups (big pieces; 1 medium sized Banana Blossom)
  • Oil............................................2 Tablespoons
  • Onion chopped………………….….1 ¼ Cups
  • Ginger ..............………………….…2 medium sized pieces
  • Garlic………………………………..…8 big cloves
  • Indian Green Chilly……….……..4 big
  • Garam Masala Powder….……..1/2 Teaspoon
  • Pepper Powder………………….….1/2 Teaspoon
  • Coriander Leaves chopped…….2 Tablespoons
  • Potato cooked...……………………1 big (1 ¼ cups mashed)
  • Egg………………………….………….1 big (Beat with 1 tablespoon Water)
  • Bread Crumbs………………………1/2 Cup
  • Salt as needed
  • Oil for deep frying
Method of Preparation
  1. Chop the Banana Blossom thoroughly in a food processor and keep it aside till ready to be used.
  2. Chop finely Onion, Ginger, Garlic and Green Chilly together in the food processor.
  3. Heat a tablespoon of Oil in a pan on medium high heat and saute the Onion mixture together with Salt, till it starts to brown.
  4. Add the chopped Banana Blossom; stir thoroughly; close the pan; reduce the heat and let it cook for 5-8 minutes.
  5. Once cooked, add Garam Masala Powder, Pepper Powder and Coriander Leaves; mix thoroughly and switch off the heat.
  6. Mix in the cooked and mashed Potato to the Blossom mixture. Check the Salt level and add if needed.
  7. Divide the mixture into 12-15 portions and make patties/ Cutlets.
  8. Dip each Cutlet in the beaten Egg and roll in the Bread crumbs. Keep it aside till ready to be fried.
  9. Heat at least an inch of Oil in a pan on medium high heat and deep fry the Cutlets till golden brown on both sides. Serve hot.
Notes:
  • If you are buying Banana Blossom, please do remove some of the loose outer bracts/ leaves.
  • If you don’t have a chopper/ food processor, chop the Banana Blossom finely by hand.
  • Please remove the stem like part at the middle of the Banana Blossom while chopping.
  • After chopping the Banana Blossom, you may find some string like things which are basically the sticky sap oozing out. Use a rod coated with Oil to stir the chopped Blossom with a circular motion so that the strings of sap will wind around the rod. Get rid of this before using the chopped Banana Blossom. If you are using a chopper this will be considerably reduced.
  • The sticky sap oozing out of the blossom may stain your hands. So please do rub your hands with Oil to avoid the stain before working with it.
  • The Cutlets should be immersed in Oil while frying. If you use less Oil the temperature of the Oil will drop once you put the Cutlets which results in over absorption of Oil by the Cutlets.
  • If in any case Oil is only coming up to the sides of the Cutlets, then temperature will increase in the portion of the Cutlet lying in the Oil. This will cause cracks in between these two portions, lying above and below the  Oil. So a way to avoid this is to turn the Cutlet over after 30 seconds of putting it in hot Oil, so that the temperature will be even on both sides.


Make it, enjoy the deliciousness and
serve it to your family with love…

Thursday, March 17, 2011

Beetroot Squash

Recipe No: 220
I first had this squash from a neighbor of ours on a hot summer day and no wonder why I fell in love with it the second I tasted it and started making it ever since. The use of Tonovin essence gives it a slight grape like taste which kids just adore.
Ingredients
  • Beetroot…………………..1/2 Kg (Peeled and cubed)
  • Sugar………………………1 ½ Kg
  • Citric Acid………………..1 1/3 Tablespoons
  • Tonovin Essence……….1/2 - 3/4 Tablespoon
Method of Preparation
To make the Beetroot Squash Concentrate
  1. Cook the cubed Beetroot pieces together with 2 ½ cups Water for 20-25 minutes on medium high heat until the Beet pieces are a bit soft.
  2. Blend the cooked Beetroot together with the remaining liquid really well.
  3. Strain the blended Beet juice through a cheese cloth taking care to avoid the pulp. Use ½ - ¾ cup Water if it needs more Water to get squeezed. Keep it aside till ready to be used.
  4. Heat Sugar with 1 cup Water until melted. Please strain it if there are any unwanted residues.
  5. Once the Sugar is dissolved and the syrup boils, add Citric acid and switch off the heat.
  6. Add the Beet juice and Tonovin Essence. Mix well and let it cool down completely before bottling. 
  7. Store the squash concentrate in the refrigerator for a longer shelf life.
To serve the squash
  • Beetroot Squash Concentrate…3-4 Tablespoons
  • Water………………………………….1 Cup
  • Ice cubes……………………………..3-4
Method of Preparation
  • Mix Squash concentrate, Ice cubes and Water well and serve chilled.
Notes:
  • Don’t try to strain it through a strainer as it will not get rid of the pulp. So use a Cheese cloth or a regular cloth with wide meshes that will allow most of the liquid  to pass but prevent the pulp. Do squeeze it lightly to get most of the liquid.
  • Citric acid gives the squash a sour taste and is very essential. It is available in most of the Indian stores.
  • Tonovin Essence has a signature Grape like taste and is available in most of the Indian stores. If you don’t like it, feel free to avoid it, but if you want to give this  squash a slight Grape like taste, do use it and the amount is entirely up to you. (I used ¾ Tablespoons)


Make it, enjoy the deliciousness and 
serve it to your family with love…

Tuesday, March 15, 2011

Caramel filled Chocolate Truffle

Recipe No: 219
Whenever I eat a gourmet Chocolate, I have this strong urge to replicate it; but I should admit that I don't know much about Chocolate art. I was all set to study it in LA but unfortunately we moved to Indiana and that dream of mine stays as such even now. Then what triggered me to attempt this? Well, it was a blogger friend of mine, Sojo of ‘My Culinary Experiments’ who encouraged me to give it a try. While chatting with her, I came to know that she is a big Caramel fan and so are me and my daughter.  Here is the result of my first attempt with Chocolate truffle… with a Carmel filling (I know the pictures are a bit messy, please forgive…) and hopefully I will be able to come up with better ones later…
Ingredients                                       Makes 12- 15
For the Chocolate
  • Semisweet Chocolate chips…3/4 Cup
  • Butter……………………………….4 Tablespoons
  • Instant Coffee Powder……….1/3 Teaspoon
  • Vanilla Essence…………………1/2 Teaspoon
For the Caramel Filling
  • Sugar………………………………..1/2 Cup
  • Water……………………………....2 Tablespoons
  • Heavy Cream…………………….1/4 Cup
  • A pinch of Salt
Method of Preparation
To make the Caramel Filling
  1. Heat Sugar, Salt and Water on medium low heat until it attains a golden brown color. Don’t stir (it will make the Caramel gritty), but do swirl the pan.
  2. Once the Sugar reaches a golden brown color, off the heat and pour the heavy Cream. (It will bubble vigorously so be careful when you do this.)
  3. Mix it  so that the Sugar dissolves well. Let it cool down completely.
  4. Take a Ziploc bag and pour the Caramel into it; snip the edge of the bag when ready to be used so that you can squeeze the Carmel through the hole.
To make the Chocolate
  1.  In a double boiler (Put Chocolate in a small bowl placed over a large pot of simmering Water so that the bottom of the Bowl with Chocolate is not touching the simmering Water), melt Chocolate chips, Coffee Powder and Butter.
  2. Take the Chocolate from the double boiler and stir it thoroughly with Vanilla Essence until smooth and shiny.
    To make the Truffle
    1. Chill a Truffle/ Candy mold in the refrigerator for 45 minutes or in the Freezer for 20 minutes.
    2. Pour the Chocolate into the chilled mold and tap it a few times on the counter to get rid of air bubbles. (Reserve the excess Chocolate for later use.)
    3. Scrape off the excess Chocolate from the top of the mold (I was not able to do it as the sides of the mold was a bit raised) and keep it back in the refrigerator for 5- 8 minutes or till the bottom and sides of the Chocolate are set but the middle is still loose.
    4. Take the mold out of the fridge and tilt it so that the loose Chocolate from the middle flows out leaving a small well in the middle of each Truffle.
    5. Squeeze some Caramel from the bag into the well in the middle of the Truffle and let it set in the fridge for 10 minutes.
    6. Melt the left over Chocolate mixture once more and pour over the Caramel filled Truffle so that the Caramel is covered with the Chocolate.
    7. Scrape off the excess Chocolate from the top and tap it to get rid of the air bubbles (if any).
    8. Let it chill in the refrigerator for at least 1 hour before taking it out of the mold.
    9. Serve it chilled or at room temperature.
    Notes:
    • The Caramel filling should be completely cooled before filling the Chocolate shell , otherwise it will melt the shell.
    • Increase the amount of Heavy Cream to half cup while making the Carmel and you will  get a delicious Caramel syrup to top Ice creams.
    • You can melt the Chocolate in the microwave, but do stop and stir every 20 seconds.
    • Don't use high heat to melt the Chocolate. It will result in scorching of the Chocolate which is irreversible.
    • The Chocolate that you pour over the Caramel filling should be slightly warm so that it can combine and become one with the already made Chocolate shell. But it shouldn’t be very hot or it will start to melt the Caramel and the Chocolate shell.
    • Don't Butter the Mold before filling the Chocolate as it will prevent Chocolate from sticking onto the mold.
    • If you find it hard to get the Chocolate out of the mold, do help it out with a pointed knife or needle.


    Make it, enjoy the deliciousness and
    serve it to your family with love…

    Monday, March 14, 2011

    Papaya Halwa

    Recipe No: 218
    Throughout the years, we used to have at least one Papaya plant at a time, in our backyard and my Mother used to make a  variety of dishes with Papaya. Of all those dishes two of them were desserts, one is Papaya Fruit Salad and the other  is Papaya Halwa. Even though she didn’t have an exact recipe for this (like everything else) , I followed the exact same procedure. I didn’t use any colors in this dish but, with the color of the Papaya it can range from light orange to dark orange.
    Ingredients                                      
    • Papaya cut into cubes……………1 ¼ kg (Peel and remove the seeds)
    • Sugar………………………………....250 grams
    • Broken Cashew pieces…………..1/4 Cup
    • Ghee…………………………………...1/4 -1/3 cup
    • Cardamom Powder………………1/2 Teaspoon
    Method of Preparation 
    1. Blend Papaya really well using just enough Water to make the blender work. (½ - ¾ cup Water will do)
    2. Heat a pan and boil the blended Papaya till it starts to form big bubbles.
    3. Add Sugar and stir to combine; let it boil on high until it starts to come from the sides.
    4. Add the Ghee, a tablespoon at a time, mixing well after each addition.
    5. Mix in the Cashew pieces and stir till the Ghee starts to ooze out slightly.
    6. Mix in the Cardamom Powder and remove it from the pan into a buttered dish; press the top and even it out with the back of a spoon; let it cool down.
    7. Cut into pieces and serve at room temperature; store the leftovers in an airtight container.
    Notes: 
    • The amount of Sugar in this recipe will not make the Halwa too sweet like the regular ones. So if you want it sweeter add more Sugar.
    • There are chances for the mixture to splatter while cooking. So please use a splatter guard or cover it partially with the lid of the pan and guard yourself while stirring.
    • Once it starts to form large bubbles, do stir the Halwa constantly to avoid burning in the bottom.
    • Wipe off the extra Ghee from the Halwa using a Paper towel.
    • As it is a Sugar based Halwa, it will reach its correct consistency fast. Stop cooking as soon as you see Ghee oozing out. If it goes too far, it will become hard when cooled. But still you have to stir till the Ghee oozes out, or it will not be able to cut the Halwa into pieces.


    Make it, enjoy the deliciousness and
    serve it to your family with love…

    Pita Bread

    Recipe No: 217
    This is a very easy to make flat Bread. The dough is a bit on the sticky side, but it makes incredibly soft Pita.
    Ingredients                                    Makes 8
    • All Purpose Flour/Maida....2 Cups + 4 Tablespoons
    • Yeast………………………………1 ½ Teaspoons
    • Warm Water………………….1/2 Cup + 1/3 Cup
    • Sugar…………………………….1 Teaspoon
    • Salt……………………………....2/3 Teaspoon
    • Olive Oil……………………...…2 Tablespoons
    Method of Preparation
    1. Dissolve Yeast and Sugar in ½ Cup Warm Water and keep it aside covered, till frothy.
    2. Mix 2 cups of Flour and Salt really well; add the frothy Yeast mixture together with the rest of the Water and stir to make a sticky dough.
    3. Sprinkle 4 Tablespoons of Flour onto a flat surface (counter top or a big cutting board), dump the dough onto it and knead with a floured hand gently for 8 minutes. (If using a stand mixture knead for 4 minutes on speed 2.)
    4. Spread the Olive Oil in a big bowl and keep the dough in it  (turn the dough once to Oil the top) covered with a damp cloth in a warm place until it doubles in volume for about 3 hours.
    5. Once doubled, dump it back onto the Floured board and knead for 3 minutes more. (Knead for 1 ½ minutes on speed 2 if using a stand mixture)
    6. Divide the dough into 8 equal portions and keep it covered on a lightly floured plate for 10 minutes.
    7. Preheat the Oven to 450˚F/232˚C with an Oven proof baking tray in it.
    8. Use enough Flour and roll out each portion of dough into 6 inch circles.
    9. Place it onto the hot baking tray and bake it on the lowest rack (or the one just above it) for 2 minutes on one side and 1 minute on the other or until the Pita is all puffed up and starts to brown here and there.
    10. Remove from the oven and serve hot; keep the left overs in an airtight plastic bag.
    Notes:
    • The dough of this Pita Bread is incredibly sticky. But the key to make a soft Pita is kneading the dough without using a large amount of Flour. So use extra Flour only if needed.
    • Please Flour the board and the rolling pin to avoid the dough from sticking.
    • Preheating the baking tray along with the oven is important as it will start cooking Pita the instant it is placed on the tray. (If you have Pizza stone that will work fine.)
    • Do remove the Pita as soon as it is cooked. But leave it in the oven for a few more seconds if you like it a bit toasted.
    • Usually Pita puffs up in the oven to make its signature pocket. It will go down once out of the oven or by slight pricking. (Puffing up is the sign of a well made Pita!!)


    Make it enjoy the deliciousness and
    serve it to your family with love.


    Friday, March 11, 2011

    Lamb Kebabs

    Recipe No: 216
    I started making Kebabs with Chicken but switched it to Lamb later. I still don’t know which one I like the most, as both of them will stand hand in hand with one another in taste. This is how I did...
    Ingredients                              Makes 10
    • Boneless Lamb………………...300 grams (with fat preferred; cut, wash and dry as well as you can; or use an equivalent quantity of ground Lamb)
    • Ginger chopped………………..1 Tablespoon
    • Garlic chopped………………...1 ½ Tablespoons
    • Onion chopped…………………2 Tablespoons
    • Coriander Leaves chopped…2 Tablespoons
    • Butter…………………………..…1 Tablespoon (optional, I added Butter as the Lamb I used was lean)
    • Egg………………………………...1 small
    • Salt………………………………...3/4 Teaspoon
    • Wooden/ metal skewer……..10 no
    • 1 Tablespoon melted Butter to baste
    To toast lightly
    • Red Chilly Powder…………….1/2 Teaspoon
    • Coriander Powder…………….3/4 Teaspoon
    • Garam Masala Powder……..1/2 Teaspoon
    • Fennel Powder………………….1/2 Teaspoon (Peringeerakam)
    Method of Preparation
    1. Soak the Skewer in cold Water for around 30 minutes.
    2. Lightly toast Red Chilly Powder, Coriander Powder, Garam Masala Powder and Fennel Powder in a dry pan till fragrant. Keep it aside till ready to be used.
    3. Grind Lamb as smooth as possible.
    4. Mix in Ginger, Garlic, Onion, Coriander Leaves, Butter, Salt, Egg and the lightly toasted Powders to the ground Lamb; grind one more time to blend everything well.
    5. Divide this into 10 equal portions.
    6. With the help of lightly oiled hands press the Meat on to the skewers so that it forms an even Kebab.
    7. Place it on a tray that can be used for broiling.
    8. Preheat the broiler for 5 minutes on high.
    9. Place the Kebabs 4-5 inches down from the heating filament (1st or the 2nd rack from the top depending on your oven) for 5-6 minutes on one side.
    10. Baste it with melted Butter and turn it over. Broil the second side of the Kebabs for 3-4 minutes or till it is cooked through and starts to brown here and there.
    11. Serve hot with Pita Bread, Salad or Rice (The yellow Rice I served is Basmati Rice cooked with a pinch of Turmeric Powder).
    Notes:
    • Grind Lamb and the other ingredients as well as possible, otherwise the Kebabs will become tough. Also include some Lamb fat while grinding.
    • Make sure to avoid all the tendons and other tough tissues from the Meat before grinding.
    • Moisture is an enemy in this dish; so try to wipe the Meat as dry as possible.
    • Use a small Egg in the recipe. If the Egg is big use only half.
    • You have to soak the wooden skewers in order to prevent it from burning under the broiler. If you are using Metal skewers, please avoid this step.
    • There are chances that juices may ooze out of the Meat while cooking and it is not desirable to cook the Kebabs in the juices (will result in steaming). So use a pan with hole in it and allow the juices to drip into a bottom pan. Line the bottom pan with Aluminum foil to make cleaning easy. 
    • The cooking time varies with oven; so adjust it according to yours.
    • Chat Masala goes excellent with Kebabs; sprinkle on top of the Kebabs if you like.
    • In the broil mode only the top filament/ burner of the oven works; that is the reason why, one should place the pan near the top for maximum heat.
    • Kebab sticks are found in most of the stores that sells small kitchen gadgets.


    Make it, enjoy the deliciousness and 
    serve it to your family with love…