Creating a blog was out of the question for a long time for me, as measuring everything in the kitchen was like biting into an eggshell. I enjoy cooking and don’t want to waste even a slightest bit of enjoyment in that small world of mine. But little did I know that everything will change, when my husband came home with the Oscar nominated film ‘Julie and Julia’( a real life story) where Julie Powell (part played by Amy Adams) challenged herself to make all the 524 recipes from Julia Child's cook book ‘Mastering the Art of French Cooking’ and blogging all her experiences (The Julie/Julia Project). It was an inspiring movie. A few days later when we were discussing this casually with a friend of ours over tea…everything changed dramatically…..” How about you making at least half of it in one year? Not French but your own. 262 recipes that will inspire others and present it as a blog?” For a minute my mind traveled faster than light… With an experience as a helper in my mother in laws kitchen for 6 years followed by a three year everyday struggle to satisfy the palate of my foodie husband, if I cannot do it then why should I cook? But on the other side with an experience in English literature extending no more than expanding outline stories in English grammar class when I was 18 and two small kids that come in handy at times, will a commitment for the next one year work? Anyway my ‘cook's ego’ didn’t allow me to say no...

So my friends …here I am opening my recipe book, trying to perfect and present 262 recipes in the coming 365 days….A Challenge that will of course tastes good. Come.. Have a walk with me along my journey.. Cheering and inspiring….Forgiving and tolerating…Testing and tasting….for ‘A Tasty Challenge’

Search This Blog

Showing posts with label Breads. Show all posts

Friday, April 15, 2011

Cheese Rings

Recipe No: 237
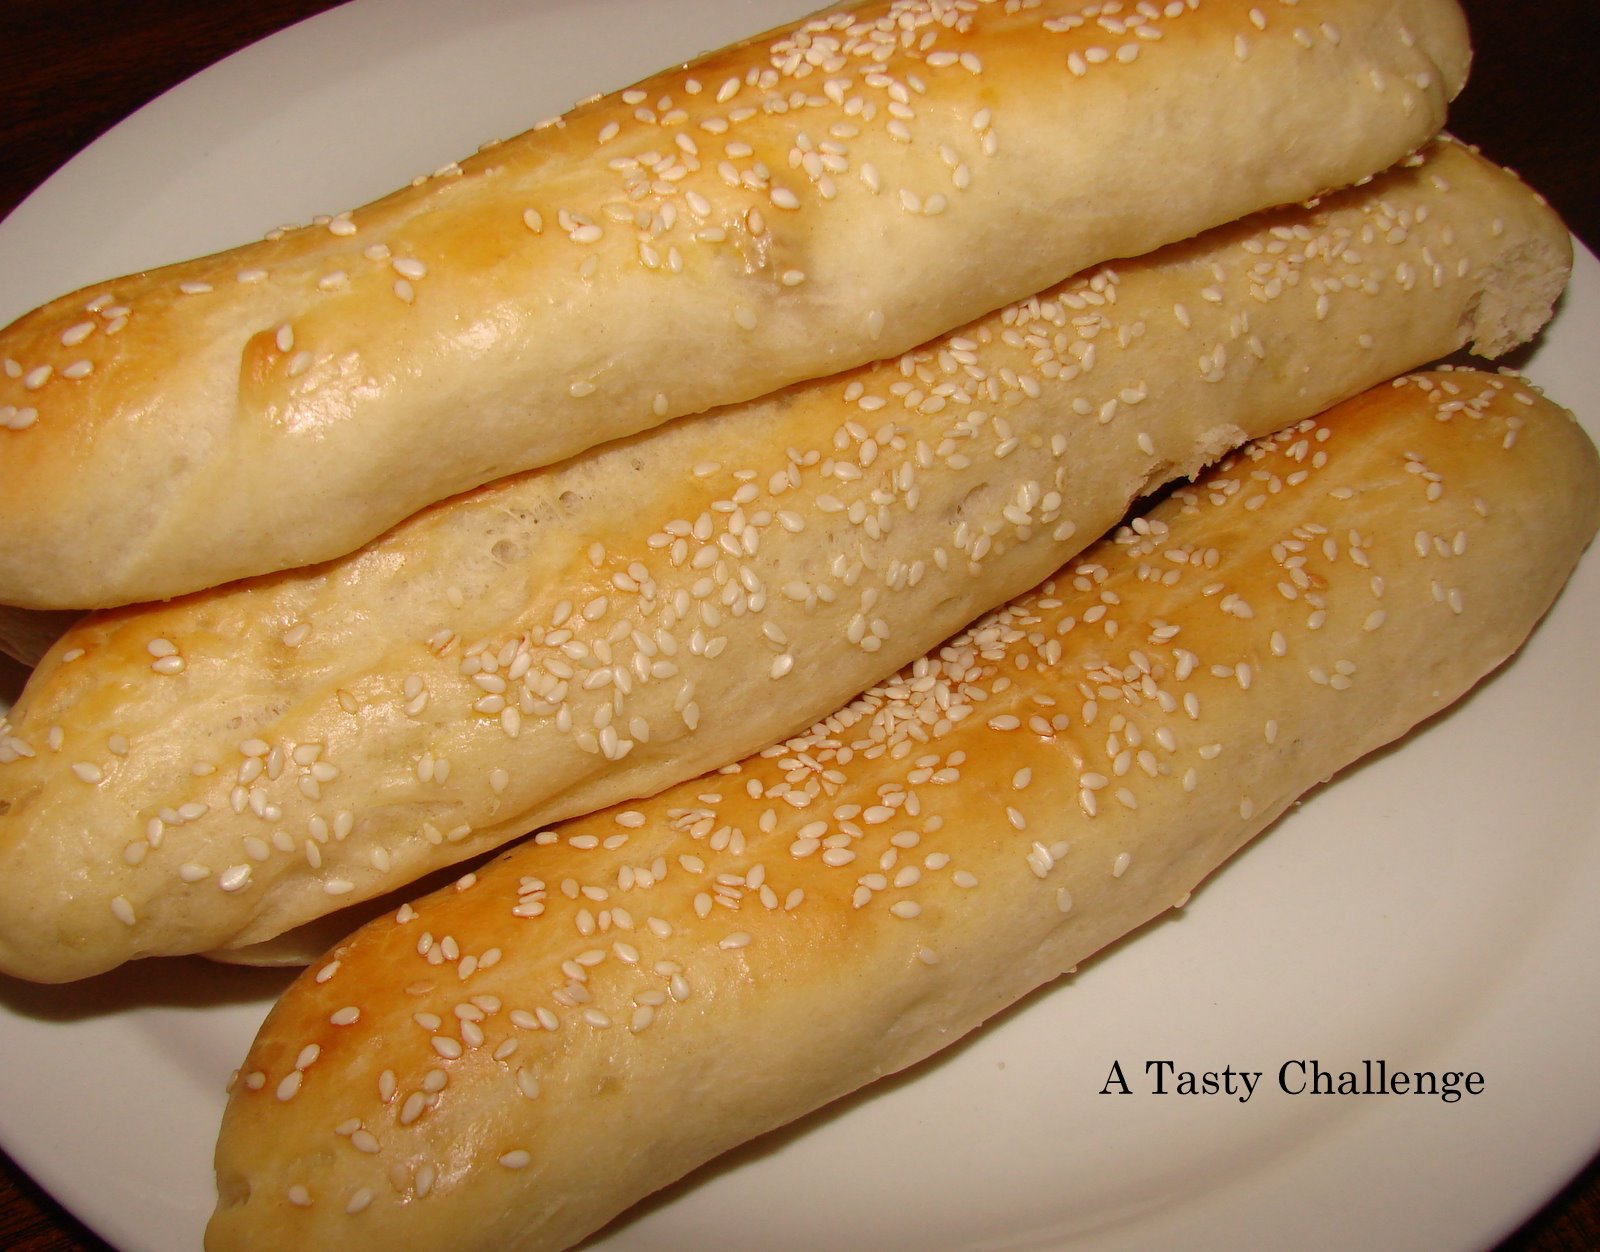
This is a bread dough based recipe flavored with Cheese and it is great as a snack with some soft Cheese or as a Bread component for dinner.
Ingredients                                    Makes 16
  • All Purpose Flour/ Maida….2 Cups + more for rolling
  • Salt…………………………………1/3 Teaspoon
  • Sugar……………………………..2 Tablespoons
  • Egg…………………………………1; Beaten
  • Butter……………………….……2 Tablespoons; melted
  • Warm Milk………………….….1/3 Cup + 2 Tablespoons for brushing
  • Instant Yeast…………..………1 Teaspoon
  • Warm Water……………….....1/4 Cup
  • Grated Cheese………............3 Tablespoons + 1 Tablespoon for sprinkling on top
Method of Preparation
  1. Dissolve Yeast in lukewarm Water and keep aside, covered, for 5 minutes or till frothy.
  2. Mix Flour, Salt and Sugar well and knead it after adding frothy Yeast mixture, 1/3 cup Milk, Egg and Melted Butter into a very soft dough.
  3. If you are using a stand mixer, knead for 3-5 minutes into a smooth but very sticky dough. If it is too sticky, do add a maximum of 2 Tablespoons more of Flour. If you are kneading by hand, dump the dough onto a floured surface and knead  for 5-7 minutes using just enough Flour to make a smooth, soft yet manageable dough.
  4. Keep the kneaded dough in a big container; cover with a damp cloth and keep in a warm place for about 1 ½ - 2 hours or until doubled in volume.
  5. Once doubled, knead in 3 Tablespoons of grated Cheese either by hand or using a mixer.
  6. Dump it into a floured surface and divide  into 16 equal portions.
  7. Roll each portion into a 10 inch rope and press the two ends together to make a ring. Do roll the dough gently where the two ends meet to make the thickness even.
  8. Place the rings on a baking tray and keep them in a warm place for about 20 minutes.
  9. Meanwhile, preheat the oven to 400˚F/ 200˚C.
  10. Brush the rings with Milk and sprinkle a tablespoon of Cheese evenly on top of the rings.
  11. Bake it in the middle of the oven for 8-12 minutes or till the rings are lightly browned on top or the internal temperature (in the middle of the rings) is 165˚F/ 74˚C.
  12. Serve hot or warm either with Cheese or as a side.
Notes:
  • The doubling time for the dough will depend on the power of the Yeast and the temperature of the surroundings. So please wait until the dough doubles in your cooking conditions.
  • I used active dried Yeast in this recipe. You can use the regular Yeast which will take more time to become active, which is shown by the frothy nature of the Water.
  • The temperature of the Water to which we put the Yeast should be lukewarm. That temperature will activate the Yeast, but on the other side, high temperature may kill them. So after dissolving the Yeast in Water give it a few minutes to become active, that is shown by the bubbling of the dissolved Water. If it doesn't show a bubbling action, either you have killed the Yeast or the Yeast is of poor quality (happens when it is very old). In both cases, start over again with fresh Yeast.
  • It is essential to use warm Milk in order to get the texture right.
  • Using too much Flour for kneading, will make the rings hard.
  • Do allow the rings to rise after shaping. This second rising period (also called proofing time) is important for the texture of the rings.
  • Please don’t over bake the rings as it will dry them up.


Make it, enjoy the deliciousness and 
serve it to your family with love…


Monday, March 14, 2011

Pita Bread

Recipe No: 217
This is a very easy to make flat Bread. The dough is a bit on the sticky side, but it makes incredibly soft Pita.
Ingredients                                    Makes 8
  • All Purpose Flour/Maida....2 Cups + 4 Tablespoons
  • Yeast………………………………1 ½ Teaspoons
  • Warm Water………………….1/2 Cup + 1/3 Cup
  • Sugar…………………………….1 Teaspoon
  • Salt……………………………....2/3 Teaspoon
  • Olive Oil……………………...…2 Tablespoons
Method of Preparation
  1. Dissolve Yeast and Sugar in ½ Cup Warm Water and keep it aside covered, till frothy.
  2. Mix 2 cups of Flour and Salt really well; add the frothy Yeast mixture together with the rest of the Water and stir to make a sticky dough.
  3. Sprinkle 4 Tablespoons of Flour onto a flat surface (counter top or a big cutting board), dump the dough onto it and knead with a floured hand gently for 8 minutes. (If using a stand mixture knead for 4 minutes on speed 2.)
  4. Spread the Olive Oil in a big bowl and keep the dough in it  (turn the dough once to Oil the top) covered with a damp cloth in a warm place until it doubles in volume for about 3 hours.
  5. Once doubled, dump it back onto the Floured board and knead for 3 minutes more. (Knead for 1 ½ minutes on speed 2 if using a stand mixture)
  6. Divide the dough into 8 equal portions and keep it covered on a lightly floured plate for 10 minutes.
  7. Preheat the Oven to 450˚F/232˚C with an Oven proof baking tray in it.
  8. Use enough Flour and roll out each portion of dough into 6 inch circles.
  9. Place it onto the hot baking tray and bake it on the lowest rack (or the one just above it) for 2 minutes on one side and 1 minute on the other or until the Pita is all puffed up and starts to brown here and there.
  10. Remove from the oven and serve hot; keep the left overs in an airtight plastic bag.
Notes:
  • The dough of this Pita Bread is incredibly sticky. But the key to make a soft Pita is kneading the dough without using a large amount of Flour. So use extra Flour only if needed.
  • Please Flour the board and the rolling pin to avoid the dough from sticking.
  • Preheating the baking tray along with the oven is important as it will start cooking Pita the instant it is placed on the tray. (If you have Pizza stone that will work fine.)
  • Do remove the Pita as soon as it is cooked. But leave it in the oven for a few more seconds if you like it a bit toasted.
  • Usually Pita puffs up in the oven to make its signature pocket. It will go down once out of the oven or by slight pricking. (Puffing up is the sign of a well made Pita!!)


Make it enjoy the deliciousness and
serve it to your family with love.


Sunday, January 16, 2011

Fish in Fish (Fish shaped Bread with a Fish Filling)

Recipe No: 172
Friday is always a fun day at my house as there is no school for kids and office for my husband for the next two days. So mostly we may go out, shop, eat out may be a movie  a late night (for kids)…. the extravaganza goes on and on… As it was really cold this weekend we decided to stay at home and as a fun thing to do with the kids, I decided to make this. Ha... forgot to mention, this name 'Fish in Fish' was suggested by my daughter...
Ingredients                                   Serves 4
For the filling
  • Oil……………………………………….2 Tablespoons
  • Onion chopped……………………..1 Cup
  • Ginger Garlic paste………………..1 Teaspoon
  • Indian Green Chilly chopped….1 no
  • Curry Leaves…………………….….1 Sprig
  • Red Chilly Powder………………..1/2 Teaspoon
  • Coriander Powder…………………1 Teaspoon
  • Turmeric Powder………………….1/4 Teaspoon
  • Garam Masala Powder………….1/2 Teaspoon
  • Pepper Powder………………..……1/2 Teaspoon
  • Tomato chopped……………….….1 small
  • Tuna……………………………………1, 7oz can drained (1 cup cooked and shredded fish)
  • Soy Sauce…………………………….3/4 teaspoon
  • Coriander Leaves chopped……..2 Tablespoons
  • Salt as needed
Method of Preparation
To make the Filling
  1. Prepare a batch of Bread Stick dough and let it rise as mentioned in the recipe.
  2. Heat Oil in a pan on medium high heat and saute the Onion, Green Chilly and Curry Leaves till the Onion is translucent.
  3. Add the Ginger Garlic paste and saute till the raw smell is gone.
  4. Lower the heat and add Red Chilly Powder, Coriander Powder, Turmeric Powder, Garam Masala Powder and Pepper Powder and fry till the raw smell is gone for a minute.
  5. Add Tomatoes and cook till it is mashed up.
  6. Add cooked Fish or Tuna and mix really well.
  7. Mix in Coriander Leaves and Soy Sauce.
  8. Add more Salt if needed and switch off the heat before it dries up.
  9. Let it cool completely before stuffing.
To stuff and bake the dish
  1. Punch down the raised dough and divide it into two equal portions.
  2. Roll out each portion of the dough into 10 x 7 inch rectangle.
  3. From each of the rolled dough, cut off pieces roughly in the shape of a fish.
  4. Place one piece of dough on a baking sheet, and on top of that, place the Fish filling  leaving 1 centimeter from the periphery  (will help in sticking both of  the dough pieces) and with more filling towards the middle (will give the height).
  5. Place the other  piece of dough on top and seal the edges tightly by pressing with a fork. Make Fins with the extra dough and attach with the help of some Water.
  6. Cover this with a damp towel and let it rise in a warm place for 30 minutes.
  7.  Preheat the oven to 375˚F/191˚C, with a pan filled with 2 cups of Water in the lower level of the oven.
  8. Once the prepared bread is raised, place a clove for the eyes, cut a slit in the front for mouth and  score the top of the fish to give the features of a fish like the Operculum (the covering of the Gills) and the scales with the help of a pointed object (like a tooth pick or the end of a knife).
  9. Beat an Egg with a tablespoon of Water (Egg Wash) and brush the top of the fish thoroughly.
  10. Bake this in the middle of the oven for 18 to 20 minutes till the top is nicely browned and the middle of the Fish is 165˚F/ 74˚C or cooked through.
  11. Let it cool on a wire rack and serve warm.
Notes:
  • Don't make the filling too dry.
  • When you make the filling, add more Salt only towards the end, as Soy Sauce contains Salt.
  • Placing more filling in the middle will give more height in the middle like the real Fish.
  • Make the marks on the top only after the second rising period, otherwise the marks will be erased while rising.
  • The Water Vapor that comes from the Water in the pan will make the Bread soft.


Make it, enjoy the deliciousness and 
serve it to your family with love...

Tuesday, December 28, 2010

Bun

Recipe No: 152
This is a variation of the basic White Bread that I posted a few days earlier. There are a few differences in the amount of ingredients (Sugar and Yeast) and a small difference in procedure. There is a second kneading involved after the first rise. This will make the Buns very light and airy when compared to the Bread. I should say that the taste of this will came very near to the Buns that are available in Kerala Bakeries.
Ingredients                                          Makes 8 big or 12 medium Buns
  • Milk……………………………...................1/4 Cup
  • Sugar…………………………....................4 Tablespoons
  • Salt…………………………….....................1 Teaspoon
  • Butter or Shortening…........................1 ½ Tablespoons
  • Active Dry Yeast…………......................3 Teaspoons
  • Luke warm Water……….......................3/4 Cup
  • Maida or All Purpose or Bread Flour…2 ½ to 3 Cups
  • Egg Wash (Beat 1 Egg with a tablespoon of Water)
Method of Preparation
  1. Heat Milk, Salt, Sugar and Butter in a saucepan over medium heat until the sugar is melted. Let it cool to lukewarm.
  2. Dissolve Yeast in Warm Water in a big Bowl. (Bowl of a stand mixer if you have one)
  3. Add the Milk mixture and 2 Cups of Flour and mix really well for a minute or till everything is combined. (Use a dough hook if using a Stand Mixer)
  4. Add ½ to 1 Cup more of Flour until the dough forms a soft and smooth ball. (In a stand mixer the dough should leave the sides of the Bowl.) Use only just enough Flour to make a manageable (can be knead without much sticking) dough.
  5. Dump it on to a floured board and knead for 8 to 12 minutes. (If you are using a stand mixer let it knead on speed 2 for 3- 5 minutes) The resulting dough should be smooth and elastic.
  6. Place the dough in a greased bowl turning it once to grease the top.
  7. Cover it with a damp towel and let it rise for about 1 hour or till it is doubled in bulk.
  8. Punch it down and knead it again for about 5 minutes. (If using a stand mixer knead on speed 2 for 2 minutes)
  9. Divide it into 8 equal sized portions. (If you want smaller buns make it 12.)
  10. Shape each portion into a smooth ball. (Pull the top of the ball and tuck it under and roll it over a board to make it smooth.)
  11. Place it 2 inches apart on a baking tray; cover with a damp towel and let it rise for 20 minutes. (It will start to touch each other at this stage)
  12. Preheat the Oven at 375˚F/ 190.5˚C.
  13. Brush the top of the raised dough with the Egg wash and bake for 13-15 minutes or till the top of the Buns are golden brown in color or the internal temperature attains 165˚F/ 74˚C.
  14. Serve it warm or at room temperature.
Notes:
  • Bread Flour and All Purpose Flour (which is same as that of Maida) are different. Bread Flour contains a higher amount protein that will in turn develop a higher amount of Gluten while kneading. This Gluten is responsible for the elasticity of Breads. Thus Bread flour will give a more elastic and soft Bread than that of All Purpose Flour. But you can substitute one with the other using the same measurements, even though, the results may vary slightly. As All Purpose Flour is widely available, I tend to use it more and the results are perfectly satisfactory.
  • Heating milk and then cooling it seems like a step that can be avoided but it is very crucial in determining the texture of the Bread. So please don't avoid that step. 
  • The doubling time for the dough will depend on the power of the Yeast and the temperature of the surroundings. So please wait till the dough doubles in your cooking conditions.As Buns got most Yeast (and Sugar, the food in which Yeast grows) this will double faster than Bread dough and  so one can make Buns faster than Breads.
  • I used active dried Yeast in this recipe. Don't let it rise for more time as mentioned in the recipe, for if you do, that will reduce the sweetness of the Buns and increase the sourness due to the overactive Yeast. So keep it only till it is doubled.
  • The temperature of the Water to which we put the Yeast should be lukewarm. That temperature will activate the Yeast, but if the temperature of the Water is high then it may kill the yeast. So after dissolving the Yeast in Water give it a few minutes to become active, that is shown by the bubbling of the dissolved Water. If it doesn't show a bubbling action either you have killed the Yeast or the Yeast is of poor quality (happens when it is very old). In both cases, start over again with fresh Yeast. 
  • A second kneading is very important in the case of Buns because that gives a very light and airy texture to the Buns (at least in my experience).
  • Shortening refers to any solid fats like Dalda or Margarine. In US the commonly used Shortening is Crisco. Butter usually have around 80% fat (the rest Water, Milk solids etc:) while most of the Shortenings are 100% fat.
  • I like these Buns when it touches each other because, personally, I know whether it is cooked well inside by the way it feels when I pull it apart to separate (a procedure that I borrowed from the making of Dinner Rolls).


    Make it, enjoy the deliciousness and 
    serve it to your family with love…

    Sunday, December 19, 2010

    Basic White Bread

    Recipe No: 145
    One of the American Iron Chefs, Michael Simon, said if you master a recipe, you can make one good dish, but if you master a technique, you can make hundreds of recipes using that technique. This is absolutely true, if you think, and one such technique is that of Bread making.

    Well earlier when I posted Bread stick recipe I mentioned, how much my husband loves homemade Bread. Now this is my recipe for the Basic White Bread, the one which I tried from my Kitchen Aid handbook with some adjustments in the measurement. Even though I tried many other recipes for Bread, this one seemed to be a keeper. Once you get this  right , you can go crazy with this recipe, making a whole lot of variations…
    Ingredients                                       Makes one 8 ½ inch Bread
    • Milk…………………………..1/4 Cup
    • Sugar…………………………1 ½ Tablespoons
    • Salt……………………………1 Teaspoon
    • Butter or Shortening…...1 ½ Tablespoons
    • Active Dry Yeast………….2 ½ Teaspoons
    • Luke warm Water……….3/4 Cup
    • Maida or All Purpose or Bread Flour…2 ½ to 3 Cups
    Method of Preparation
    1. Heat Milk, Salt, Sugar and Butter in a saucepan over medium heat until the Sugar is melted. Let it cool to lukewarm.
    2. Dissolve Yeast in Warm Water in a big Bowl. (Bowl of a stand mixer if you have one)
    3. Add the Milk mixture and 2 Cups of Flour and mix really well for a minute or till everything is combined. (Use a dough hook if using a Stand Mixer)
    4. Add ½ to ¾ Cup more of Flour little by little, until the dough forms a soft and sticky ball. (In a stand mixer the dough should leave the sides of the Bowl.) Use only just enough Flour to make a manageable (can be knead without much sticking) dough.
    5. Dump it on to a floured board and knead for 8 to 12 minutes. (If you are using a stand mixer let it knead on speed 2 for 3- 5 minutes) The resulting dough should be smooth and elastic.
    6. Place the dough in a greased bowl turning it once to grease the top.
    7. Cover with a damp towel and let it rise for about 2 hours or till it is doubled in bulk.
    8. Punch it down and roll it into a 14 inch circle.
    9. Fold both sides so that it overlaps slightly in the middle and then from the other side roll the dough as tightly as possible.
    10. Place it in a greased  8 ½ X 4 ½ X 2 ½ inch Bread pan. Cover with a damp towel and let it rise in a warm place till it is doubled in bulk for about 1 hour.
    11. Preheat the Oven to 350˚F/ 180˚C with a another pan filled with 2 Cups of Water in a lower rack.
    12. Bake till the top of the Bread is light brown in color or the internal temperature is 165˚F/ 74˚C.
    13. Remove from pan and let it cool on a wire rack.
    14. Slice and serve once cooled.
    Notes:
    • Bread Flour and All Purpose Flour (which is same as that of Maida) are different. Bread Flour contains a higher amount protein that will in turn develop a higher amount of Gluten when kneaded. This Gluten is responsible for the elasticity of Breads. Thus Bread flour will give a more elastic and soft Bread than that of All Purpose Flour. But you can substitute one with the other using the same measurements, even though, the results may vary slightly. As All Purpose Flour is widely available, I tend to use it more and the results are perfectly satisfactory.
    • Heating milk and then cooling it seems like a step that can be avoided but it is very crucial in determining the texture of the Bread. So please don't avoid this step. 
    • The doubling time for the dough will depend on the power of the Yeast and the temperature of the surroundings. So please wait till the dough doubles in your cooking conditions.
    • The temperature of the Water to which we put the Yeast should be lukewarm. That temperature will activate the Yeast, but if the temperature of the Water is high then it may kill the yeast. So after dissolving the Yeast in Water give it a few minutes to become active, that is shown by the bubbling of the dissolved Water. If it doesn't show a bubbling action either you have killed the Yeast or the Yeast is of poor quality (happens when it is very old). In both cases, start over again with fresh Yeast. 
    • The Water in the pan from the lower rack gives enough water vapor to keep the Bread moist.


      Make it, enjoy the deliciousness and 
      serve it to your family with love...

        Wednesday, December 8, 2010

        Egg Masala Stuffed Bread

        Recipe No: 138
        This recipe makes use of the same Bread dough that was made for Bread Sticks. So if you have tried it with good results then this will be a breeze.
        Ingredients                                 Serves 3
        For the Stuffing
        • Hard Boiled Egg…………….…3
        • Oil……………………………..…..2 Tablespoons
        • Onion sliced thin……………..1 ½ Cups
        • Ginger- Garlic Paste………...1 Tablespoon
        • Green Chilly chopped……….1 small
        • Red Chilly Powder…………...1/2 Teaspoon
        • Coriander Powder…………….3/4 Teaspoon
        • Turmeric Powder…………..…1/4 Teaspoon
        • Garam Masala Powder………1/2 Teaspoon
        • Pepper Powder………………...1/4 Teaspoon
        • Tomato sliced……………….....1/2 Large
        • Coconut milk……………………1/4 Cup
        • Coriander Leaves chopped...2 Tablespoons
        • Salt to taste
        Method of Preparation
        1. Make a batch of Bread stick dough. Let it double as mentioned in the recipe.
        To make the Stuffing
        1. Heat Oil in a pan on medium heat, and saute Onion, Green Chilly and Salt till Onion starts to brown along the edges.
        2. Add Ginger-Garlic paste and saute till the raw smell is gone.
        3. Reduce the temperature to low and add Turmeric Powder, Red Chilly Powder, Coriander Powder, Garam Masala Powder and Pepper Powder and saute for a minute till the raw smell is gone.
        4. Add Tomato and cook till it is mashed thoroughly.
        5. Add Coconut Milk and the Egg and let it dry out. Check for seasoning and adjust if needed.
        6. Switch off the flame and sprinkle Coriander leaves; mix well.
        To Make and Bake the Stuffed Bread
        1. Roll out the doubled Bread dough into a 12 inch circle.
        2. Place the Egg mixture on one end in a row leaving an inch of the  sides. (Please take a look at the picture)
        3. Fold the end over the Egg followed by the two sides.
        4. Roll it tightly into a log and place in an oiled 9 ½ / 5 inch bread tin, cover it with a damp towel and let it rise for 45 minutes.
        5. Preheat oven to 350˚F/ 180˚C with a small pan filled with 2 cups of Water in the bottom rack.
        6. Place the Bread on the top rack and bake for 30- 40 minutes or till its top is lightly browned and the internal temperature (Temperature at the middle of the Bread) is 165˚F/ 74˚C
        7. Let it cool down slightly on a wire rack .
        8. Slice and serve while still warm.
        Notes:
        • The pan filled with water will produce water vapor that will keep the Bread from drying out.
        • If you try to slice the bread while still piping hot it will be very crumbly.


        Make it, enjoy the deliciousness and 
        serve it to your family with love….

        Saturday, November 13, 2010

        Flat Soda Bread

        Recipe No: 120
        I started to make this when doctors asked my husband to go on an yeast free diet temporarily. Getting bored with Chappati every night, I decided to go for a Maida/ All Purpose Flour based flat bread…and so came this recipe. This is very versatile in the sense that it can be either fried or cook on a griddle.
        Ingredients                                              Makes 8
        • All Purpose Flour/ Maida……2 Cups
        • Baking Soda……………………...1/2 Teaspoons
        • Salt…………………………………..1/2 Teaspoon
        • Oil…………………………………….2 Tablespoon
        • Yogurt…………………………..….2 Tablespoon
        • Egg…………………………………..1
        • Water……………………………....1/4 Cup
        • Butter as needed
        Method of Preparation
        1. Combine All Purpose Flour, Salt and baking Soda well.
        2. Beat together Egg, Yogurt and Oil really well.
        3. Mix the Yogurt mixture and Flour mixture and make a soft dough using water. Start with ¼ Cups of water and use more as needed. Let the dough rest for 30 minutes.
        To make on a griddle
        1. Divide the dough into 8 equal pieces.
        2. Roll each of them into 8 inch circles.
        3. Place it on a hot griddle/thava and cook on both sides.
        4. Once out of the griddle rub both sides of the bread with Butter.
        5. Serve it hot with Curries that have lots of  gravy. 
         

        To deep fry
        1. Divide the dough into 12 equal pieces
        2. Roll each of the pieces into 4 inch circles.
        3. Heat at least 2 inches of Oil in a deep pan.
        4. Fry the rolled out dough till golden brown. Do turn it over half way through frying.
        5. Serve it hot with Curries that have lots of  gravy.


          Notes:
          • The flat bread from the griddle tends to become dry when cold. So please serve it as hot as possible with lots of gravy.


          Make it, enjoy the deliciousness and 
          serve it to your family with love...

          Sunday, November 7, 2010

          Kerala Parotta/ Porotta/ Borotta

          Recipe No: 115
          After ‘God knows  how many times’ I got my favorite ‘thattukada’ food, the one thing that is responsible for my 7 kg increase in weight on our last Kerala visit, right. Somehow many people like Parottas from roadside shops (Thattukada) better than what you get from a rather high class restaurant. May be I am one among them…This is an entirely different thing from the North Indian Parathas, but from the information in the internet, I come to know that variations of this can be found in some other countries (like Singapore) too..

          Ingredients                                                Makes 10-12
          • Maida………………4 Cups (I don’t prefer All Purpose Flour)
          • Sugar……………….2 Tablespoons
          • Salt………………….3/4 Teaspoon
          • Water……………...1 ½ Cups (Distilled or Spring Water preferred)
          • Oil………………...…1/3 Cup + 2 Tablespoons
          Method of Preparation
          1. Mix together Maida, Sugar and Salt and make a dough using Water. Dump it onto a flat surface (Marble, counter top or a large cutting board will do) and knead thoroughly into soft, elastic dough. If you are kneading by hand it will take at least 20 minutes but if you have a stand mixer, knead it for about 8 minutes on speed 2.
          2. Towards the end of kneading add two tablespoons of Oil and knead well. Don’t use flour to reduce sticking. Use only Oil. At the end of kneading the dough should be smooth, elastic and soft.
          3. Spread some Oil on top of the Dough; cover it with a damp cloth and let it rest for 20 minutes.
          4. After resting, divide the dough into 12 equal parts. For this, smooth the surface of the dough and detach the amount of dough for the ball from the rest by pressing with the thump and the index finger. This will give a perfectly smooth ball of dough.
          5. Rub the ball with Oil and arrange them on an oiled tray covered with a damp cloth. Let it rest for 5 minutes.
          6. On a large working surface (Marble, counter top or a large cutting board will do) roll each portion as thin as possible. The dough may tear in between but that is perfectly okay.
          7. Spread a tablespoon of Oil on the rolled out dough.
          8. Now you can either pleat or just raise one side of the dough with one hand and let the rest form a pleat with some help from the other hand. This will result in a long piece of pleated dough.
          9. With a circular motion roll it as concentric circles on itself. Tuck the end of the dough on the under side of the pleated ball.
          10. Let this sit under a damp cloth while you work with the other pieces.
          11. Heat a pan on medium high heat. Rub the surface with Oil.
          12. Roll each piece again into 5 or 6 inch circles and place on the heated pan. When the under surface starts to cook turn it over and let the other side also cook. Turn it once more and start pressing. This will reveal the layers.
          13. Once cooked and slightly browned on both sides, take it from the pan and place it on a board.
          14. Once two of them are ready, layer then on top of each other and press with both hands from both sides. This will partially separate the layers, which is a characteristic of Parottas.
          15. Serve it hot with desired Curries.
          Notes:
          • Don’t use more Maida than mentioned in the ingredient section and use only Oil to prevent sticking.
          • If the kneading is not done properly the Parottas will be tough to tear. I should confess that it happened to me a lot of times, but since I have a stand mixer now, kneading is a breeze and the Parottas are as soft as store bought ones.
          • Parotta makers at the roadside shops won’t roll out the Poratta dough but they will stretch it  by holding with two hands on one end and throw the other side in the air and let it hit the work surface (Veeshal). This needs experience and a big work surface. But this way of rolling and pleating is perfect when you make this at home.
          • I like to use Indian Maida in this recipe over All Purpose Flour as in my experience the former one gives a much similar texture of Parottas.
          • Tap water may change the behavior of the dough slightly. So I prefer Spring or Distilled water from bottles.


          Make it, enjoy the deliciousness and
          serve it to your family with love…

          Tuesday, October 5, 2010

          Biscuits and Gravy

          Recipe No:91
          The Biscuit part of this recipe is adapted from food Network’s Paula Deen  with very minimum modifications. It is a very easy recipe if you follow the directions. Please make sure to read the ‘notes’ before making attempts. Gravy part is also very easy and  it can be made with or without Sausage... Either way it goes well with Biscuits. So here goes the American style Biscuits…
          Biscuits


          Ingredients                                         Makes 8 big ones
          • Flour………………………...2 Cups
          • Sugar………………………..2 Teaspoon
          • Baking Powder…………..1 Tablespoon
          • Baking Soda……………....1/2 Teaspoon
          • Salt…………………………..3/4 teaspoon
          • Cold Butter………………..8 Tablespoons
          • Cold Milk……………….….3/4 Cup
          • Egg…………………………..1
          • Water…………………….…1 Tablespoon
          • Pepper Powder………....As per needed
          Method of Preparation
          1. Preheat the oven to 425˚F/ 218˚C
          2. Mix together Flour, Baking Powder, Baking Soda, Sugar and Salt; mix really well.
          3. Chop cold Butter into small pieces and gently mix into the flour until it makes a  coarse consistency. Small pieces of Butter should be present in the flour at this stage. If you are using a food processor this will be achieved in a few pulses and if you are using a stand mixer, mix it for two minutes or until butter forms the size of Peas.
          4. Add cold Milk and mix lightly till a dough is formed.
          5. Dump this into a well floured board and pat the dough together into 1 inch thick disc. Don’t knead the dough.
          6. Cut the Biscuits using a round cutter of desired diameter and place them on a buttered baking sheet. Chill this for 10 minutes.
          7. Beat Egg and Water together (This is egg wash) and brush the top of the Biscuits with the egg wash and sprinkle some coarsely ground Pepper  on top.
          8. Bake for 14-16 minutes in the middle rack of the oven  until the Biscuits achieve a light brown color on top.
          Notes:
          • It is very important that the butter is cold in this recipe and it should be crumbly and not melted into the dough so that when the heat hits the cold butter it melts and the steam will make the Biscuits puff up. This is the same reason why you shouldn't knead the dough, for if you knead the heat of our palm will melt the Butter.
          • You can use Red Chilly Powder to sprinkle the top of the Biscuits instead of Pepper Powder.
          • The leftover Biscuits can be used to make sandwiches.
          Sausage Gravy 
          Ingredients                                       Makes 1 1/2 Cups
          • Spicy Italian Sausage......….1 (Uncooked is the best)
          • All Purpose Flour…………....1 ½ Tablespoons
          • Milk……………………………....1 ½ Cups
          • Oil…………………………………1 Tablespoon
          • Salt and Pepper to taste
          Method of Preparation
          1. Heat Oil in a pan on medium heat and add the sausage meat that is taken out of the casing.
          2. Try to separate the meat as much as possible using a spoon and fry it in the oil till slightly brown.
          3. Reduce the temperature to medium low and sprinkle the Flour on top and fry it for two minutes or till the raw smell of the Flour is gone.
          4. Add the Milk and mix well without any lumps. Let it start to simmer along the edges. Add Salt and Pepper to taste.
          5. Serve it hot on top of Biscuits.
          Notes:
          • Its very important to fry the flour well in the oil or the gravy will taste like raw flour.
          • If you don't eat Sausage then start by frying Flour in Oil  (1 1/2 tablespoons of Oil and   1 1/2 tablespoons of Flour)and then add the milk and the rest of the procedure is same as that of the Sausage gravy.
          • Raw Sausage is available in the fresh meat section of your grocery store.


          Make it, enjoy the deliciousness and
          serve it to your family with love…

          Tuesday, July 27, 2010

          Battura

          Recipe No: 68
          Even though I love Battura, thinking of the guilty feeling that I am going to have after eating them often kept me away from making it. So after some trials and a lot of greasy Batturas, I came up with this non greasy variety of Battura. The secret is much in the consistency of the dough. If the dough is too soft, it will absorb a lot of oil. If it is too hard, the end product will be hard. So take care in making the dough to the just right consistency.
          Ingredients                                                  Makes 16 small ones
          • All Purpose flour/ Maida….2 cups
          • Yeast…………………………….1 Teaspoon
          • Sugar…………………………….1 tablespoon
          • Salt……………………………….3/4 Teaspoon
          • Yogurt………………………..…3 Tablespoons
          • Lukewarm water……………1/2 Cup
          • Oil for deep frying
          Method of Preparation
          1. Dissolve Sugar and Yeast in lukewarm water. Cover this with a foil and keep aside for 5 minutes. This is to activate the yeast and it should be foamy by this time.
          2. Mix Flour, Salt and Yogurt and knead it into a soft dough using the Yeast water. It should not be too sticky. Use more water if needed.
          3. Place this in a big bowl, cover with a kitchen towel and keep it in a warm place till it is doubled in size.
          4. Once doubled, punch it down, and let it rise once more time for 1 hour. This time also cover it with a towel and keep in a warm place.
          5. Divide this into 16 equal portions and roll them into 3 inch circles. This should not be very thin otherwise it will not puff up.
          6. Heat the oil for deep frying on high flame. There should be at least 2 inches of oil.
          7. Deep fry the Batturas on both sides till they are cooked and nicely browned on both sides. With the back side of a  slotted spoon, push the Batturas into the oil till it is puffed.
          8. Once fried, take it out of the oil and drain the excess oil on a paper towel.
          9. Serve hot with Channa Masala.
          Notes: 
          • The Oil should be really hot while frying, otherwise it will absorb a lot of oil.
          • Put yeast only in lukewarm water. Hot water might kill the yeast and cold water might not activate the yeast. If the water in which the yeast is dissolved is not frothy in 5-10 minutes, then either you have killed the Yeast or its too old. In both cases start over again.
          • I like to make small Batturas than the traditional big ones, as its easy to be fried. But that's only a personal preference. 


            Make it, enjoy the deliciousness and
            serve it to your family with love…

            Sunday, June 6, 2010

            Naan

            Recipe No: 23
            Ingredients                                                    Serves 6
            • All Purpose Flour/ Maida…..3 Cups
            • Milk…………………………………….160ml
            • Yeast…………………………………..1 Teaspoon
            • Egg……………………………………..1
            • Curd……………………………………2 Tablespoons
            • Sugar…………………………………..2 Tablespoons
            • Salt as per taste
            • Butter as needed
            • A few drops of oil
            Method of Preparation
            1. Heat milk till a lukewarm temperature is reached. It should be warm to the touch and not hot. Dissolve Sugar and Yeast in the milk and keep covered for 5 to 10 minutes. By this time the mixture should be frothy showing yeast activity. If it is not, either your yeast is not good or you killed the yeast by putting it in hot milk. In both  of the cases it is better to start over again.
            2. Mix Flour, Egg, Yogurt, Salt and the Yeast mixture and knead it for about 5 to 10 minutes. If you have a stand mixture, knead it on 2nd speed for 5 minutes. If you don’t have one, after mixing everything dump it onto a floured surface and  knead for 10 minutes.
            3. Keep this dough in a big lightly oiled bowl covered with a damp cloth in a warm place till it is doubled in size for 1 ½ to 2 hours.
            4. Once it is doubled in size, punch it down and let it rise for another half hour.
            5. Divide this into 8 to 10 equal portions. Roll each of them into 1/4th of a centimeter in thickness. Place it on a paper towel, cover with another towel and let it rest for 5 minutes.
            6. Heat a flat pan really hot. Reduce the flame to medium and place the Naan on the pan. Once you see the bubbles turn it and wait for some more bubbles. Then crank up the heat to the highest possible on your stove and turn the Naan once more. Press the top with a spatula.  At this stage the Naan will really puff up turn once more and let it finish cooking. (Till you get a nice brown color here and there.)
            7. Take the Naan out of the pan and rub with cold butter and serve hot.
            Notes: The doubling time for the dough will depend on the power of the yeast and the temperature of the surroundings. So please wait till the dough doubles in your cooking conditions.
            After rolling the Naan out you can put some chopped coriander leaves and garlic and roll lightly and then cook to get a garlic Naan. If you want only a slight Garlic taste, cut the top of a Garlic clove and rub it on to the Naan when it is still hot.
            You can make Naan in the oven at a very high temperature but I like this because it can be made without an oven.
            If this amount of the dough is too much for your family take the extra dough after punching it down, store it in a Ziploc bag in the freezer. Thaw it and allow it to rise for the second time whenever you want.
            If your Naan somehow went cold before serving heat it in a microwave for 30 seconds.


             Make it, enjoy the deliciousness and 
            serve it to your family with love.....

            Monday, May 17, 2010

            Bread sticks

            Recipe No: 7

            For me there is nothing more enticing as the smell of fresh bread baking in the oven. Even though I make breads often, the thought of that warm end piece of fresh bread slathered with butter makes my mouth water. I started baking breads after I realized that how much my husband loves fresh baked breads. I found this recipe in an old, yellow page of a bread recipe book. I was amazed when I felt the texture of this bread when I first made this. It became one of my favorites fast…. Just like many others!! Now I use this basic recipe in a number of different ways.
            Posted by Picasa

            Ingredients
            • Yeast……………………2 teaspoons
            • Warm water………..2/3 cup
            • Salt……………………...3/4 teaspoon
            • Sugar....................1 Tablespoon
            • All purpose flour….2 cups
            • Shortening…………..1/4 cup
            • Oil…………………………A few drops
            • Egg……………………….1
            • Water…………………..1 Tablespoon
            • Sesame or Poppy seeds…2-3 Tablespoons
            • Melted butter……………1 Tablespoon
            Method of Preparation
            1. In a big mixing bowl, dissolve yeast and sugar in warm water. Cover and keep aside for 5 minutes for the yeast to activate. (If the mixture is frothy after 5 minutes then you are ready to proceed)
            2. To the yeast mixture, add salt, shortening, and 1 cup flour. Mix it till smooth.
            3. When it is mixed well add the rest of the flour and mix.
            4. Dump it onto a floured board or a clean counter top and knead until smooth about 5 minutes. If you have a stand mixer it works perfect.
            5. Add a few drops of oil in a large bowl and put the kneaded dough, turning once so that the whole dough is covered lightly with oil.
            6. Cover the bowl with a damp cloth n keep in a warm place till the dough doubles in size. (This depends on the atmospheric temperature. I keep it inside the oven and it will double in size in about 11/2 to 2 hours)
            7. When the dough is doubled, punch it down and divide it into eight to ten portions.
            8. Shape each of them into 6 inches long stripes.
            9. Place it on an oiled baking sheet. Cover it again with a moist kitchen towel allow to rest for 10 -15 minutes. It will rise a bit during this process which is also called proofing.
            10. Arrange two racks in the oven, one in the middle and one two rows below that.
            11.  Place a small oven proof bowl filled with 2 cups of water in the lower rack of the oven.
            12. With the water dish inside preheat the oven to 375°F or 190°C.
            13. Beat the egg with 1 tablespoon of water. This is also called egg wash.
            14. Brush the top of the proofed bread sticks with the egg wash and sprinkle the sesame/ poppy seeds. The egg wash will give the top of the bread a beautiful color and also helps the seeds stick.
            15. Bake in the middle rack of the oven until the top of the bread is light brown. Don’t over bake. This will take around 18 minutes. (The inside temperature of the bread should be 190°F)
            16. When it comes out of the oven, brush the top with melted butter. Serve warm or at room temperature.
            Notes: Keeping the pan with water inside the oven throughout baking is important, as it gives a nice texture to the crust of the bread while keeping the inside soft.


            Make it, enjoy the deliciousness 
            and serve it to your family with love....

            Posted by Picasa