Creating a blog was out of the question for a long time for me, as measuring everything in the kitchen was like biting into an eggshell. I enjoy cooking and don’t want to waste even a slightest bit of enjoyment in that small world of mine. But little did I know that everything will change, when my husband came home with the Oscar nominated film ‘Julie and Julia’( a real life story) where Julie Powell (part played by Amy Adams) challenged herself to make all the 524 recipes from Julia Child's cook book ‘Mastering the Art of French Cooking’ and blogging all her experiences (The Julie/Julia Project). It was an inspiring movie. A few days later when we were discussing this casually with a friend of ours over tea…everything changed dramatically…..” How about you making at least half of it in one year? Not French but your own. 262 recipes that will inspire others and present it as a blog?” For a minute my mind traveled faster than light… With an experience as a helper in my mother in laws kitchen for 6 years followed by a three year everyday struggle to satisfy the palate of my foodie husband, if I cannot do it then why should I cook? But on the other side with an experience in English literature extending no more than expanding outline stories in English grammar class when I was 18 and two small kids that come in handy at times, will a commitment for the next one year work? Anyway my ‘cook's ego’ didn’t allow me to say no...

So my friends …here I am opening my recipe book, trying to perfect and present 262 recipes in the coming 365 days….A Challenge that will of course tastes good. Come.. Have a walk with me along my journey.. Cheering and inspiring….Forgiving and tolerating…Testing and tasting….for ‘A Tasty Challenge’

Search This Blog

Showing posts with label Appetizers. Show all posts

Thursday, April 26, 2012

Stuffed Mushrooms

Recipe No: 293
This is the simplified vegetarian version of the Chicken Stuffed Mushrooms that I posted earlier. It is easy, delicious and perfect for an appetizer.
Ingredients                                                    Serves 3
  • Mushrooms…………......8 oz/ 227 Grams/ 12 small Mushrooms
  • Oil……………………………1 Tablespoon
  • Onion chopped………....1/3 Cup
  • Garlic chopped fine…..1 big clove
  • Cream Cheese…………..4 oz/ ½ Cup/ 125 grams (At room temperature)
  • Bread Crumbs…………..1/4 Cup
  • Butter……………………...1 Teaspoon
  •  Salt and Pepper to taste
Method of Preparation
  1. Clean the Mushrooms and remove the stems taking care not to break the caps.
  2. Chop the stems finely and keep aside till ready to be used.
  3. Heat Oil in a pan on medium high heat and saute the Onion and Garlic till slightly translucent.
  4. Add the chopped Mushroom stems and saute till it is cooked for about 2 minutes.
  5. Add necessary Salt and pepper and switch off the heat. Let this mixture cool to a room temperature.
  6. Once the mixture is cooled, mix in Cream Cheese and make sure the seasonings are on spot.
  7. Preheat the oven to 400˚F/ 205˚C.
  8. Lightly salt the Mushroom Caps and fill it with the Cream Cheese mixture. It is okay if some of the filling covers the top of the Mushrooms rims especially, if the space inside the Mushroom cap is very small. Repeat this with all the Mushroom and place them on a greased baking tray.
  9. In another bowl, melt Butter and mix it with the Bread crumbs.
  10. Sprinkle the Bread Crumbs over the stuffed Mushrooms and bake it in the preheated oven for 20 minutes or till the Bread crumbs are slightly brown and crispy.
  11. Once the Mushrooms are cooked, remove from the oven and serve hot.
Notes:
  • I used Baby Bella Mushrooms (with a brown cap) in this recipe but regular white button Mushrooms will be good.
  • To clean the mushrooms, I give it a light rinse and wipe it thoroughly to remove the Water. Don’t let the Mushrooms absorb too much Water while rinsing.


Make it, enjoy the deliciousness and 
serve it to your family with love…

Thursday, April 19, 2012

Chicken Pakora/ Pakoda/ Bhaji

Recipe No: 291
There is a small restaurant near our home, here in Alpharetta, which serves these awesome Pakoras. Whenever we go by that area we stop at this restaurant and amazingly kids will never ask ‘are we eating from outside today?’ We all know that we will have Chicken Pakoras at any time of the day, even if we just had our food. This is the result of my desperate attempt to recreate its taste… I will never say that it taste the same but it is pretty close… (I think... I hope...)
Ingredients                                      Serves 6
  • Boneless Chicken……......450 grams (thighs preferred; cut into bite (small) size pieces)
  • Oil for deep frying
To Marinate
  • Salt…………………………....1/2 Teaspoon
  • Pepper Powder………......1/4 Teaspoon
  • Lemon Juice…………….....1 Teaspoon
To Make the Batter
  • Besan/ Chickpea Flour….1/4 Cup (Kadala Mavu)
  • Maida………………………….2 Tablespoons (All Purpose Flour)
  • Rice Flour………………..…..2 Tablespoons
  • Baking Soda………………...1/4 Teaspoon
  • Red Chilly Powder………..1 Teaspoon
  • Salt……………………………..1/2 Teaspoon
  • Garam Masala Powder…1/2 Teaspoon
  • Ginger Garlic Paste……...1/2 Teaspoon
  • Curry Leaves ……………...1 Teaspoon (Cut into very small pieces; 6-8 leaves will do)
  • Coriander Leaves…….…..2 Teaspoons (Cut into very small pieces)
  • Lemon Juice………………..1 Teaspoon
Method of Preparation
  1. Wash the Chicken pieces and drain thoroughly. Wipe off the excess Water as much as possible with a kitchen tissue.
  2. Marinate Chicken with the ingredients mentioned in the ‘to marinate’ section and keep for at least 3-4 hours in the refrigerator. (If you don’t have so much time, please do keep it marinated for at least 1 hour at room temperature; but overnight in the fridge is the best.)  Pakora that we eat from the restaurant has added food color; so if you are using it, please do add along with the marinade.) Let the Chicken come to the room temperature before mixing with the batter.

  3. Mix all the ingredients to make the batter (adding a bit of Water if needed) and mix in with the marinated Chicken. (Don’t make the batter too thin as there will be some liquid in the marinated Chicken too. So if you feel it is too dry after mixing the batter with the marinated Chicken , do sprinkle some more Water.) Keep aside for 30 minutes at room temperature.
  4. Heat at least an inch of Oil in a frying pan on high heat. Once really hot, reduce the flame to medium or medium high (depending on your stove; too low heat will make the Chicken absorb too much Oil and too high heat will burn the Chicken without cooking) and deep fry the Chicken pieces. Do try to drop the pieces one by one to avoid clumping. Don't overcook and do stir now and then to ensure even cooking. If you are doubtful about the cooking time (which depends on size of the pieces and the heat of the stove), do take one piece out of the Oil and check.
  5. Repeat the process with all the Chicken pieces.
  6. Serve it hot with Ketch up or Mint or Tamarind Chutney.
Notes:
  • Adjust the amount of Salt, Coriander Leaves and Curry Leaves according to your taste.
  • If you dont have Maida, do use 4 Tablespoons of Rice Flour and vice-versa. 
  • Don’t overcrowd the pan while frying as it will decrease the temperature of the Oil resulting in over absorption of Oil by the Pakoras.
  • I served this with a Chutney made of some Mint Leaves, Coriander Leaves, Green Chilly, Ginger, Salt and Yogurt.


Make it, enjoy the deliciousness and
serve it to your family with love…

Wednesday, March 14, 2012

Chicken Sliders

Recipe No: 289
This is a very easy and tasty appetizer that can be converted to a full meal with the addition of some Fries and a Salad. I made this with Chicken, but you can substitute it with any meat of your choice. With a hint of Chinese taste, this will satisfy any non vegetarian palate.
Ingredients                                            Makes 8
To make the Patties
  • Ground Chicken………...1 lb/ 450 grams (raw Chicken is a must)
  • Red Chilly Powder….....1/2 Teaspoon
  • Black Pepper powder...1/4 Teaspoon
  • Ginger Garlic Paste……1 Teaspoon
  • Coriander Leaves………1 Tablespoon (chopped fine)
  •  Salt to taste
To fry and make the sliders
  • Butter………………………2 + 2 Tablespoons
  • Oil…………………………..2 Tablespoons
  • Dinner Rolls………….…8 (I used Potato Rolls; but any small buns will do)
To make the Sauce
  • Onion chopped fine…..1/2 Cup
  • Garlic chopped fine…..2 big cloves
  • Ketchup…………………..2 Tablespoons
  • Chilly Garlic Sauce….1 Tablespoon (If not available, please use 1/2 Teaspoon Sambal Oelek.)
  • Worcestershire Sauce...1/2 Teaspoon
  • Dark Soy Sauce…….…..1 Teaspoon
  • Water……………………....1/4 Cup
Method of Preparation
  1. Mix all the ingredients to make the patties thoroughly. Divide it into 8 equal sized portions.
  2. Make each portion into a patty approximately the diameter of your buns. Keep them aside.
  3. In a wide pan on high heat, melt Butter and Oil together. Once heated, place the patties in a single layer and cook for 3-4 minutes or until the patties are nicely browned on one side.
  4. Turn them over and let the other side also brown for about 3 minutes. (By this time the patties will be mostly cooked through.)
  5. Once browned on both sides, remove the patties from the pan and keep them aside.
  6. To the remaining Oil (add a bit more if needed) add the chopped Onion and Garlic; sauté till slightly wilted.
  7. Add Ketchup, Chilly Garlic Sauce, Worcestershire Sauce, Soy Sauce and Water; mix well and slide the patties back into the sauce. (Add the liquid oozed out of the patties (if any) too.)
  8. Let it cook for a minute on both sides in the sauce or till the sauce is reduced considerably. (A bit of the remaining sauce is good.) 
  9. In the mean time, cut the dinner rolls horizontally into two, apply a light pat of Butter on the cut sides of both halves and toast them in another pan on high heat. (You have to toast them only on the cut sides.) Once slightly browned, take and keep them on a plate ready for the patties. Repeat this with all the Rolls.
  10. Place the patties on the bottom half of the Rolls and spoon the remaining sauce equally on top of the patties.
  11. Place the other half of the bun on top of the patty and serve hot.
Notes
  • Water is an enemy in making patties. So make the minced Chicken as dry as possible. (Meaning remove all the Water content with a kitchen tissue.)
  • The minced Chicken mixture is usually on the sticky side; so please rub your palms with Oil to reduce sticking.
  • The patties will be mostly cooked during frying itself, but by putting them in the sauce you can ensure that it is fully cooked. Before taking it off the stove, please check at least one patty for 'doneness'. The color of the meat will change from pink to almost white when fully cooked.
  • If you don't have  a pan to fry all patties at one time, please do it in batches.


Make it, enjoy the deliciousness and 
serve it to your family with love…

Saturday, April 30, 2011

Cheese Puffs

Recipe No: 249
Visit to a Brazilian restaurant is something that I will never forget… with 13 different types of meat all grilled…all savory… and all with distinct flavors, carved in front of you... just for you...as much as you want... But before having this ‘Meat extravaganza’, one can eat anything from the salad bar which is bigger than the biggest buffet that I had ever seen and among them was this special Cheese Puffs. When most of the Cheese Puffs have Cheese in the batter, this one was special in the fact that the Cheese was inside the Puffs as a filling. We all enjoyed that delicious Cheese Puffs which encouraged me to recreate.
Ingredients                                          Makes 12
To make the Puffs
  • Milk……………………..............1/4 Cup
  • Salt………………………............1/8 Teaspoon (reduce the amount if using salted butter)
  • Pepper Powder……..............1/8 Teaspoon
  • Unsalted Butter………..........2 Tablespoons
  • All Purpose Flour/ Maida….1/4 Cup
  • Egg…………………………......….1
To make the Cheese filling
  • Cream……………………….........1/4 Cup
  • Grated Cheese………………......1/3 Cup (Use Cheese that melts like Mozzarella, Cheddar etc: I used Cheddar)
Method of Preparation
  1. Preheat the oven to 400˚F/ 204˚C.
  2. Heat together Milk, Salt, Pepper Powder and Butter together in a sauce pan on medium low heat until the Butter is melted.
  3. Once melted, crank up the heat and let the mixture boil.
  4. Once boiled, add the Flour all at once and mix really well as fast as possible. Continue this until the Flour comes together as one mass.
  5. Transfer this to a food processor and pulse it together with an Egg until really smooth. (If you don’t have a food processor use an egg beater, or you can do this with a hand whisk, but it is a bit tedious.)
  6. Transfer the mixture to a small Zip Lock bag.
  7. Cut one corner of the Zip Lock bag and pipe the mixture (in circular motion) as a mount onto an oiled baking tray. Press the tip slightly with a wet finger to make it flat. (or the tip will burn in the oven.)
  8. Bake it in the middle of the oven for 15-20 minutes (Don’t peak during this time.)  or until it is all puffed up and golden brown on top. 
  9. Switch off the oven and let the puffs sit in the oven for 3 minutes. These puffs will be hollow inside.
  10. Once out, fill it with the Cheese mixture.
To make the Cheese filling
  1. Heat Cream and Cheese until the Cheese is melted thoroughly. Add Salt and Pepper if you prefer. Transfer this to a sauce bottle.
To fill the Puffs
  1. With the tip of the sauce bottle make a small incision on one side of the Puffs and squeeze the bottle to fill the inner hollow part with some of the sauce.
  2. Repeat this process with the rest of the Puffs and serve it warm with a cup of Tea.
Notes:
  • Once the Flour is added to the Milk mixture, do mix it immediately to combine without lumps.
  • It is very important to maintain the temperature while the Puffs are baking. So don’t peak at all. Sudden changes in the temperature will lead the Puffs to fall. If you want to see the Puffs, do switch on the light and take a peek through the glass door (if possible) or wait for at least 17 minutes to open the door (slightly) to peak. Letting the puffs sit in the hot oven itself, after baking, for sometime will avoid the Puffs from falling.
  • While making Cheese sauce, you can substitute Cream with Milk and a pinch of Corn Starch/Corn Flour.
  • You can make the Puffs in advance, but do fill it just before serving. But don’t forget to reheat the Puffs by keeping in the hot oven for a few minutes before filling and serving.


Make it, enjoy the deliciousness and 
serve it to your family with love…

Friday, April 29, 2011

Baked Chicken Parcels

Recipe No: 248
This is one of the best ways to use left over Keema. It is a very easy to make snack and the pastry/ covering, even though very different from Puff pastry, resembles it a lot being on the flaky side…
Ingredients                                        Makes 10
To make the covering
  • All Purpose Flour/ Maida……2 Cups
  • Baking Powder…………………..1 Teaspoon
  • Salt……………………………….....1/4 Teaspoon
  • Egg…………………………………..1 beaten (Reserve 1 Tablespoon from this to brush the top of the parcels.)
  • Luke warm Water as needed
  • Soft Butter…………………….....2 Tablespoons
For the Filling
Method of Preparation
  1. Mix together Flour, Baking Powder and Salt really well.
  2. Add the Egg (don't forget to reserve a tablespoon) and make a soft dough using enough Luke warm Water. The dough should be smooth and soft.
  3. Cover it with a damp towel and keep aside for 15 minutes. By this time the dough will be softer.
  4. Roll it out into a 14 inch square.
  5. Apply the Butter on top of the dough and roll it up tightly into a cylinder.
  6. Wrap this rolled up dough in a plastic sheet or Aluminum foil and refrigerate for at least 40 minutes. (This will solidify the Butter)
  7. Preheat the oven to 350˚F/ 180˚C.
  8. Cut the chilled dough into 10 equal portions.
  9. Press one portion of the dough slightly and roll it out into 5-5 ½ inch circle. The outer portions of the dough should be thin otherwise the underside of the Parcels , where all the dough from the sides meet, will be thick.
  10. Place a big Tablespoon of filling (Chicken Keema) in the middle, leaving some space along the sides.
  11. Fold the outer edges and pinch them together so that the filling is secured inside. (Take care not to gather up a lot of dough from the sides, which can make that  portion very thick.)
  12. Place this parcels seam side down and press slightly to make a 3 – 3 ½ inch circle. Repeat with all the other portions.
  13. Place this, seam side down, on an oiled baking tray; brush the leftover Egg on top evenly and bake for about 25- 30 minutes or till the parcels are golden brown.
  14. Serve hot with ketchup.
Notes:
  • Chilling the dough is very essential as it will solidify the Butter and the solid Butter when hits the hot oven releases vapor making the pastry flaky. (Solid butter pieces can be seen while rolling the chilled dough.)
  • The dough can be made earlier and refrigerated for about a day or two. You can just roll it out and make the snack when ever needed, making it good for parties.
  • You can use the filling of your choice to make this snack. If you are using left over Chicken Keema remove the big Potato pieces before using.


Make it, enjoy the deliciousness and
serve it to your family with love…

Sunday, April 10, 2011

Chicken Stuffed Potato Balls

Recipe No: 233
The idea of this appetizer is from a Food Network show, that I just glimpsed while wandering through the channels. The idea suddenly struck me and decided to make it in my style, the way my family will like it the most. It came out delicious and I liked it warm than piping hot…
Ingredients                                           Makes 16 pieces
  • Potato…………………....….1/2 Kg
  • Salt………………………......1/4 Teaspoon
  • Pepper Powder……....…..1/8 Teaspoon
  • Egg………………………......1 (Beaten with a tablespoon of Water)
  • Bread Crumbs…………....1/2 – 2/3 Cups
  • Oil for deep frying
To make the filling
  • Oil…………………………......1 Tablespoon
  • Cooked Chicken……........1 cup (cooked with a pinch of Salt and Pepper; shredded into medium sized pieces)
  • Onion chopped……….......1/2 Cup
  • Ginger Garlic Paste…......3/4 Teaspoon
  • Indian Green Chilly........1 chopped fine
  • Curry Leaves………….......1 sprig chopped
  • Tomato……………………….1/2 small chopped
  • Garam Masala Powder…1/2 Teaspoon
  • Pepper Powder…………….1/4 Teaspoon
  • Soy Sauce……………………1 Teaspoon
  • Coriander Leaves…………1 Tablespoon chopped
  • Salt as needed
Method of Preparation
  1. Prick the Potatoes here and there with a fork and microwave it on a Microwave safe plate (without Water) till a toothpick/ knife goes through it easily.
  2. Once it is cooked, take the skin off and mash the Potatoes well. (Don’t whip/knead it too much; it will develop the glue/starchiness in the Potatoes which will give an unpleasant texture)
  3. Mix in Salt and Pepper Powder; divide it into 16 parts and keep aside till ready to be used.
To make the Filling
  1. Heat a Tablespoon of Oil in a pan on medium high heat and saute Onion, Ginger Garlic paste, Green Chilly and Curry Leaves until translucent.
  2. Add Tomato and let it saute until mashed.
  3. Add Chicken pieces, Garam Masala Powder, Pepper Powder and Soy Sauce; mix well and let it dry out. Add more Salt if you want at this stage.
  4. Add Coriander Leaves; mix and switch off the heat. Let it cool down before filling the Potatoes.
To make the Potato Balls
  1. Take one portion of Potato in your palm; flatten it; place a teaspoon full of filling in the middle and cover it with the Potato mixture from the sides.
  2. Close the edges properly and keep aside till you make all of them.
  3. Dip each of the balls in beaten Egg and roll in the Bread Crumbs. Keep aside till ready to be fried.
  4. Heat at least 1 ½ inches of Oil in a pan on high heat and deep fry the Potato balls  until golden brown.
  5. Drain the excess Oil on a paper towel and serve it warm with Ketchup.
Notes:
  • While making the filling, add more Salt only towards the end ,as Soy Sauce contains a good amount of Salt.
  • Let the Chicken mixture dry out, as moisture makes the Potato mixture soft.
  • You can use any sort of filling (Fish, Meat, Shrimp,Paneer, Mushroom or Vegetable) to make this Potato Balls depending on your eating habits.
  • As Water is an enemy in this dish, please don’t boil the Potatoes. Do microwave or bake them in the oven.
  • For ½ kg Potato, it will take around 10-12 minutes in the microwave. But don’t do it in one stretch, start at 7 minutes and then progress depending on the power of your microwave.
  • Do taste the Potato mixture before making it into balls to ensure proper seasoning.
  • If the Potatoes are sticking to your hands, do lightly wet them before making the balls.
  • Ensure proper closing of the Potato balls or it will crack open in the Oil making it absorb a lot of Oil. Not to mention that it will be an unpleasant scene with lot of spluttering.
  • I made fresh Bread crumbs by grinding broken slices of Bread in a food processor. You can use a blender too. But if you use store bought Panko Bread Crumbs (Japanese style Bread Crumbs), the Potato Balls will become more crispy. You can find it in the international section of your grocery store.
  • You can make the Balls and keep for 1-2 hours and fry it 10 – 15 minutes before serving, making it an excellent appetizer for parties.
  • Do try to immerse the balls in the Oil while frying or it may break at the point that separates the portion that is in the Oil and that isn’t (due to the temperature difference). To avoid this do turn the balls after 30 seconds of putting them in the Oil.
  • Don't overcrowd the pan while frying the balls, as it will reduce the temperature of the Oil, resulting in the over absorption of Oil by the Potato balls.
  • These Potato balls are on the soft side and do take care while frying. Please handle them with care!!!


Make it, enjoy the deliciousness and 
serve it to your family with love…

Friday, March 18, 2011

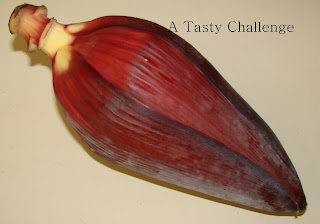
Koombu/ Vazhachundu/ Banana Blossom Cutlet

Recipe No: 221
This is a very simple basic recipe for a Cutlet using Banana Blossom. I have special interest in this as I can make my kids eat it without much fuss.
Ingredients                                          Makes 12 - 15
  • Banana Blossom cubed………….2 ½ Cups (big pieces; 1 medium sized Banana Blossom)
  • Oil............................................2 Tablespoons
  • Onion chopped………………….….1 ¼ Cups
  • Ginger ..............………………….…2 medium sized pieces
  • Garlic………………………………..…8 big cloves
  • Indian Green Chilly……….……..4 big
  • Garam Masala Powder….……..1/2 Teaspoon
  • Pepper Powder………………….….1/2 Teaspoon
  • Coriander Leaves chopped…….2 Tablespoons
  • Potato cooked...……………………1 big (1 ¼ cups mashed)
  • Egg………………………….………….1 big (Beat with 1 tablespoon Water)
  • Bread Crumbs………………………1/2 Cup
  • Salt as needed
  • Oil for deep frying
Method of Preparation
  1. Chop the Banana Blossom thoroughly in a food processor and keep it aside till ready to be used.
  2. Chop finely Onion, Ginger, Garlic and Green Chilly together in the food processor.
  3. Heat a tablespoon of Oil in a pan on medium high heat and saute the Onion mixture together with Salt, till it starts to brown.
  4. Add the chopped Banana Blossom; stir thoroughly; close the pan; reduce the heat and let it cook for 5-8 minutes.
  5. Once cooked, add Garam Masala Powder, Pepper Powder and Coriander Leaves; mix thoroughly and switch off the heat.
  6. Mix in the cooked and mashed Potato to the Blossom mixture. Check the Salt level and add if needed.
  7. Divide the mixture into 12-15 portions and make patties/ Cutlets.
  8. Dip each Cutlet in the beaten Egg and roll in the Bread crumbs. Keep it aside till ready to be fried.
  9. Heat at least an inch of Oil in a pan on medium high heat and deep fry the Cutlets till golden brown on both sides. Serve hot.
Notes:
  • If you are buying Banana Blossom, please do remove some of the loose outer bracts/ leaves.
  • If you don’t have a chopper/ food processor, chop the Banana Blossom finely by hand.
  • Please remove the stem like part at the middle of the Banana Blossom while chopping.
  • After chopping the Banana Blossom, you may find some string like things which are basically the sticky sap oozing out. Use a rod coated with Oil to stir the chopped Blossom with a circular motion so that the strings of sap will wind around the rod. Get rid of this before using the chopped Banana Blossom. If you are using a chopper this will be considerably reduced.
  • The sticky sap oozing out of the blossom may stain your hands. So please do rub your hands with Oil to avoid the stain before working with it.
  • The Cutlets should be immersed in Oil while frying. If you use less Oil the temperature of the Oil will drop once you put the Cutlets which results in over absorption of Oil by the Cutlets.
  • If in any case Oil is only coming up to the sides of the Cutlets, then temperature will increase in the portion of the Cutlet lying in the Oil. This will cause cracks in between these two portions, lying above and below the  Oil. So a way to avoid this is to turn the Cutlet over after 30 seconds of putting it in hot Oil, so that the temperature will be even on both sides.


Make it, enjoy the deliciousness and
serve it to your family with love…

Friday, March 11, 2011

Lamb Kebabs

Recipe No: 216
I started making Kebabs with Chicken but switched it to Lamb later. I still don’t know which one I like the most, as both of them will stand hand in hand with one another in taste. This is how I did...
Ingredients                              Makes 10
  • Boneless Lamb………………...300 grams (with fat preferred; cut, wash and dry as well as you can; or use an equivalent quantity of ground Lamb)
  • Ginger chopped………………..1 Tablespoon
  • Garlic chopped………………...1 ½ Tablespoons
  • Onion chopped…………………2 Tablespoons
  • Coriander Leaves chopped…2 Tablespoons
  • Butter…………………………..…1 Tablespoon (optional, I added Butter as the Lamb I used was lean)
  • Egg………………………………...1 small
  • Salt………………………………...3/4 Teaspoon
  • Wooden/ metal skewer……..10 no
  • 1 Tablespoon melted Butter to baste
To toast lightly
  • Red Chilly Powder…………….1/2 Teaspoon
  • Coriander Powder…………….3/4 Teaspoon
  • Garam Masala Powder……..1/2 Teaspoon
  • Fennel Powder………………….1/2 Teaspoon (Peringeerakam)
Method of Preparation
  1. Soak the Skewer in cold Water for around 30 minutes.
  2. Lightly toast Red Chilly Powder, Coriander Powder, Garam Masala Powder and Fennel Powder in a dry pan till fragrant. Keep it aside till ready to be used.
  3. Grind Lamb as smooth as possible.
  4. Mix in Ginger, Garlic, Onion, Coriander Leaves, Butter, Salt, Egg and the lightly toasted Powders to the ground Lamb; grind one more time to blend everything well.
  5. Divide this into 10 equal portions.
  6. With the help of lightly oiled hands press the Meat on to the skewers so that it forms an even Kebab.
  7. Place it on a tray that can be used for broiling.
  8. Preheat the broiler for 5 minutes on high.
  9. Place the Kebabs 4-5 inches down from the heating filament (1st or the 2nd rack from the top depending on your oven) for 5-6 minutes on one side.
  10. Baste it with melted Butter and turn it over. Broil the second side of the Kebabs for 3-4 minutes or till it is cooked through and starts to brown here and there.
  11. Serve hot with Pita Bread, Salad or Rice (The yellow Rice I served is Basmati Rice cooked with a pinch of Turmeric Powder).
Notes:
  • Grind Lamb and the other ingredients as well as possible, otherwise the Kebabs will become tough. Also include some Lamb fat while grinding.
  • Make sure to avoid all the tendons and other tough tissues from the Meat before grinding.
  • Moisture is an enemy in this dish; so try to wipe the Meat as dry as possible.
  • Use a small Egg in the recipe. If the Egg is big use only half.
  • You have to soak the wooden skewers in order to prevent it from burning under the broiler. If you are using Metal skewers, please avoid this step.
  • There are chances that juices may ooze out of the Meat while cooking and it is not desirable to cook the Kebabs in the juices (will result in steaming). So use a pan with hole in it and allow the juices to drip into a bottom pan. Line the bottom pan with Aluminum foil to make cleaning easy. 
  • The cooking time varies with oven; so adjust it according to yours.
  • Chat Masala goes excellent with Kebabs; sprinkle on top of the Kebabs if you like.
  • In the broil mode only the top filament/ burner of the oven works; that is the reason why, one should place the pan near the top for maximum heat.
  • Kebab sticks are found in most of the stores that sells small kitchen gadgets.


Make it, enjoy the deliciousness and 
serve it to your family with love…

Monday, March 7, 2011

Chicken Toast

Recipe No: 212
This is my version of the famous Chinese appetizer ‘Shrimp Toast’, made with Chicken. Generally this is deep fried and if anyone has fried Bread before, you will know how it will absorb Oil like a sponge. So I decided to shallow fry in a pan, but definitely you can bake or grill.
Ingredients                                           Serves 8
  • Skinless, boneless Chicken….........200 grams
  • Shortening/Dalda/ Margarine…..1 ½ Tablespoons
  • Green/ Spring Onion/ Scallions….1 (Chopped fine)
  • Ginger chopped fine………………....1 Teaspoon
  • Green Chilly chopped fine………….1 Teaspoon
  • Beaten Egg……………………………...3 Tablespoons
  • Corn Starch……………………………..1 Tablespoon
  • Salt…………………………………………1/4 Teaspoon
  • Bread……………………………………..6 Pieces (I used whole Wheat)
  • Sesame seeds…………………………..1 Tablespoon
  • Oil as needed
Method of Preparation
  1. Chop Chicken finely. Once almost chopped, add the Shortening and chop it together until it  blends in with the Chicken.
  2. Add Spring Onion, Ginger, Green Chilly, Egg, Corn Starch and Salt and mix well.
  3. Divide this mixture into 6 portions and spread each portion evenly on a slice of Bread.
  4. Sprinkle some Sesame seeds on top and repeat this process with all the pieces of Bread.
  5. Heat 2 tablespoons of Oil in a pan on medium low heat and place two slices of Bread each with the Chicken side down.
  6. Once the Chicken is cooked and the top browns slightly, turn it over and let the bread side crisp up.
  7. Once the Bread is crispy, take it out of the pan; drain the excess Oil by placing it on a paper towel; remove the sides of the Bread; slice each piece into 3 or 4 lengthwise (depending on the size of the bread) and serve hot with ketchup.
Notes:
  • Frying, Grilling or Baking, place the Bread with the Chicken side down, first on the pan so as to keep much of the juices of the Chicken away from the Bread, thus preventing it from becoming soggy.
  • Do this dish only in medium or medium low flame; otherwise it will brown the bread fast without making it crispy.
  • Do add more Oil in between batches if necessary.
  • Don’t cut the edges of the Bread before frying as it will give some sort of a support  while frying.
  • If the Oil factor is okay with you, then do keep fry. (I should say it will make the Bread really crispy and tasty.)


Make it, enjoy the deliciousness and 
serve it to your family with love…

Saturday, February 26, 2011

Egg Stuffed Cutlets

Recipe No: 205
Cutlets are one of the most popular appetizers among us. Well I should say, if you want your guests to go ‘hmm’, then try this… It can be made using whole hard boiled Eggs and when you serve you can cut them into halves or quarters. But I love to conceal the Egg inside and let the person who eats, discover the secret.
This can be a two in one recipe… The Beef- Potato mixture is the same as of regular Beef Cutlet; when you want it simple, just leave the Egg out. But if you want to take it to another level and surprise your guests, use the Egg for the stuffing.
Ingredients                                        Makes 12
  • Cooked and minced Beef…............1 ½ Cup
  • Hard boiled Eggs……………...........3 (Cut into quarters)
  • Oil……………………………………....….2-3 Tablespoons
  • Garam Masala Powder………........3/4 Teaspoon
  • Pepper Powder………………........….1/2 Teaspoon
  • Coriander leaves chopped…….......2 Tablespoons
  • Potato (Boiled and mashed)….......1 Large (or 1 ½ Cups)
  • Oil for deep frying
  • Salt to taste
To Grind or Chop fine
  • Onion cubed.........................1 cup
  • Garlic……………………………...6 big cloves
  • Ginger………………………….….1 big piece
  • Indian Green Chilly…………..4 big ones
To coat and fry
  • Eggs……………………………….2 beaten with 2 Tablespoons Water and a pinch of Salt
  • Bread Crumbs……………….…1 Cup
Method of Preparation
To make the Meat- Potato mixture
  1. Grind coarsely or chop fine Onion, Green Chilly, Ginger and Garlic.
  2. Heat Oil in a pan and saute the ground mixture until slightly brown, together with a bit of Salt.
  3. Add minced Beef followed by Garam Masala Powder, Pepper Powder and Coriander Leaves. Mix thoroughly.
  4. Off the heat and add the mashed Potato and mix well. Add more Salt if necessary at this point.
To make and fry the Stuffed Cutlets
  1. Divide the Beef - Potato mixture into 12 equally sized balls.
  2. Take one portion and press it with your palms and fingers to make a thin round.
  3. Place a piece of Egg in the middle and cover it with the Beef mixture from the sides so  that the Egg is sealed inside the Beef - Potato mixture. Repeat this with all the 12 portions.
  4. Dip it in the beaten Egg and roll in the Bread crumbs. Keep them aside.
  5. Heat at least two inches of Oil in a pan and deep fry these stuffed Cutlets until golden brown on both sides and serve hot.
Notes:
  • Cook Beef with ¼ teaspoon of Pepper Powder and ¼ Teaspoon of Salt in a pan until the Water oozed out dries up. (Not necessary to cook in a Pressure cooker) Then shred it in a food processor or a blender.
  • If you don't eat Meat, please substitute it with Chicken, Turkey, Soy chunks or Paneer.
  • The Onion and Green Chilly should be very fine; otherwise they will keep coming out of the mixture. I love to add chopped Curry Leaves too while sauteing.
  • In any case if the Beef Potato mixture is sticking, then wet your hands a bit.
  • Cut fresh Bread into small pieces and grind into Crumbs in a food processor or a blender for fresh Bread Crumbs.
  • There shouldn’t be any cracks on the Cutlets otherwise it may splatter while frying.
  • The Cutlets should be immersed in Oil while frying. If you use less Oil the temperature of the Oil will drop once you put the Cutlets which results in over absorption of Oil by the Cutlets.
  • If in any case Oil is only coming up to the sides of the Cutlets, then temperature will increase in the portion of the Cutlet lying in the Oil. This will cause cracks in between these two portions. So a way to avoid this is to turn the Cutlet over after 30 seconds of putting it in hot Oil so that the temperature will be even on both sides which will prevent a lot of cracking.


Make it, enjoy the deliciousness and 
serve it to your family with love…

Monday, February 21, 2011

Chicken Squares

Recipe No: 201
Puff Pastry is one of our family favorites… any savory snacks made from it is a hit at ours…and no difference with this one too…
Ingredients                                   Makes 16
  • Puff Pastry Sheet…………….1 (9 ½ inch square)
  • Egg………………………………..1 (Beat with a tablespoon of Water)
  • Shredded Cheese…………....as needed (I used Cheddar, but any melting Cheese like Mozzarella will work)
For the filling
  • Butter/ Oil………………………..1 Tablespoon
  • Flour…………………………….…3/4 Tablespoon
  • Milk……………………………..….1/2 Cup
  • Cooked, Shredded Chicken...2/3 Cups
  • Salt and Pepper to taste
Method of Preparation
  1. Preheat the oven to 400˚F/ 204˚C.
  2. Cut the Puff Pastry sheet into 16 equal squares (3 cuts at equal distance on both sides).
  3. With a small round Cookie cutter (1 ¼-1 ½ inch in diameter) make a mark on top of each piece. (Don’t press it whole the way through.)
  4. Brush the top of the pastry sheets with the beaten Egg and bake  it in the preheated oven for about 14-16 minutes or till the top of the Puff Pastry is golden brown in color.
  5. Once browned, remove  from the oven and let it cool slightly.
To make the filling
  1. Melt Butter in a pan on medium heat and add the Flour.
  2. Mix and let it fry till the raw smell is gone.
  3. Whisk in the milk taking care to avoid forming lumps. Let it become thick, stirring constantly.
  4. Mix in the Chicken and add Salt and Pepper as needed. Let this cook till it thickens. Switch off the heat and keep it aside till ready to be used.
To assemble and make the Chicken Squares
  1. Once the Puff Pastry Shells are cooled slightly, cut the top along the circular mark with the help of a sharp pointed knife, taking care not to cut till the bottom.
  2. Press the small round with the finger so that it forms a small well.
  3. Fill the well with the Chicken filling and top it with a very small amount of Cheese.
  4. Put this back in the hot oven for a few minutes till the Cheese is melted.
  5. Serve hot.
Notes:
  • While making the filling, use Cold milk and whisk really good to avoid lumps.
  • Take care not to add a lot of Cheese on top of the Chicken for it may cover the top of the Pastry when melted.
  • Instead of Chicken you can use any other filling to make this dish.
  • If the oven is hot from baking the pastry, then you don't have to switch it on again. The residual heat will melt the Cheese.
  • You can make the shells in advance, but fill it and reheat it all the way through just before serving. (Don't fill in advance for it might make the bottom of the pastry soggy.)


    Make it, enjoy the deliciousness and 
    serve it to your family with love…

    Wednesday, February 16, 2011

    Chicken Vada

    Recipe No: 198
    Many a days during my childhood I woke up to this ‘tuk… tuk’ sound from the kitchen, which is my Mother chopping Meat on her wooden cutting board for making Irachi/ Meat Vada. Within seconds I will come to the realization that my maternal Grandfather is visiting that day… yes… it was one of his favorite dishes…
    This is the Chicken version of the delicious Irachi Vada, which has all the flavors of a traditional Vada yet very easy to make.
    Ingredients                                                 Makes 12
    • Skinless, boneless Chicken……..300 grams
    • Shallots chopped fine…………….1/4 Cup
    • Ginger chopped fine………………1 Tablespoon
    • Indian Green Chilly chopped….1 Tablespoon
    • Salt……………………………………..2/3 Teaspoon
    • Curry leaves chopped fine……..4-5 leaves
    • Crushed Black Pepper…………...1/4 Teaspoon (optional)
    • Cooked Rice………………………….1/2 Cup (mashed really good)
    • All Purpose Flour (Maida) or Corn Flour for dusting the patties
    • Oil for deep frying
    Method of Preparation
    1. Chop the Chicken on a cutting board  finely. (I didn’t use a food processor for chopping as it will make the Chicken pasty.)
    2. Mix all the other ingredients except the Oil and Flour with the chopped Chicken  really well.
    3. Make 15 equal portions out of the Chicken mixture. This may be a bit on the sticky side. So wet your hands lightly with Water to avoid sticking.
    4. Make each portion into a ball; press slightly to flatten it and dust lightly with All Purpose/ Maida or Corn Flour.
    5. Heat at least an inch of Oil in a pan and deep fry the Vadas for about 2-3 minutes on each side or until cooked through.
    6. Serve hot with Ketchup.
    Notes:
    •  Cooked Rice is the binding agent here. Don't use Egg instead, as it makes the mixture watery or mashed Potato as it  changes the taste of the dish.
    • As we wet our hands to avoid the chicken sticking, it is essential to dust the Vadas slightly with Flour, otherwise it will splatter in hot Oil.
    • Here I used Chicken breast meat, but Chicken thigh meat is better when it comes to taste (at least for me). If you are using Thigh meat please do give it a minute more to cook.
    • There is a chance for the Chicken Vada to shrink and become more round in shape while frying, so flattening it before frying is essential.


    Make it, enjoy the deliciousness and 
    serve it to your family with love…

    Tuesday, February 8, 2011

    Pork Dumplings with Dipping sauce

    Recipe No: 191
    Dumplings are one of our favorites from Chinese restaurants… This recipe is inspired from the cook book ‘Stir Fry’ by Linda Doeser. I made Wontons many times before using store bought Wonton skins, but the homemade wrapper of this dumpling took me by surprise, that they were soft and much tastier than the Wonton skins, which are usually very thin. Anyway the dish was a huge success at ours and was proved by the  silence with occasional 'hmm's when I put this platter on the dining table...
    Ingredients                                           Makes 20-22
    For the Wrapper
    • All Purpose Flour/ Maida…1 Cup
    • Salt…………………………….….1/4 Teaspoon
    • Water…………………………….1/2-2/3 Cup
    For the Filling
    • Minced Raw Pork…………..150 grams or 1 ¾ Cup
    • Cabbage……………………..…120 Grams Blanched (Put in boiling Water for 2 minutes; drain the Water; dry them on a kitchen towel; chop into small pieces; drizzle ½ teaspoon of Sesame oil and mix. 120 grams will yield 1 heaping cup of blanched and chopped cabbage)
    • Green Onion chopped……...2
    • Ginger chopped fine………..1 teaspoon
    • Salt……………………..…………3/4 teaspoon
    • Soy Sauce……………………….1 Tablespoon
    • Brown Sugar…………………..1/2 Teaspoon
    • Rice Wine………………...…….1/2 Teaspoon (Can substitute with any dry Wine; If you don’t have, just avoid)
    • Pepper powder…………..……1/2 Teaspoon
    To cook the Dumplings
    • Oil…………………………….…..1 Tablespoon
    • Chicken Stock…………..…….1 Cup
    To make the dipping sauce
    • Soy Sauce………………………2 Tablespoons
    • Chilly Garlic Sauce………….1 Tablespoon
    • Vegetable Oil……………….…1 Tablespoon
    • Water……………………………1/4 Cup
    • Brown Sugar……………..…..1/2 Teaspoon
    • Chopped spring Onion…….1 Teaspoon
    Method of Preparation
    To make the Wrapper
    1. Mix Flour and Salt well and make a smooth dough using Water. The dough should be soft yet manageable.
    2. Knead it for 5 minutes. By this time the dough will be soft and the surface will be really smooth.
    3. Cover with a lightly damp cloth and keep aside for 30 minutes.
    To make the Filling
    1. Mix all the ingredients to make the filling and keep aside till ready to be used.
    To make the Dumplings
    1. Divide the rested dough into 20-22 equal sized balls.
    2. Roll out these into 3 inch circles. Use Flour if it is sticking.
    3. Place a tablespoon of filling in the middle of the rolled out dough and fold one half over the other. Take care to remove the air bubbles that may be trapped inside.
    4. Once the edges are stuck together make pleats with the dough on the outer edge of the dumpling.
    5. Place this on a lightly floured plate and repeat this process with all the other portions.
    To cook the Dumplings
    1. Heat Oil in a pan on medium high heat and place the dumplings with the broad side touching the pan.
    2. Fry the dumplings for about two minutes or till the broad side is brown in color.
    3. Pour the Chicken stock into the pan; close it; reduce the heat to medium and let it finish cooking with the steam from the stock for around 8 minutes.
    4. If there is a lot of stock left, open the pan and let the excess liquid evaporate.
    5. Off the heat and serve the dumplings with the dipping sauce. Pour the thick stock left in the pan (if any) over the dumplings while serving.
    To make the Dipping Sauce
    1. Mix all the ingredients except the Spring Onions to make the sauce and heat in the microwave or on the stove top till the sugar is dissolved thoroughly. 
    2. Mix in the Spring Onions and serve with Dumplings.
    Notes:
    • Blanching the Cabbage leaves will get rid of the excess Water in them.Coating chopped Cabbage with Sesame Oil will prevent the mix from becoming watery.
    • I found that it is easy to form Wontons if the rolled out skins rest for a while. So I’ll prefer to roll all of them and then start to form Dumplings with the first one that is rolled. As the skins are a bit sticky don’t place one on top of another.
    • Do shake the pan often while frying the dumplings to avoid sticking to the bottom. In case it sticks, help it out with a spoon while transferring to the serving plate.
    • Chilly Garlic Sauce is available in most of the Indian stores.
    • I used Kikkoman Soy Sauce in this recipe.


    Make it, enjoy the deliciousness and 
    serve it to your family with love…

    Tuesday, January 25, 2011

    Mushroom Cutlet

    Recipe No: 177
    • Mushrooms…………………….…350 grams (approximately 4 cups chopped)
    • Oil………………………………..…..2 Tablespoons
    • Onion chopped fine…………….1 Cup
    • Indian Green Chilly……………2 (chopped fine)
    • Ginger Garlic paste…………….2 Teaspoons
    • Turmeric Powder……………….1/2 Teaspoon
    • Pepper Powder…………………..1/2 Teaspoon
    • Garam Masala Powder……….1/3 Teaspoon
    • Coriander Leaves chopped….2 Tablespoons
    • Salt as needed
    • Potato……………………………...2 small (approximately 1 1/4- 1 ½ Cup mashed)
    • Egg………………………………....1 (Beat with a Tablespoon of Water)
    • Bread Crumbs…………………..1/2 – ¾ Cup
    • Oil for deep frying
    Method of Preparation
    1. Heat Oil in a pan on medium heat and saute Onion and Green Chilly till they are translucent.
    2. Add Ginger Garlic paste and saute till the raw smell is gone.
    3. Add chopped Mushrooms and fry till it is slightly browned for about 10 minutes on medium heat. By this time all the Water will come out of the Mushrooms and they will be reduced a lot.
    4. Add Salt, Turmeric Powder, Pepper Powder and Garam Masala Powder and saute for a minute.
    5. Sprinkle the Coriander Leaves and switch off the heat.
    6. Add boiled and mashed Potatoes to the Mushroom mixture and mix  till everything is combined well. Add more Salt and Pepper if needed at this stage.
    7. Divide this mixture into 12 equal portions and make it into desired shapes.
    8. Dip the cutlets in Egg and roll in Bread Crumbs.
    9. Heat at least an inch of Oil in a pan on high heat and fry the Cutlets until golden brown and serve hot.
    Notes:
    • Mushrooms tend to absorb a lot of Oil like a sponge while sauteing. But once sauteed, it will give out some of that Oil. So don’t add more than 3 tablespoons of Oil in total , otherwise, the mixture will become too oily.
    • Try to chop Mushrooms into small pieces.
    • Add Salt only after the Mushrooms had reduced or there are chances that you may misjudge the amount of Salt seeing the huge amount of Mushrooms which will actually reduce considerably.
    • The Cutlets should be immersed in Oil while frying. If you use less Oil the temperature of the Oil will drop once you put the Cutlets which results in over absorption of Oil by the Cutlets.
    • If in any case Oil is only coming up to the sides of the Cutlets, then temperature will increase in the portion of the Cutlet lying in the Oil. This will cause cracks in between these two portions. So a way to avoid this is to turn the Cutlet over after 30 seconds of putting it in hot Oil  so that the temperature will be even on both sides which will prevent a lot of cracking.
    • Please use Mushrooms as fresh as possible.


    Make it, enjoy the deliciousness and
    serve it to your family with love...

    Tuesday, December 28, 2010

    Chicken Wings Indian Style

    Recipe No: 153
    Wings are one of our family favorites. I was thinking of making it with an Indian twist for some time and this is the result. I should say this has a Manjurian flair to it which will be very appealing to an Indian palate.

    A whole Chicken Wing has three parts a Drummette, the part that attaches the wing to the shoulder (the part with most meat in a wing) a Wingette, the part between Drummette and the tip (part which have two bones) and the tip which is not so good for eating but very good for making Chicken stock. The Drummette and Wingette can be separated easily by cutting through the attachment and these separated parts are what we need in this recipe. (Reserve the tips for making Stock)
    Ingredients                                  Serves 3
    • Wing pieces………………………..12 (Drummetts and Wingetts separated)
    • Oil for deep frying
    To marinate
    • All Purpose Flour/ Maida……..1 Teaspoon
    • Corn Flour……………………….…1Teaspoon
    • Rice flour……………………………1 Teaspoon
    • Ginger Garlic Paste………………1/2 Teaspoon
    • Salt………………………………..….3/4 teaspoon
    • Soy Sauce……………………………1 Teaspoon
    • Red Chilly Powder………………..1/2 Teaspoon
    • Egg…………………………………....1 beaten
    To Make the Sauce
    • Oil………………………………………2 Tablespoons
    • Garlic chopped……………………..2 Tablespoons
    • Spring Onion Chopped……..…..2 (separate Whites and Greens)
    • Sambal Oelek…………………….….1/2 Teaspoon (If not available use Red Chilly Flakes or crushed Red Chilly)
    • Red Chilly Garlic Sauce…………1 Tablespoon
    • Soy sauce……………………….…..1 ½ Teaspoons
    • Tomato Ketchup…………….……1 Tablespoon (Can substitute with Tomato Sauce)
    • Vinegar……………………….……..1 Teaspoon
    • Sugar………………………….………1/2 Teaspoon
    • Coriander Leaves Chopped.…..2 Tablespoons
    • Corn Starch…………………..…….3/4 Teaspoon diluted in ¼ Cup Water
    • Salt as needed
    Method of Preparation
    1. Clean the Chicken Wings and dry it thoroughly.
    2. Make a marinade with all the ingredients mentioned in the ‘to marinate’ section and marinate the Wings; keep it aside for 20 minutes.
    3. Heat at least 2 inches of Oil in a pan on medium high heat and deep fry the Wings until crispy.
    4. Drain the excess Oil on a paper towel.
    5. In another pan heat 2 tablespoons of Oil on medium high heat and saute the Garlic and Spring Onion Whites for about 40 seconds. Take care not to burn it.
    6. Add Sambal Oelek and saute for 30 seconds.
    7. Add Red Chilly Garlic Sauce, Soy Sauce, Ketch up, Vinegar, and Sugar; mix well. Check the Salt content and add if more needed.
    8. Add the fried Chicken Wings and mix well followed by Coriander leaves and Spring Onion Greens.
    9. Once mixed well, drizzle the Corn Starch Water and combine as fast as possible.
    10. Once coated well, move it to a serving dish and serve hot.
    Notes:
    •  If you don't want to deep fry the Wings, do broil it in the Oven.
    • While making the sauce, add Salt only after adding all the sauces as most of them contains Salt.
    • Do keep everything ready before you start making the sauce as the whole process is very fast.
    • Sambal Oelek is Red Chilly Paste in Vinegar and is found in the International section of all grocery stores.
    • Red Chilly Garlic Sauce is available in most of the Indian stores.


    Make it, enjoy the deliciousness and 
    serve it to your family with love…