Creating a blog was out of the question for a long time for me, as measuring everything in the kitchen was like biting into an eggshell. I enjoy cooking and don’t want to waste even a slightest bit of enjoyment in that small world of mine. But little did I know that everything will change, when my husband came home with the Oscar nominated film ‘Julie and Julia’( a real life story) where Julie Powell (part played by Amy Adams) challenged herself to make all the 524 recipes from Julia Child's cook book ‘Mastering the Art of French Cooking’ and blogging all her experiences (The Julie/Julia Project). It was an inspiring movie. A few days later when we were discussing this casually with a friend of ours over tea…everything changed dramatically…..” How about you making at least half of it in one year? Not French but your own. 262 recipes that will inspire others and present it as a blog?” For a minute my mind traveled faster than light… With an experience as a helper in my mother in laws kitchen for 6 years followed by a three year everyday struggle to satisfy the palate of my foodie husband, if I cannot do it then why should I cook? But on the other side with an experience in English literature extending no more than expanding outline stories in English grammar class when I was 18 and two small kids that come in handy at times, will a commitment for the next one year work? Anyway my ‘cook's ego’ didn’t allow me to say no...

So my friends …here I am opening my recipe book, trying to perfect and present 262 recipes in the coming 365 days….A Challenge that will of course tastes good. Come.. Have a walk with me along my journey.. Cheering and inspiring….Forgiving and tolerating…Testing and tasting….for ‘A Tasty Challenge’

Search This Blog

Showing posts with label Soups and Salads. Show all posts

Tuesday, February 21, 2012

Chicken Chili

Recipe No: 287
This is my version (also Chicken) of the American dish ‘Chili’ which is usually made with Beef. This recipe is a combination of Chicken and Red Kidney Beans (Rajma) with an outstanding Cumin flavor. Well, if you are not a Beef person, you can try this… Here is Chicken Chili that suits an Indian palate...
Ingredients                                      Serves 4-5
  • Oil………………..................……2 Tablespoons
  • Ground Chicken….................1 lb
  • Onion chopped fine……........2/3 cup
  • Garlic chopped fine….....……4 big ones
  • Green Chilly chopped fine….1
  • Bell peppers chopped fine….1/2 cup (Capsicum; I used red and green ones)
  • Rajma……………………………...1/2 Cup (Red Kidney Beans; washed and soaked overnight in 2 cups water)
  • Tomato chopped…………....…1 medium
  • Tomato Sauce……………….....1/2 Cup
  • Red Chilly Powder…………....1 Teaspoon (Use more if you want)
  • Cumin Powder………………....1/2 Teaspoon
  • Oregano……………………….....1/2 Teaspoon (If you don’t have this please skip; but I see them in Kerala cooking shows now a days.)
  • Corn Starch…………………......1 Teaspoon
  • Salt as needed
Method of Preparation
  1. Heat Oil in the pan of a pressure cooker (If you want to wash more dishes, please feel free to use another pan!!!) on high heat and fry the minced Chicken with Salt, stirring and separating the Chicken.
  2. Once the Chicken changes its color, add Onion, Garlic, Green Chilly, Bell Peppers/ Capsicum and the soaked Rajma (reserve the soaking liquid) and sauté for 2-3 minutes.
  3. Add Tomato, Tomato Sauce, Red Chilly Powder, Cumin Powder and Oregano; add 2 ½ Cups of Water (Use the Rajma soaking Water now); mix well; close the pan and cook till 2 whistles.
  4. Once the pressure subsides, open the cooker; switch on the heat again (put the flame on medium ) and adjust the seasonings and the level of the liquid. (You need some gravy, but not too much. With the amount mentioned in the recipe, I didn’t add more; but it depends on the Pressure Cooker too.)
  5. Mix the Corn Flour in ¼ cup Water and add to the Chili once it is boiled. Mix well and let it boil and thicken for a minute.
  6. Off the heat and serve hot with desired toppings. (I used chopped Onion, Grated Cheese and sliced Green Onions.
Notes:
  • Tomato sauces generally come in cans and are different from Ketchup.  It is not sweet and in case you don’t have it, please blend 2 Tomatoes without the seeds (Seeds increases its sourness) and use.  But the canned Tomato Sauce gives a nice color and texture.
  • Cooking Rajma/ Kidney Beans and Chicken together in the Pressure Cooker works only if the Rajma is soaked properly. So it is advised to do that. Otherwise you have to cook the Beans separate (or use canned Beans) and add it to the Chili once the Chicken is cooked and let them cook together for about 10 minutes.
  • If you are cooking the Kidney Beans/ Rajma separate, please cook it only till soft. Over cooked Beans (It will be a bit slimy) are not good in this preparation.
  • You can use any kind of Beans for this preparation but adjust the cooking time accordingly.
  • Chili can be eaten by itself, serve over Chips or even Rice, over Burgers or hot dogs…. Let your imagination work...


Make it, enjoy the deliciousness and 
serve it to your family with love…

Monday, May 2, 2011

Sweet Corn Chicken Soup

Recipe No: 250
This is one of our favorite soups to have whenever we eat out in Kerala. Not only is this easy to make, but a bowl of this on a rainy day (like today) makes us so 'at home'...
Ingredients                                             Serves 3-4
  • Sweet Corn (cream style)….14.75 oz/ 418 grams
  • Butter……………………………..1 Tablespoon
  • Carrot chopped fine…………2 Tablespoons
  • Onion chopped fine………….2 Tablespoons
  • Celery chopped fine………….2 Tablespoons
  • Chicken stock………………....3 1/2 Cups (I used homemade; for recipe click here)
  • Cooked, shredded Chicken...1/2 Cup
  • Egg………………………………....1, beaten well with a tablespoon of Water
  • Light Soy Sauce…….............2 Teaspoons (I used Kikkoman; if using Indian dark Soy use 1 teaspoon)
  • Salt and Pepper to taste
Method of Preparation
  1. Heat Butter in a pan on medium heat and saute Onion, Celery and Carrots for a minute (don’t brown).
  2. Add Corn together with Chicken stock and let it cook for 5-8 minutes. (There are chances of boiling over if you are not using a big pan)
  3. Add Shredded Chicken, Salt, Pepper and Soy sauce; mix well.
  4. While the soup is rolling boiling, add the beaten Egg in a thin steady line from top while stirring continuously as I explained in Egg drop soup. (Read more about Egg Drop Soup here.)
  5. Once boiled again, look for seasonings; switch off the heat and serve it hot with a piece of crusty Bread.
Notes:
  • Cream Style corn is different from Creamed Corn. Cream style Corn from American grocery stores tend to be on the sweeter side, so if you can get it from an Indian grocery store it will be better for this Soup. If you have no problem with the sweetness, this does not matter or you can decrease the amount of corn used to reduce the sweetness.
  • Don't use regular Corn for this as it is not creamed.
  • The Egg, if poured like I mentioned above, will be cooked instantly and will stay in the Soup as very fine threads. It will thicken the Soup too.


Make it, enjoy the deliciousness and
serve it to your family with love…

Tuesday, April 12, 2011

Fish/Tuna Cakes with Cabbage Salad/ Coleslaw

Recipe No: 235
This is Fish Cakes my way, with an Indian touch  with Garam Masala and Coriander Leaves. The first time I made this dish, I was amazed by how much it taste different from Fish Cutlets and how the browned outside and edges compliments the taste! Usually I make this from canned Tuna and I have to say that this may be one of the best make over a canned Fish can get.
Coming to the Coleslaw/ Cabbage Salad, it complements the Fish Cakes really well and not to mention that Cabbage is one of those Vegetables that has very low calories.
Ingredients                                      Serves 4
To make the Fish Cakes
  • Oil……………………………...........2 Tablespoons
  • Onion chopped…………...........1 Cup
  • Indian Green Chilly…............1 (chopped fine)
  • Garlic ………………………..........3 Big (chopped fine)
  • Ginger………………………..........1 small piece (chopped fine)
  • Cooked Fish/Canned Tuna…400 grams / 14 oz (Boneless; drained)
  • Coriander Leaves………….......2 Tablespoons (chopped)
  • Garam Masala Powder….......1/4 Teaspoon
  • Pepper Powder……………….....1/4 Teaspoon
  • Eggs………………………………....2 Large
  • Bread Crumbs………………......2/3 Cup
  • Salt to taste
  • Oil for shallow frying
To make the Coleslaw
  • Cabbage shredded thin….......2 Cups
  • Carrot shredded thin…….......1/4 Cup (Use the big holes of a box grater to grate the Carrots.)
  • Mayonnaise……………………...2-3 Tablespoons
  • Black Pepper Powder……......1/4 Teaspoon
  • Salt to taste
Method of Preparation
To make the Fish Cakes
  1. Heat 2 tablespoons of Oil in a pan on medium high heat and saute Onion, Ginger, Garlic and Green Chilly with some Salt until translucent.
  2. Add Fish/ drained Tuna, Coriander Leaves, Garam Masala Powder and Pepper Powder; mix well to break the Fish pieces. (If there are traces of Water, let it evaporate.) Do a taste test (The Salt level should be a bit high at this stage, as we will be adding stuffs later and it is better not to taste after adding raw Eggs.) and add more Salt if needed.
  3. Switch off the heat and let it cool down lightly before adding Eggs and Bread Crumbs. Mix well and let it sit for 5 minutes before making the Fish Cakes. (The mixture will be a bit soft, but due to the presence of Eggs it will become hard enough to handle once cooked.) Divide this into 8 equal portions.
  4. Heat 2 Tablespoons of Oil in a pan on medium heat.
  5. Take a portion of the Fish Cake mixture; flatten it in your palm and fry on both sides till they are browned. (I like the Cakes pretty thin)
  6. Once browned, allow the excess Oil to drain on a paper towel before serving it warm with Cabbage Salad.
  7. Fry the rest of the Fish Cakes in batches and add more Oil in between if necessary.
To make the Cabbage Salad/ Coleslaw
  1. Mix all the ingredients given in the section and serve with Fish Cakes.
Notes:
  • If using canned Tuna, do drain the liquid out thoroughly before using.
  • If using fresh Fish, do cook it with a pinch of Salt and Pepper; remove the bones and shred with your hands.
  • Grind small pieces of Bread in a Grinder/ Food processor to make fresh Bread Crumbs at home. It is not necessary to toast the Bread slices. The same thing can be easily done in a blender too.
  • The Fish Cake mix is a bit soft but easily manageable. If in case it stick to your hands, do wet them very lightly. (It may not be necessary though.)
  • The outside browned portions of the Fish Cake gives it a very special taste.
  • Don't use high heat while frying the Fish as the Egg in the Cakes have to be cooked and I find that the Cake tastes better when fried on a low heat.
  • It is better to mix the ingredients to make the Coleslaw just before serving. Otherwise the Salt may drain the Water out of the Veggies and also the color of Carrot may spread throughout the Salad.


Make it, enjoy the deliciousness and 
serve it to your family with love…

Monday, February 14, 2011

Sautéed Spinach n Chickpea with Quail Eggs

Recipe No:196
This can be served as a side dish to Rice or Chappathi as well as a Warm Salad. The Eggs are completely optional, so whether to use it or not is entirely up to you but, I think the presence of Eggs makes this dish complete.
Ingredients                                             Serves 2
  • Oil………………………………..1 Teaspoon
  • Shallots sliced……………....2 big
  • Garlic sliced………………....1 big
  • Dry Red Chilly………………2 crushed
  • Spinach………………………..3 Cups (Washed and drained thoroughly)
  • Cooked Chickpea………....1/2 cup (Channa)
  • Hard Boiled Quail Eggs….4
  • Salt to taste
Method of Preparation
  1. Heat Oil in a pan on medium heat and fry the Shallots and Garlic till transparent.
  2. Add the dry Red Chilly, followed by Spinach and cooked Chickpea.
  3. Mix everything together and cover the pan for two minutes or until the Spinach is wilted thoroughly.
  4. Open the pan and let the excess Water (if any) evaporate.
  5. Add Salt and the cooked Quail Eggs; saute everything together for a minute and serve hot.
Notes:
  • Add Salt only at the end or you may add more seeing the amount of Spinach which will reduce considerably.
  • If you are a vegetarian, please avoid Eggs. 
  • I used baby Spinach in this recipe.
  • Quail Eggs are available in most of the stores that sells Asian groceries.


Make it, enjoy the deliciousness and 
serve it to your family with love…

Monday, January 10, 2011

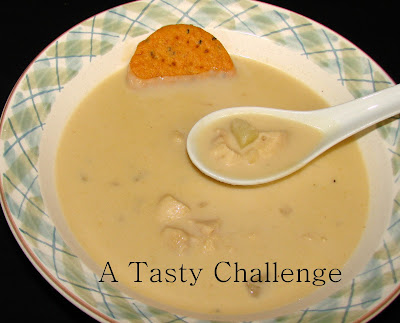
Chicken Chowder! (A ‘Clam Chowder’ inspired Chicken Soup)

Recipe No: 166
This Soup is inspired by Clam Chowder, which is a Soup made with Clams (A bivalve like Oyster) and is slightly similar to the Cream of Chicken Soup in its look, but the ingredients are basically what are there in a Chowder.

Ingredients                                       Serve 3
  • Oil and Butter…………………………...2 Tablespoons each
  • Garlic chopped………………………....3 big cloves
  • Celery chopped………………………....1/4 Cup
  • Onion chopped………………………….1/2 Cup
  • All Purpose Flour/ Maida……………3 ½ Tablespoons
  • Potato cubed…………………………....1 heaping cup
  • Boneless skinless Chicken cubed…1 Cup
  • Chicken Stock……………………………3 Cups
  • Heavy Cream………………………….…1 Cup
  • Salt and Pepper to taste
Method of Preparation
  1. Heat Butter and Oil in a pan on medium high heat and saute Garlic followed by Celery and Onion.
  2. When the Onion is translucent, lower the heat and sprinkle Flour and fry till the raw smell is gone.
  3. Once the smell of fried Flour comes, add Chicken Stock and stir continuously so that the Flour forms no lumps.
  4.  Add cubed Potatoes, Chicken, Salt and Pepper and cook till the Chicken and Potatoes are done.
  5. Add Cream and allow it to boil along the edges.
  6. Serve warm with Cheese Crackers or Crusty Bread.
Notes:
  • In this recipe both Oil and Butter are used. Butter is used for its flavor while Oil is used for its higher smoking point (so that we can saute without burning).


    Make it, enjoy the deliciousness and 
    serve it to your family with love…

    Sunday, December 26, 2010

    Russian Salad

    Recipe No: 149
    This is my version of the Russian Salad that I ate from the restaurant Oasis in Kedaram Shopping Complex in Thiruvananthapuram. The thing I love most about this salad is the presence of a fruit along with the other Vegetables, which makes it one of those dishes that have both sweet and savory elements. I had this same dish from the same restaurant with different fruits like Orange and Pineapple (only one fruit at a time), but I should say my favorite is always the one with Pineapple.
    Ingredients                                       Serves 2
    • Carrot cut into cubes……….....1/2 Cup
    • Beans cut into cubes……………1/2 Cup
    • Potato cut into cubes…………..1/2 Cup
    • Pineapple cut into cubes…..….1/3 cup
    • Hard boiled Egg…………….……1, quartered
    • Mayonnaise……………………….2 ½ Tablespoons
    • Salt and Pepper to taste
    Method of Preparation
    1. Bring Carrots, Beans and Potatoes with ¼ cup water to a boil and then lower the heat to low and let it cook. The Vegetables should be just cooked. Drain if there is excess water.
    2. Let the Vegetables cool down a bit and mix Pineapple, Mayonnaise, Salt and Pepper.
    3. Transfer it to a serving dish and arrange Egg on top.
    4. Serve warm or cold.
    Notes:
    • Don't over cook the Vegetables or it will mash while mixing.  It should be only just cooked.
    • Don’t mix Mayonnaise when the Vegetables are very hot or Mayo will lose its consistency.
    • If you are on a diet, please use low fat Mayo. (Don’t substitute Mayo with Yogurt in this recipe.)


    Make it, enjoy the deliciousness and
    serve it to your family with love…

    Monday, December 13, 2010

    Spinach Soup with Croutons

    Recipe No: 141
    Hearing the name and color don’t think that it tastes healthy…Even though it is healthy it tastes very good. This is something great when you want to have a vegetarian soup and if kids are attracted to that bright green color then you are lucky, you can get some good stuff into your kids without much effort. Croutons are an addition to this recipe and if you want to avoid that, please use toasted bread instead.
    Ingredients                                     Serves 2
    For the Soup
    • Spinach……………………1/2 Pound or approximately 225 grams
    • Onion chopped………….1/2 Cup
    • Cream…………………….. ½ Cup (I used ¼ Cup Cream and ¼ Cup low fat milk)
    • Salt and Pepper to taste
    • A Teaspoon of Cream, Croutons and some cheese for decoration (optional)
    For Croutons
    • Bread cubes………………..1 Cup (A crusty day old bread is most suited)
    • Roasted Garlic Butter….1 Tablespoon (For recipe click here. If you don’t have that, use Butter together with some freshly mashed Garlic)
    • Salt and Pepper…………..a pinch each
    Method of Preparation
    1. Boil washed and drained Spinach and Onion with ¼ Cup water for 3 minutes or till Spinach is wilted thoroughly. If you are using freshly washed Spinach, please avoid Water.
    2. Blend this in a blender until smooth but thick. Avoid using more Water if possible.
    3. Boil the blended Spinach in a pan on medium high heat and add Cream, Salt and Pepper. Let it warm through.
    4. Serve it hot with the desired toppings. I used Croutons, Cream and some grated Cheese.
    To make the Croutons

    1. Mix Bread, Butter, Salt and Pepper in a pan and heat it on low heat. Don’t let the Bread cubes pile up. Use a pan which is wide enough, so that the bread forms a single layer.
    2. Fry this till the bread is toasted and crispy, turning now and then.
    3. This will take anywhere between 20 to 30 minutes. 
    4. Once cooled thoroughly, store it in an airtight container.
    Notes:
    • Those who want to have the low fat version, use Milk instead of Cream, but Cream gives that thick texture of this Soup. I usually use half milk and half Cream. But if you can get some fat free evaporated Milk that will be a very good substitute for Cream.
    • Please don’t rush the making of Croutons because if you do, the bread will burn and the Croutons will lose its crispiness fast.
    • A day old Bread is best for this. If you don’t have old Bread, just let the Bread cubes sit on the counter top for 1 or 2 hours.
    • It is not advised to make this with soft white bread as it is difficult to make it crispy. Use crusty Breads like Sourdough or a French loaf.


    Make it, enjoy the deliciousness and 
    serve it to your family with love…

    Sunday, November 21, 2010

    Wonton Soup and Freezing Wontons

    Recipe No: 127
    This is a Chinese style soup and I should say very tasty. This uses both Pork and Shrimp and ideally Pork should have some amount of fat. But personally I am not a ‘Pork Fat’ person, so mostly I use Pork with less fat. So if you want your Wontons melt in your mouth, include some fat but even without that it is an awesome tasting Soup. It is also very easy to freeze this Wontons so that  homemade Wontons are ready in your refrigerator to make Soup on a cold and lazy Winter evening. This recipe is adapted from Linda Doeser's 'Wok and Stir Fry ' with some modifications.
    Ingredients                                                                  Serves 5
    • Ground Pork………………………….1 Cup (around 200 grams)
    • Shrimp……………………………….…6 big ones cleaned, deveined and chopped finely
    • Light Brown Sugar………………..1 Teaspoon (If not available, use grated Jaggary)
    • Rice Wine…………………………..…1 Tablespoon (If not available,use any dry white wine)
    • Soy Sauce…………………………..…2 Tablespoons divided
    • Green/Spring Onion chopped….1 Tablespoon
    • Ginger chopped finely………….…1 Teaspoon
    • Wonton wrappers…………………..30
    • Chicken Stock…………………….…3 Cups
    • Sliced Green/Spring Onion for garnish
    Method of Preparation
    1. Combine together Pork, Shrimp, Brown Sugar, Rice Wine, one tablespoon Soy Sauce, Chopped Green / Spring Onion, and Ginger. Keep it aside for 20 minutes till all the flavors mingle.
    2. Place ¾ teaspoon of filling in the middle of the Wonton wrapper.
    3. Wet the edges of the wrapper with water and press all the edges together with your fingers to seal. Make all the Wontons like this.
    4. Heat 3 Cups of Chicken Stock till rolling boil, add 20 Wontons and cook for 5-7 minutes.
    5. Add one tablespoon of Soy Sauce, mix well, switch off the stove and transfer the Soup to individual serving bowls.
    6. Garnish with Spring/ Green Onions and serve hot.
    Notes:
    • The no of Wontons to be served per portion depends on you. Anywhere from 3 to 5 Wontons per serving is fine.
    • Usually I cook one Wonton extra per person if in case any of the Wontons open up in the Stock and become unable to be served. But if closed properly by pressing the tips of the Wontons tightly, then I am sure it will not open up.
    • Working with Wontons wrappers are tricky, as it dries out pretty fast. So take only one by one out of its cover or make sure to cover the extra ones with a damp cloth if it is out of its cover.
    • From this amount you will get 30-32 Wontons. Use only 18-20 for this recipe. Freeze the rest so that Wontons are ready in your fridge when you crave for this Soup the next time.
    • Wonton wrappers are available in the frozen section of most of the grocery stores. Both square and round ones work perfectly.
      To Store the extra Wontons
      • Place the extra Wontons without touching each other on a lightly floured plate or tray and keep in the refrigerator for 10-12 hours. By this time each of them will be individually frozen.
      • Once individually frozen, put them in a Zip Lock bag and store it in the Freezer. 
      • If you skip on individually freezing the Wontons, then they will form one frozen mass.
      • When ready to be used the next time, let then thaw on a lightly floured plate without touching each other, covered with a damp cloth and make Soup as stated above.


      Make it, enjoy the deliciousness and 
      serve it to your family with love…

      Wednesday, November 3, 2010

      Roasted Tomato Soup

      Recipe No: 111
      I used to make Tomato soup now and then but then I decided to roast the Tomatoes before making the Soup. It was just for fun at first but I was amazed to see how much sweeter the Tomatoes will become once it is roasted. This is a very delicious yet nutritious soup that is perfect for a cold winter night.
      Ingredients                            Serves 2
      • Tomato…………………......5 Large (I prefer Roma Tomatoes)
      • Balsamic Vinegar…......…1 Tablespoon (If you don’t have that use ½ Tablespoon white Vinegar)
      • Oil……………………….........1 Teaspoon
      • Onion cut into wedges…1/2 big
      • Salt and Pepper to taste
      Method of preparation
      1. Preheat the oven to 400˚F/200˚C
      2. Cut the Tomatoes into two. Place Tomato and Onion on a baking sheet; drizzle with Balsamic Vinegar and Oil and Roast in the Oven for 45 minutes.
      3. Put the roasted Tomato and Onion in a blender and blend into a smooth paste. Strain it through a strainer with wide mesh to remove the seeds and the skin.
      4. Heat the tomato pulp in the stove, add Salt and Black Pepper and serve hot.
      Notes:
      • It is very necessary to use a wide meshed strainer as we need the pulp and at the same time have to remove the seeds and the skin.
      • I prefer Roma Tomatoes as they have a very less liquid content when compared to may other varieties.


      Make it, enjoy the deliciousness and 
      serve it to your family with love…

      Wednesday, October 20, 2010

      Cucumber and Lamb Soup

      Recipe No: 101
      The inspiration for this soup is from a cook book by Linda Doeser.  Lamb and Cucumber are some how considered as a real good combination especially in Middle Eastern cuisine.  The quality of this soup depends entirely on the quality of Chicken Stock. So please make your own or use a good variety from your super market. Please don’t use Chicken broth which is milder than Chicken stock.
      Ingredients                                     Serves 4
      To Marinate
      • Lamb thinly sliced……….1/2 Cup
      • Soy sauce……..…………….1/2 Tablespoon
      • Rice Wine…………..……….1/2 Teaspoon (Optional)
      • Sesame Oil……..…………..1/2 Teaspoon
      To Make the Soup
      • Chicken Stock……….…….3 Cups
      • Cucumber Slices…..……..1 Cup
      • Rice Vinegar……………….1/2 Tablespoon (If not use ¼ Teaspoon White Vinegar)
      • Soy Sauce………………...…A Dash
      • Salt and Pepper to taste
      Method of Preparation
      1. Marinate the Lamb pieces with the ingredients mentioned in the Marinade section and keep aside for 30 minutes. After 30 minutes drain the excess marinade if any.
      2. Bring the Chicken stock to a rolling boil and add the Lamb pieces. Mix well to separate the Lamb pieces.
      3. Let it boil for 2 minutes and add the Cucumber Slices.
      4. Once boiled add Vinegar, Soy Sauce, Salt and Pepper.
      5. Serve the Soup while it is piping hot.
      Notes: 
      • Don't cook the Soup for too long after adding the Cucumbers or they will disintegrate. 
      • As the Lamb pieces are really thin it will cook within minutes.


        Make it enjoy the deliciousness and 
        serve it to your family with love…

        Friday, October 15, 2010

        Masala Fried Quail Egg Salad

        Recipe No: 97
        “Salad making is an art.” These are not a 'once said' golden words from a famous person. These are the words that my husband uses to show his resentment whenever I make a salad for dinner… So in order to put a temporary halt to his resentment and tempt to him to eat a salad... well I need some extra ordinary measures. This one came as a first step in mastering that 'art'….inspired from a picture in a cook book….
        Ingredients                                         Serves 1
        • Hard Boiled Quail Eggs……..3
        • Lettuce…………………………...3 Medium sized leaves (Tear by hands)
        • Shallots………………………...…3 (Slice into thin rounds)
        • Garlic……………………………...1 Clove (Slice into thin rounds)
        • Dry Whole Red Chilly…….....1 (Split into two with your hands before using)
        • Oil……………………………….....1/2 Teaspoon + for deep frying the egg
        For the Masala Powder
        • Red Chilly Powder………...…1/8 Teaspoon
        • Coriander Powder……………1/8 Teaspoon
        • Turmeric Powder…………….A Pinch
        • Roasted Cumin Powder……1/8 Teaspoon
        • Garam Masala Powder…….1/8 Teaspoon
        • Salt………………………………...1/8 Teaspoon
        For the Sauce
        • Brown Sugar………………...4 Tablespoons
        • Worcestershire sauce…….2 Tablespoons
        • Tamarind Water………...…4 Tablespoons
        Method of Preparation
        To make the Sauce
        1. Boil the ingredients to make the sauce in a pan on medium high heat. Once the sugar is melted lower the heat to medium low and let it simmer till the sauce become a syrupy consistency. Keep aside till ready to be used.
        To make Masala Fried Eggs
        1. Mix the ingredients for the Masala and coat the eggs. Keep the remaining Masala aside for later use.
        2. Heat oil for deep frying on high and fry the eggs for a minute or till the outer side of the egg attains a light brown color. 
        3. Drain the excess oil on a paper towel. When it is still hot sprinkle the remaining Masala on the Egg and keep aside till ready to be used.
        To make the fried Shallots
        1. Heat ½ Teaspoon of Oil in a pan and fry sliced Shallots, Garlic and Dry Red Chilly till golden brown.
        2. Drain the excess Oil if any.
        To Assemble the Salad
        1. Arrange the Lettuce in the bottom of a plate and place the fried Eggs on top.
        2. Sprinkle the fried Shallot mixture on top of the salad followed by a drizzle of the Tamarind sauce.
        3. Serve while the Eggs are still hot.
        Notes:
        • If Quail Eggs are not available substitute it with one regular Egg and don’t forget to quarter it before serving.
        • The Tamarind Sauce should be sweet, sour and salty. Adjust the amount of ingredients according to your taste. 
        • The Tamarind Sauce will thicken when it cools down. So switch the stove off a bit in advance. If in case it thicken a bit too much, add a tablespoon of water to loosen it  just before using.


        Make it, enjoy the deliciousness and
        serve it to your family with love...

        Thursday, September 9, 2010

        Chicken Egg Drop Soup

        Recipe No: 72
        This is a very light and refreshing soup that should be served hot. It’s perfect for cold winter nights. This is one of my family’s must order when we visit Chinese restaurants.
         I usually make homemade stock from Chicken bones whenever I make this at home. Apart from the other soups there are only very few ingredients in this one other than the stock. So a strong tasting Chicken stock is essential in this particular recipe. In order to attain that strong taste, I usually add some extra bones when I make stock for this soup to my usual  stock recipe.(For the original homemade Chicken soup recipe click here) If the ingredients are ready it will practically take only a few minutes to put together this fabulously comforting soup.
        Ingredients                                                Serves 3
        • Homemade Chicken Stock……............…3 Cups (Don't forget to add some extra bones)
        • Cooked and shredded Chicken pieces….1/4 Cup
        • Egg…………………………........................…2 (Beat with 3 Tablespoons of water)
        • Soy sauce……………………........................1 Tablespoon(or as per taste)
        • Salt and pepper to taste.
        Method of Preparation
        1. Heat the Stock and shredded Chicken pieces together till boiling.
        2. To this boiling stock, add beaten egg in a very thin stream form some distance above with one hand while you continuously stir the soup with the other hand. The egg that falls into the boiling soup will cook so fast that it will form tiny threads which are very much a characteristic feature of egg drop soups.
        3. Add soy sauce and adjust salt and pepper to your taste and serve hot.
        Notes:
        • The amount of Soy sauce depends on your taste. Add more or less to suit your palate.
        • Diluting the egg with some water is important as it helps the egg flowing in a very thin stream. If not there is a tendency for some of the egg white to fall together that will result in huge lumps of cooked egg which is not so desirable.
        • It is very essential to stir the soup while dropping the egg. This will separate the threads from each other. Also continue to stir the soup really good for a few minutes after dropping the egg. This will help to cook the egg well and will keep them from clumping.
        Make it, enjoy the deliciousness and serve it to your family with love…

        Friday, July 16, 2010

        Chicken Noodle Soup

        Recipe No: 61
        Ingredients                                           Serves 3
        • Butter………………...........1 Teaspoon
        • Noodles….........................3 oz or 1 packet (I used Top Ramen, but you can use any. Discard the taste maker)
        • Carrot………………….…...1 Small (Cut into thin long pieces)
        • Beans…………………….....5-6 (Cut into thin long pieces)
        • Onion…………………….....1/2 Small (Cut into thin long pieces)
        • Chicken………………….....1/2 Cup (cooked and shredded)
        • Chicken Stock…………….4 Cups
        • Soy sauce……………….....1/2 – 1 Teaspoon (Optional)
        • Spring Onion……………...1 (Sliced)
        • Salt and Pepper to taste
        Method of Preparation
        1. Heat butter in a deep pan and add Onion, Carrots and Beans and saute for a minute.
        2. Add the Chicken stock, close the pan and let it boil.
        3. Add the Noodles and let it cook.
        4. Once cooked add Chicken, Spring Onion, Soy Sauce, Salt (If needed) and Pepper. Let it boil one more time.
        5. Serve hot after a sprinkle of freshly chopped spring/ green onion.


        Make it, taste the deliciousness and
        serve it to your family with love…

        Thursday, June 3, 2010

        Cream of Mushroom Soup

        Recipe No: 22
        Ingredients
        • Mushroom Caps sliced……15 big ones (If the mushrooms are small use more. I used
                                                                 Button Mushrooms. Separate the Caps and the stems)
        • Butter…………………………….3 Tablespoons
        • Flour/ Maida…………………..3 Tablespoons
        • Mushroom stock…………….2 ½ cups (Recipe follows)
        • Cream…………………………...1 cup
        • Spring Onion chopped……..2 Tablespoons (optional)
          Method of Preparation
          1. Wash, peel and slice the Mushroom caps. Reserve the stems and the peels to make the stock.
          2. Heat butter in a pan on medium high heat and saute the mushroom slices till brown. Mushrooms tend to absorb the butter. If you add more Butter it will absorb more. But once fried it will release the butter back into the pan. So I will advice not to add more butter than said in the recipe.
          3. Add the flour and saute on medium heat till the raw smell is gone for around 4 minutes.
          4. Add the Mushroom stock and mix well so that there are no lumps. Allow it to boil for 4 to 5 minutes.
          5. Add cream and spring onion (if using) and allow boiling along the edges.
          6. Switch off the flame and serve hot.
          Ingredients to make Mushroom stock
          • Oil………………………………..2 Tablespoon
          • Onion chopped……………1/3 cup
          • Celery chopped……………1/2 a stalk
          • Spring Onion………………..5 no
          • Mushroom stems………..15 no. (Chopped)
          • Water…………………………..3 cup
          • Salt and Pepper to taste
          Method of Preparation
          1. Heat oil in a pressure cooker and saute Onion, Celery, Spring onion and Mushroom stems till the mushroom stems are brown in color. Sauteing till brown is essential as it imparts the rich brown color to the stock.
          2. Add Salt, Pepper and Water, close the lid and allow the pressure cooker to whistle once. Turn the heat to medium and cook for 30 to 45 minutes. If you don’t have a pressure cooker, simmer it for one hour. In that case add more water.
          3. Once the pressure is cooled strain the stock. Don’t squeeze the vegetables very hard.
          4. This will yield around 2 ½ cups.
          Notes: Instead of Cream it is perfectly okay to use half and half or fat free evaporated milk. Using regular milk or reduced fat milk will make the soup a bit on the brown side, but still that too will taste good.


          Make it, enjoy the deliciousness and
          serve it to your family with love…

          Saturday, May 29, 2010

          Vegetable Soup

          Recipe No:18
          This is a very hearty yet healthy soup.  One of our kid’s favorite. And as a mother I don’t have to see all the fuss made by them in front of the vegetables. This soup is good for even small kids. 
          Ingredients
          • Beans chopped……………………..1 ½ cups
          • Carrot chopped…………………….3/4cup
          • Cabbage chopped…………………1 ½ cup
          • Tomato………………………………….2 large
          • Onion chopped……………………..1/2 big
          • Water……………………………………2 cups
          • Butter……………………………………1 ½ Tablespoons
          • All Purpose Flour/Maida………1 ½ Tablespoons
          • Cold Milk……………………………….1 ½ cup
          • Salt and Pepper to taste
          Method of Preparation
          1. Cook Beans, Carrots, Cabbage, Tomato, Onion and water in a pressure cooker, till one whistle.
          2. When the pressure of the cooker is gone, blend all the vegetables with the excess water from the cooker in a blender till smooth and keep aside.
          3. Heat Butter in a deep pan and fry the flour untill the raw smell is gone.
          4. Add half cup of milk and whisk so that there are no lumps. Add the rest of the milk and blend in.
          5. Let the milk thicken and start to boil along the edges.
          6. Add the blended vegetables and mix well. Let it start to boil along the sides once more and switch off the flame.
          7. Add salt and pepper to your taste and serve hot with a slice of bread.
          Notes: Other vegetables like cauliflower, Celery etc can also be used to make this soup.
          If you are on a diet, low calorie vegetables like Cabbage and Celery should be used more.
          Low fat/ No fat milk works very good in this recipe too, making it healthier.


          Make it, enjoy the deliciousness and
          serve it to your family with love.