Creating a blog was out of the question for a long time for me, as measuring everything in the kitchen was like biting into an eggshell. I enjoy cooking and don’t want to waste even a slightest bit of enjoyment in that small world of mine. But little did I know that everything will change, when my husband came home with the Oscar nominated film ‘Julie and Julia’( a real life story) where Julie Powell (part played by Amy Adams) challenged herself to make all the 524 recipes from Julia Child's cook book ‘Mastering the Art of French Cooking’ and blogging all her experiences (The Julie/Julia Project). It was an inspiring movie. A few days later when we were discussing this casually with a friend of ours over tea…everything changed dramatically…..” How about you making at least half of it in one year? Not French but your own. 262 recipes that will inspire others and present it as a blog?” For a minute my mind traveled faster than light… With an experience as a helper in my mother in laws kitchen for 6 years followed by a three year everyday struggle to satisfy the palate of my foodie husband, if I cannot do it then why should I cook? But on the other side with an experience in English literature extending no more than expanding outline stories in English grammar class when I was 18 and two small kids that come in handy at times, will a commitment for the next one year work? Anyway my ‘cook's ego’ didn’t allow me to say no...

So my friends …here I am opening my recipe book, trying to perfect and present 262 recipes in the coming 365 days….A Challenge that will of course tastes good. Come.. Have a walk with me along my journey.. Cheering and inspiring….Forgiving and tolerating…Testing and tasting….for ‘A Tasty Challenge’

Search This Blog

Showing posts with label Jams Preserves Pickles and Chutneys. Show all posts

Wednesday, January 25, 2012

Radish Pickle

Recipe No: 282
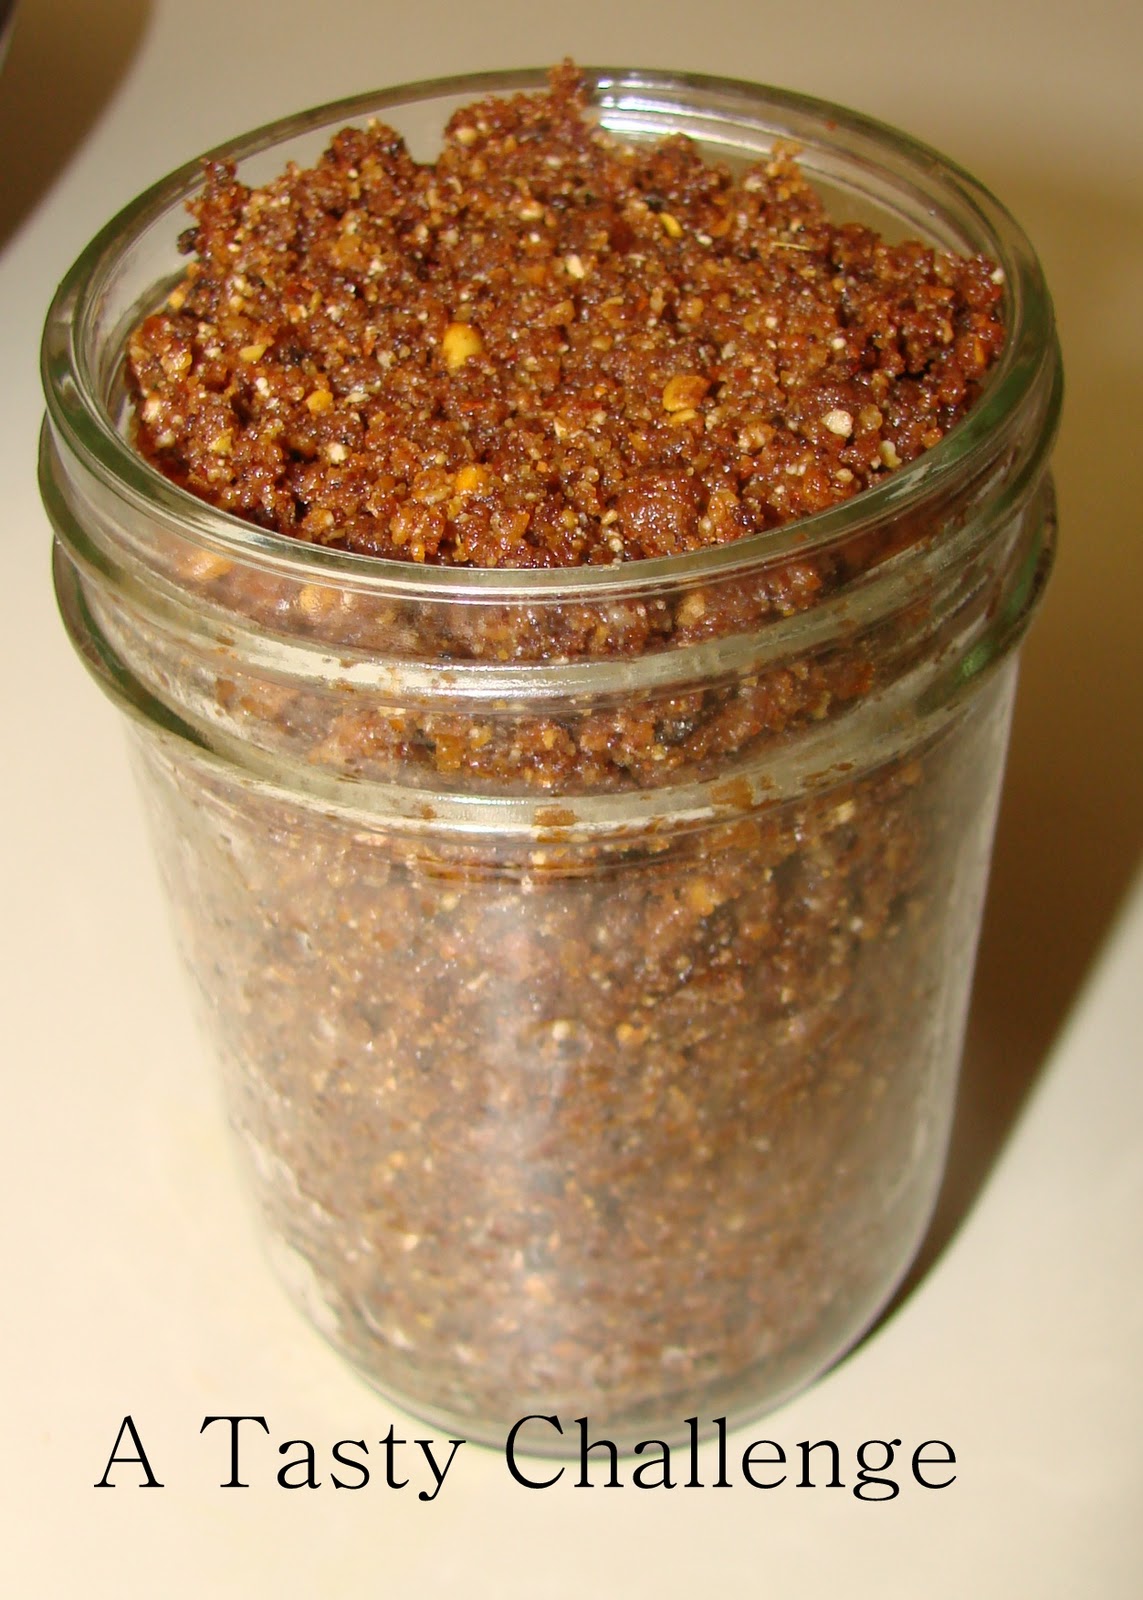
This is one of those recipes that came into life as a desperate attempt to save some Radishes that were left behind in my vegetable bin just before we moved to Atlanta. It stayed good for a long time and was a real help during the movement.
The inspiration for this recipe is the Carrot Pickle featured in one of my favorite blog Mishmash. As Radish contains lot more Water, it requires a different treatment than that of Carrots. So here is it…
Ingredients
  • Radish……...............3 Cups (wash; cut off both ends and slice into thin long pieces)
  • Salt……………………..1 Teaspoon
To Saute
  • Oil……………………….2 Tablespoons (I used Vegetable Oil)
  • Mustard Seeds……..1/2 Teaspoon
  • Garlic…….…….........2 Tablespoons (cut into thin, long slices)
  • Ginger……...............1 Tablespoon (cut into thin, long slices)
  • Green Chilly……......3 Tablespoons (cut into thin, long slices)
  • Vinegar……………....1/4 Cup
  • Sugar………………….1/4 Teaspoon
Method of Preparation
  1. Mix Radish and Salt; keep aside for 20 minutes. (By this time Water from the Radish will be oozing out.)
  2. Squeeze the Radish really good; discard the excess liquid and keep aside.
  3. Heat Oil in a pan on medium high flame and splutter the Mustard Seeds.
  4. Add Garlic, Ginger and Green Chilly; sauté for a minute or till slightly wilted.
  5. Add the Radish; mix well and off the heat immediately.
  6. Mix in the Vinegar and Sugar. (Add Salt only if needed; most of the Salt that was added to the Radish will go while squeezing them and the remaining will give enough Saltiness to the pickle.)
  7. When cooled, store in an airtight container.
Notes:
  • Even though this pickle is good to serve the day it is made, I think it tastes better the second day.
  • Don't leave the Radish in the heat for a long time as it may reduce its crunchiness. 
  • Do adjust the amount of Vinegar according to your taste. (But the amount given in the recipe is good for mine.)


Make it, enjoy the deliciousness and 
serve it to your family with love…


Thursday, May 5, 2011

Vazhuthananga/ Eggplant/ Brinjal Pickle

Recipe No: 256
As I mentioned in Nettoli/ Anchovy Pickle recipe, my pickling is a lot different from traditional pickling. This is a nice yet different Pickle which becomes better and better as it sits…
Ingredients       
To marinate  
  • Brinjal…………………….....6-7 small ones (cut into long pieces; approximately 3 cups)     
  • Turmeric Powder………..1/2 Teaspoon  
  • Red Chilly Powder……….1/2 Teaspoon
  • Salt…………………………....1/2 Teaspoon     
To Saute
  • Oil………………………………1/4 Cup
  • Onion chopped…………….1/2 Cup       
  • Ginger Garlic paste………2 Tablespoons
  • Red Chilly Powder………3 Tablespoons (I mixed hot Red Chilly Powder and Paprika which is milder than Kashmiri Chilly Powder.)   
  • Turmeric Powder…………1/2 Teaspoon
  • Cumin Powder…………….1/2 Teaspoon  
  • Fenugreek Powder……….1/4 Teaspoon (Uluva Podi)
  • Vinegar……………………….1/3 Cup
  • Sugar………………………....1/2 Teaspoon
  • Salt as needed
  • Oil for deep frying
Method of Preparation
  1. Cut the Brinjal into long pieces (doesn't have to be very thin) and wash thoroughly in a colander. (Washing in a colander will help to get rid of some of the seeds easily.)
  2. Wipe the Brinjal pieces thoroughly and marinate with the rest of the ingredients mentioned in the ‘to marinate’ section.
  3. Heat at least a cup of Oil in a pan/ Kadai on high heat and deep fry the marinated Brinjal pieces. (Don’t overcrowd the pan; fry in batches if necessary.)
  4. Leave ¼ Cup Oil in the pan and remove the rest.
  5. To the left over Oil, add Onion and saute till brown on medium heat. (It has to brown or the Pickle will go rancid fast.)
  6. Add Ginger Garlic paste and fry till the raw smell is gone.
  7. Lower the heat to medium low and add Red Chilly Powder, Turmeric Powder, Cumin Powder and Fenugreek Powder; fry for 30 seconds or till the raw smell is gone and fried a bit.
  8. Add the fried Brinjal Pieces, Vinegar, Salt and Sugar.
  9. Switch off the heat and let it sit in the pan for 5 minutes. If you want more gravy, add boiled and cooled Water.
  10. Transfer it into clean bottles and store in a cool place or in the refrigerator.
Notes:
  • 3 Cups of Brinjal, when fried, will yield only about 1 1/3 cup.
  • Traditionally the Oil used to make Pickle is Sesame Oil/ Nallenna/ Gingelly Oil. But I used regular Vegetable Oil (Canola works fine too) in this recipe.
  • The amount of Vinegar and Fenugreek Powder can be increased or decreased according to your taste. The amount given in the recipe is what suited in my household.
  • If you are adding Water in the end, do add only boiled and cooled Water. This will help in keeping the Pickle as sterilised as possible (rather than using plain Water.).
  • The Brinjal skin will be tough on the day it is made; but will soften as it sits. If you are using large varieties of Brinjal, do take the skin off.
  • It is good if Oil floats on top of the jar when the pickled is bottled, as it prevents the pickle from going bad.
  • The dark red color of the Pickle is from the variety of Paprika used.


Make it, enjoy the deliciousness and 
serve it to your family with love…

Wednesday, March 23, 2011

Orange Marmalade

Recipe No: 224
Last week one of our friends came with a bunch of Oranges to see my 'sick husband'... As there were already some Oranges in my fruit basket, I decided to make some Marmalade, which my husband loves a lot.
Ingredients                                   Makes 2 pints
  • Orange…………………….1/2 Kg
  • Water……………………..4 Cups
  • Sugar………………………3 ½ Cups
  • Citric acid………………..3/4 Teaspoon
Method of Preparation
  1. Keep a plate in the freezer before starting the process so that it will be perfectly cold and ready to test the readiness of the Marmalade.
  2. Wash the Oranges thoroughly; cut them into two (I prefer to cut it lengthwise so that it is easy to take the tips off) and slice it as thin as possible.
  3. Boil the sliced Oranges together with Water in a non reactive pan on high heat till it boils and then reduce the heat to medium and boil it for another 20 minutes or till the Orange skin is a bit soft.
  4. Add the Sugar and Citric Acid to the cooked Oranges and boil it on high for 15 minutes.
  5. Skim off the form that appears on top of the cooking Oranges; lower the heat to medium and cook for another 10 minutes or till it is ready. Readiness of the Marmalade can be checked by pouring some liquid portion of the Marmalade on top of a chilled plate; wait for 10- 12 seconds and draw a line through the middle. If the divided halves are not flowing together again, then it is ready to be bottled.
  6. Transfer it into bottles and follow the canning process if you prefer (Please read my post on canning (here) if you are interested) and store it in a cool place.
  7. Serve it at room temperature on top of Breads, Crackers etc:
Notes:
  • As we use acid (Citric Acid) in this recipe, it is preferable to use a non reactive vessel like a Stainless Steel pan. It is good not to use Aluminum or Non Stick cook wares.
  • The Marmalade will look kind of runny when it is done, but it will harden up as it sits. Don’t over reduce it or it will become a bit hard to spread when cold.
  • The use of Citric Acid is very important as it provides an acidic medium for Pectin, a carbohydrate present in the cell wall of ripe fruits, which are capable of forming gels when dissolved in water in an acidic medium. (This is mostly made use in making Jams, Jellies and Preserves.) You can substitute this with Lime or Lemon Juice. But some sort of Acid is very important. (For more details please read my post on Strawberry Preserve here)
  • Citric Acid is readily available in most of the Indian stores. (A fine white powder)
  • This Marmalade will stay good outside in cool conditions for weeks, but if you are sure that it is not going to finish in one month, either can it or keep the extra in the refrigerator.
  • After opening a canned Marmalade use it within 2-3 weeks or keep the leftover in the refrigerator. (So I prefer to can it in small bottles.)


Make it, enjoy the deliciousness and 
serve it to your family with love…

Sunday, February 27, 2011

Idi Chammanthi/ Chammanthippodi/ Sammanthipodi/ Coconut dry Chutney Powder

Recipe No: 206
Every household in Kerala will have a recipe for this. I don’t know how many Grandmothers and Mothers made this and still making this to send it to their loved ones abroad. Apart from the fact that this will stay good for a long time at room temperature and a very long time in the refrigerator, this is an excellent combination to eat with Rice and Curd.

Once, a friend of ours gave a packet of Chammanthippodi, which they bought from a homegrown business somewhere near Kottayam, Kerala. Well, that was one the best Chammanthippodi that I ever ate, but felt really different. But while eating that, I came across a fried Urad Dal which gave me the idea for this. So I changed my Mother's recipe  a bit so that it imitates the one that I liked a lot by incorporating Urad Dal... and have to say the Urad Dal gives a very different but a very pleasant texture.
Ingredients
  • Grated Unsweetened Coconut…2 ½ Cups (Fresh/ Frozen preferred, don't use dessicated)
  • Split Urad Dal……………………….1/4 Cup (Washed and drained)
  • Dry Red Chilly……………………...20 (break into small pieces, adjust according to your taste)
  • Tamarind………………………..……1 inch diameter piece
  • Curry Leaves…………………..…….2 Sprigs
  • Salt as needed
Method of Preparation
  1. In a dry pan on medium high heat, add all the ingredients except Salt and fry till evenly browned stirring constantly.
  2. Once browned, off the heat and let it cool.
  3. Grind it into a course powder together with Salt and store in an airtight container.
  4. Serve with Rice (and with everything else or simply by itself as per my husband!!!).
Notes:
  • Frying the Tamarind along with the other ingredients will take away some of its moisture that will help while dry grinding.
  • It will take at least 1/2 an hour to get the mixture fried. Don't try to rush the process by increasing the heat as it will burn the mixture without frying evenly.
  • Don’t leave the mixture unattended in the same pan after switching it off, as the residual heat may burn the bottom. So do stir it often till it cools down or transfer it to another plate.
  • It is not possible to grind this using a blender. You have to use a dry grinder or a Coffee Grinder.


Make it, enjoy the deliciousness and
serve it to your family with love…

Thursday, December 23, 2010

Nettoli/ Anchovy/ Smelt/Fish Pickle

Recipe No: 148

Asha, can I make a recipe request?
It's for Fish Pickle. I know the regular recipe, but I'm looking for something similar to what mummy (Valsa) makes. It has a lot of gravy in it, and if I'm not wrong, she grinds garlic, ginger, tomato, and rest of the stuff to get that thick paste.  She and your MIL might have a lot of recipes in common...  Just wondering if yours is something similar?
I've always wanted to ask her, but never happened.

This is a mail that I received a few weeks before from a blog reader which I spied as a relative of my cousin!!! (See I am good at that too!!!) I think this Fish pickle recipe cannot get a better description than what she said. Yes… it is really against all the traditional pickling methods and all those who adore those pickles may raise their eyebrows. But we, including my 7 year old daughter simply adore my Mother In Law's pickle because it has a lot of thick gravy and simply sitting around the dining table licking it after the meal chatting, is something worth cherishing. Well it does have a drawback too…Everyone  will eat it just like other curries...and it will be finished in a jiffy. But I am very good in hiding things around my place. (and so is my husband in finding things that I hide from him!!)

Any way let me come to my recipe; I use the same procedure as that of my Mother in Law . With Anchovies, one may think that it will be full of bones... but believe me you will never hit a bone as it is deep fried well in Oil and I should say it is different and delicious...              
Ingredients         
To marinate                           
  • Fish cut into small pieces…1/2 kg (I used Nettoli/ Anchovy. If they are big, cut into small pieces. Any sort of Fish cut into small pieces will work)
  • Salt………………………………....1/2 Teaspoon
  • Red Chilly Powder…………….1/2 Teaspoon
  • Turmeric Powder……………...1/2 Teaspoon
To Saute
  • Oil…………………………………..1/2 Cup (Gingelly/ Sesame Oil/ Nallenna is used widely but I used Canola)
  • Whole Garlic………………..…..1/3-1/2 Cup (If too big slice them into two)
  • Onion chopped finely………...1/2 Cup
  • Ginger- Garlic paste…………..2 Tablespoons
  • Chopped Tomato……………….1/3 Cup (Optional)
  • Red Chilly Powder……..……3-4 Tablespoons (According to your taste, I used 4 Tablespoons of Red Chilly Powder with a less heat)
  • Cumin Powder………………....1/2 Teaspoon
  • Fenugreek Powder…………....1/3 Teaspoons (Uluva podi)
  • Vinegar…………………………….1/2 – 2/3 Cup (Adjust according to your taste)
  • Boiled Water………………….…2/3 Cup
Method of Preparation
  1. Marinate the Fish pieces with the ingredients mentioned in the ‘to marinate’ section.
  2. Heat ½ cup of Oil in a pan and fry the Fish pieces till they are crispy. Do it in two batches.
  3. Take the Fish pieces off the Oil and keep them aside till ready to be used.
  4. To the rest of the Oil on medium heat, add the  whole Garlic cloves and fry till slightly browned. Take them aside and keep with the fried Fishes
  5. To the remaining Oil, add the chopped Onion and saute till nicely browned. (Very important…it should be really brown, but take care not to burn)
  6. Add Ginger Garlic paste and saute till the raw smell is gone.
  7. Mix in Red Chilly Powder, Cumin Powder and Fenugreek Powder and fry till the raw smell is gone.
  8. Add the chopped Tomatoes (if using) and saute till it is really mashed up and Oil starts to separate. (Very important that Oil has to separate.)
  9. Add the fried Fishes, Garlic and the Vinegar, boiled Water and Salt; mix well.
  10. Let it boil slightly. At this stage Oil will start to float on top. Off the heat and transfer it to a dry sterilized bottle.
  11. Once cooled, close it nicely and store in the refrigerator.
Notes:
  •  If properly made by sauteing everything well (especially Onion), this pickle won’t go bad at room temperature for 2-3 weeks (if the climate is cool). But if the room temperature is high and you have to open and close the Pickle bottle often, then please do store it in the refrigerator.
  • The Pickle becomes thick when it cools down. So if you want more gravy add a bit more of Boiled Water. 
  • Use only boiled water to give as much sterilization as possible.
  • Even though this Pickle can be eaten on the day it is made, it becomes tastier as it sits.


    Make it, enjoy the deliciousness and 
    serve it to your family with love…

    Thursday, September 23, 2010

    Tomato Chutney

    Recipe No: 82
    This is my favorite chutney to eat with Dosa and Idli. I usually make this when tomatoes are really plump and ripe. It is not desirable to use canned tomatoes for this particular dish.
    Ingredients                                         Serves 4
    • Oil…………….................2 Teaspoons
    • Urad Dal……….............1 Tablespoon
    • Grated Coconut…….....1/4 Cup
    • Sliced Onion…………….1 Cup
    • Chopped Tomato……...3 Cup
    • Red Chilly Powder…….3/4 Teaspoon
    • Salt…………………………1/2 Teaspoon or to your taste
    Method of Preparation
    1. Heat one tablespoon of oil in a pan on medium high heat and fry Urad Dal for 30 seconds.
    2. To the Urad Dal add grated Coconut and fry till the water content is gone. Don’t brown.
    3. Remove the coconut mixture into the bowl of a blender.
    4. In the same pan add another teaspoon of Oil and saute the Onion till it starts to wilt. Don’t saute for too long.
    5. Add the chopped Tomatoes and saute till it is also heated through.
    6. Switch off the flame and blend the tomato mixture together with the coconut mixture, Chilly powder and Salt to a course consistency. There is no need to add more water as the water from the tomatoes and onion will be enough.
    7. Serve it hot or at room temperature with Idli or Dosa.
    Notes:
    • I love to keep this course as I can bite the Urad Dal and Coconut here and there. But the consistency is entirely up to your liking.
    • If fresh coconut is not available, it is perfectly okay to use unsweetened dessicated coconut.
    • Do take care while blending hot things. Leave a small space open so that the vapor can escape. Cover that space with a piece of cloth or a kitchen towel to prevent hot liquid  from splattering out.


    Make it enjoy the deliciousness and
    serve it to your family with love…

    Tuesday, July 6, 2010

    Strawberry Preserve

    Recipe No: 52
    While we where roaming around with our friends for the long weekend, we spotted this farmers market where they sell locally grown produce. One among them was Strawberries. As the Strawberry season is coming to an end very fast, I thought of freezing some and making some Preserve. So we bought two boxes of Strawberries. It was so sweet that we ate a huge lot of them but I managed to freeze some as well as preserving some.

    When it comes to making preserves, one has to be aware of some scientific facts behind this process. So I decided to give some insight regarding some of them. Located in the cell wall of ripe fruits there are a group of carbohydrates called Pectin, which are mostly capable of forming gels when dissolved in water in an acidic medium. This is mostly made use in making jams, jellies and preserves. Some fruits have large amounts of pectin while some others have less. Even though Strawberries have only a less amount of Pectin, it is possible to extract that by slowly cooking it. (Or if you like you can add fruit Pectin that are available in the market.) To give the acidic medium that is essential for the Pectin to form gel, we can add either Lemon/Lime juice or commercially available Citric acid. As I am preserving these Strawberries for a longer period of time I used Citric Acid.

    In order to keep the Preserve for a longer period of time it is essential to store them in sterilized containers. This process should be done really carefully. Otherwise the Preserve may go bad very fast. If properly canned, it will stay good at least for a year in a cool dry place without refrigeration.

    Even though making and storing Preserves takes some time, it is very easy and economical and needs only a minimum amount of 'baby sitting'.
    Ingredients                                  Makes 3 Pints of Preserve
    • Whole Strawberries….6 heaping cups (Wash, dry, hull and leave them whole)
    • Sugar……………………...6 level cups
    • Citric Acid………………..1 ½ Teaspoons
    Method of Preparation
    1. Mix the Strawberries and sugar in a wide deep pan and keep aside for at least 6 hours. Overnight is preferred. This step is essential as the sugar will absorb some moisture from the strawberries and will make the Strawberries a bit hard. This will help the berries to retain some of its shape while cooking.
    2. Keep three plates in the freezer before you start making the preserve. This is to test whether the Preserve is ready or not.
    3. Bring the Strawberries to a rolling boil on medium heat. This will take some time but there is no necessity to baby sit this. Stir once in a while. 
    4. Skim off the foam that is coming on top while cooking.
    5. Once boiled, add the Citric acid and let it boil for 10 to 15 minutes or till done.
    6. To know whether the preserve is done add ½ a Teaspoon of the preserve onto a chilled plate. Wait for a few seconds and make a line in the middle with your finger. If the jam flows back into the line very fast, then it is not done. (Check the ones in the 10'o clock and the 4'o clock positions in the picture.) If the line stays like that, then the Preserve is ready to be canned. (The one in the 7'o clock position in the picture.)
    7. Store in Sterilized jars using easy Canning methods for long term storage.
    Notes: Citric Acid is available in most of the Indian stores.
    If you are not canning and the Preserve will not be over in two weeks, please keep it in the refrigerator.
    If you want to can, please read my post on Canning before making the preserve.


      Make it, enjoy the deliciousness and
      serve it to your family with love...


      Saturday, July 3, 2010

      Tomato Pickle

      Recipe No: 50
      When Tomatoes came on sale week after week nothing came into my mind other than this pickle. So I brought three pound of tomatoes and made this. The end product was one small bottle of pickle that I am sure will conquer the minds of all tomato loving people.
      Ingredients
      • Tomato chopped………..3 lb
      • Chilly Powder…………….2 Tablespoons
      • Cumin Powder…………..1/2 Teaspoon
      • Fenugreek Powder…….1/4 Teaspoon
      • Turmeric Powder………1/4 Teaspoon
      • Oil…………………………...1/4 Cup (I used Canola oil)
      • Vinegar…………………….1/4 Cup
      • Sugar……………………....3/4 Teaspoon
      • Salt as needed
      Method of Preparation
      1. Heat a pan and add the tomato and ½ teaspoon of salt. Cover the pan and let it cook on a medium heat. Stir at times. This process will take time as the tomato will give out all its water first.
      2. When the tomato is cooked and all the water is evaporated add Chilly powder, Turmeric powder, Cumin powder and Fenugreek powder and saute really good.
      3. When the raw small is gone add Oil, Vinegar, Sugar and Salt. (If needed)
      4. Mix really well and switch off the flame.
      5. When cooled, store in an airtight container in the fridge. Serve at room temperature.
      Notes: Back at home this pickle is made using Gingelly/ Sesame oil.
      Most of the amounts given here is according to our taste buds. Do change it according to yours.


       Make it, enjoy the deliciousness and
      serve it to your family with love…