Creating a blog was out of the question for a long time for me, as measuring everything in the kitchen was like biting into an eggshell. I enjoy cooking and don’t want to waste even a slightest bit of enjoyment in that small world of mine. But little did I know that everything will change, when my husband came home with the Oscar nominated film ‘Julie and Julia’( a real life story) where Julie Powell (part played by Amy Adams) challenged herself to make all the 524 recipes from Julia Child's cook book ‘Mastering the Art of French Cooking’ and blogging all her experiences (The Julie/Julia Project). It was an inspiring movie. A few days later when we were discussing this casually with a friend of ours over tea…everything changed dramatically…..” How about you making at least half of it in one year? Not French but your own. 262 recipes that will inspire others and present it as a blog?” For a minute my mind traveled faster than light… With an experience as a helper in my mother in laws kitchen for 6 years followed by a three year everyday struggle to satisfy the palate of my foodie husband, if I cannot do it then why should I cook? But on the other side with an experience in English literature extending no more than expanding outline stories in English grammar class when I was 18 and two small kids that come in handy at times, will a commitment for the next one year work? Anyway my ‘cook's ego’ didn’t allow me to say no...

So my friends …here I am opening my recipe book, trying to perfect and present 262 recipes in the coming 365 days….A Challenge that will of course tastes good. Come.. Have a walk with me along my journey.. Cheering and inspiring….Forgiving and tolerating…Testing and tasting….for ‘A Tasty Challenge’

Search This Blog

Showing posts with label Rice. Show all posts

Thursday, October 20, 2011

Salmon and Egg Rice

Recipe No: 269
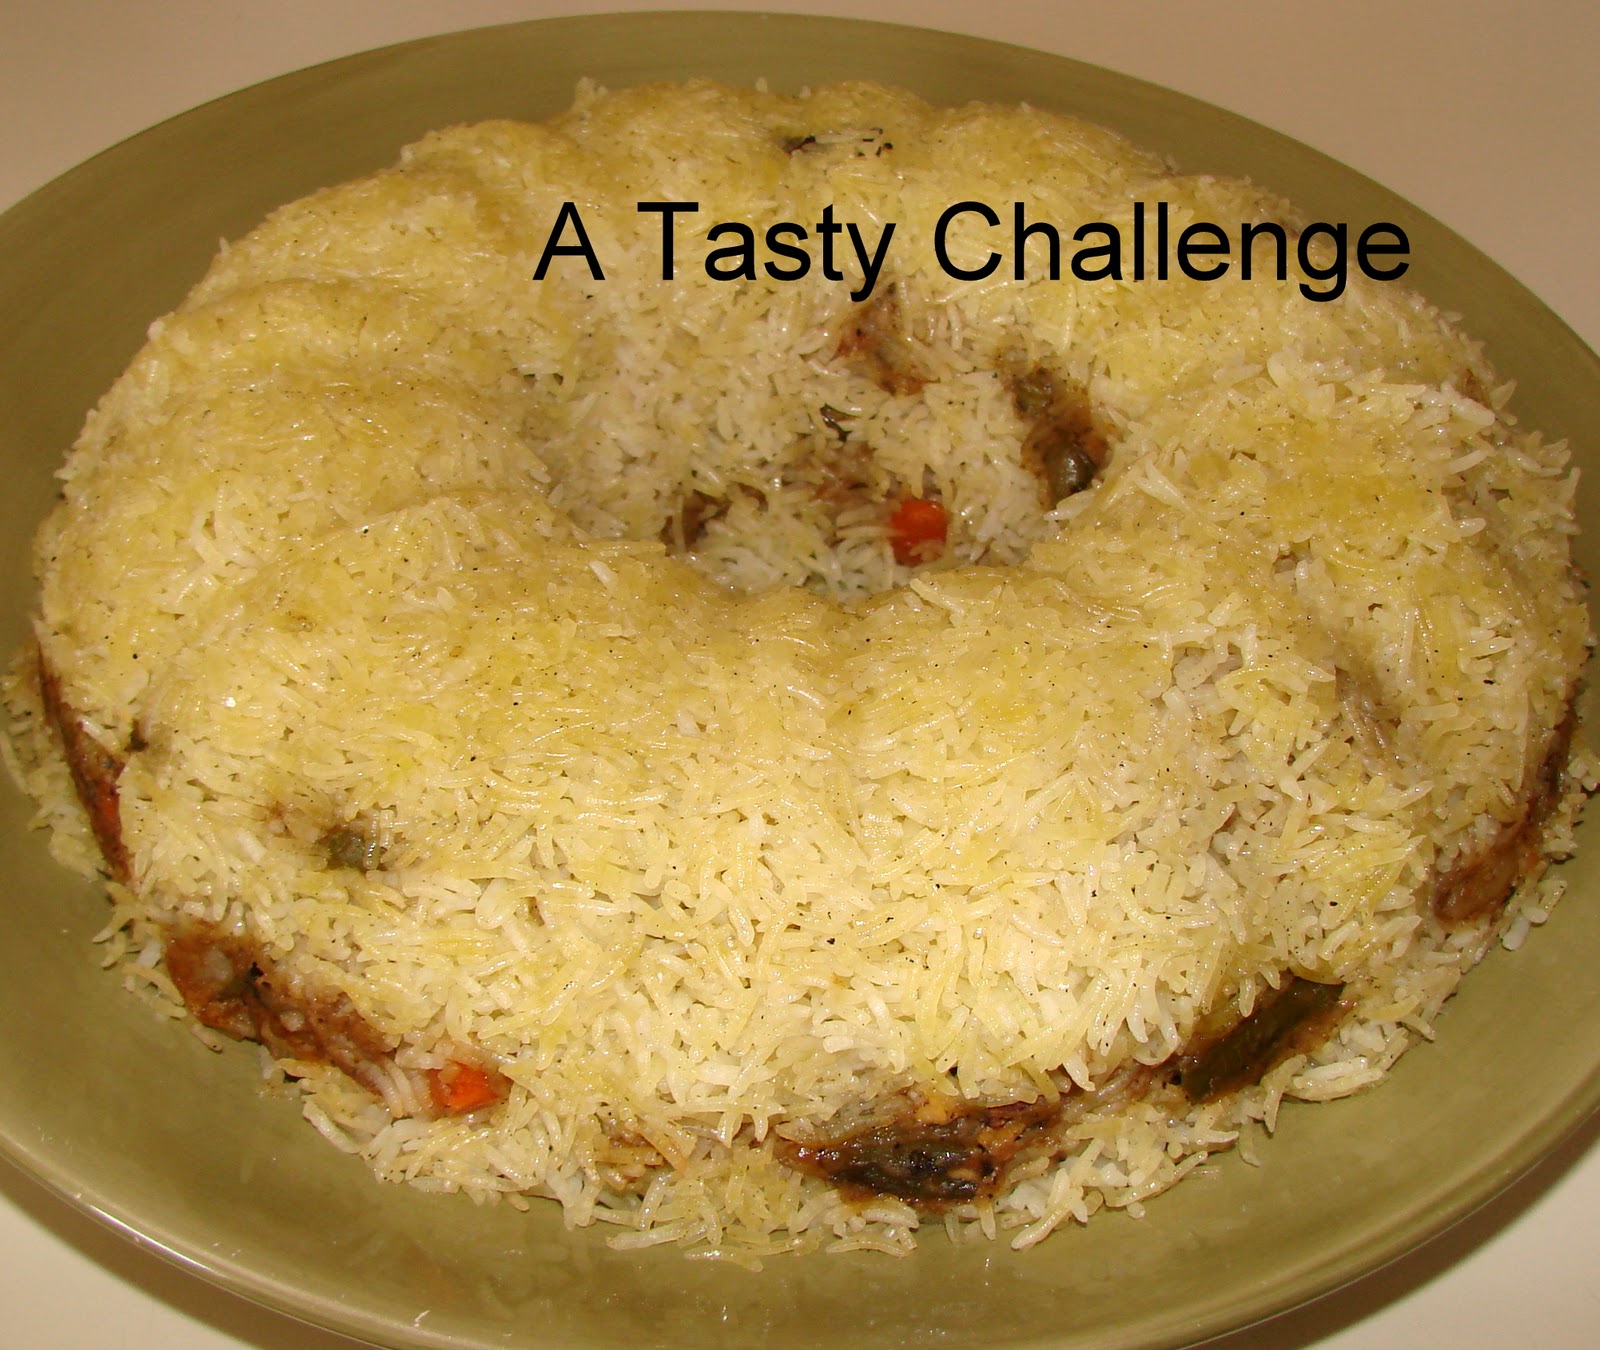
This is one easy yet very delicious Rice dish that will be ready to serve in a matter of minutes, making it an excellent after work dinner or a lazy late afternoon lunch. 
Ingredients                                   Serves 3
  • Basmati Rice…………….........1 1/2 Cups (Washed and drained)
  • Hard boiled Eggs………….....2 (cut each into 4 pieces)
To cook the Salmon
  • Salmon……………………….......300 Grams (clean and wash; but don’t cut)
  • Salt…………………………......….1/2 Teaspoon
  • Pepper Powder………….........1/2 Teaspoon
  • Water…………………………......2 Cups
To make the Rice
  • Oil……………………………….......2 Tablespoons
  • Cumin seeds……………….........1/3 Teaspoon
  • Onion chopped……………........1/2 Cup
  • Ginger Garlic Paste…………....1 Teaspoon
  • Coriander Powder……………...1 ½ Teaspoons
  • Turmeric Powder……………….1/4 Teaspoon
  • Garam Masala Powder………3/4 Teaspoon
  • Coconut Milk……………………..1 Cup (medium thickness)
  • Salt……………………………………as needed (I used around ¾ Teaspoon)
  • Chopped Coriander Leaves….2 Tablespoons
Method of Preparation
  1. Soak the washed and drained Rice in warm water for about 20 minutes. Drain well.
  2. Combine all the ingredients in the ‘to cook the Salmon’ section in a deep pan and boil on high heat. (It is good if the Fish is immersed fully in the Water otherwise, turn it over half way through cooking.)
  3. Once boiled, lower the flame to medium low and cook for 5 minutes. (By this time Fish will be fully cooked.)
  4. Take the fish out of the Water and keep aside. Once slightly cooled, tear it into big bite size pieces with the help of a fork. (As Salmon is delicate it will be a bit difficult to cut them into small pieces, but you are more than welcome to do so if you want. But I preferred irregular pieces. If your husband or guests ask why, tell them that it is 'rustic'!!)
  5. Measure the remaining cooking liquid and add more Water to make it up to 2 cups.
  6. Heat Oil in a wide pan on medium high heat and splutter the Cumin seeds.
  7. Add the Onion and saute till translucent for about a minute or two.
  8. Add Ginger Garlic paste and cook till the raw smell is gone.
  9. Lower the heat to low and add Coriander Powder, Turmeric Powder and Garam Masala Powder; saute for 30 seconds.
  10. Add the drained Rice and fry it for about 3 minutes on medium high heat.
  11. Once fried, add the Fish cooking liquid (the one that we added Water to make 2 cups), Coconut Milk and the Salt (consider the fact that the Fish cooking liquid has Salt). Mix well, cover and let it boil.
  12. Once boiled, reduce the heat to minimum and let it cook.
  13. Once the Rice is half cooked, add the Fish; mix gently and let it cook covered till all the liquid is absorbed and the Rice is cooked perfectly.
  14. Once cooked, switch off the heat; sprinkle the Coriander Leaves and mix gently.
  15. Serve hot topped with Egg.
Notes:
  • If you are squeezing fresh Coconut Milk, do combine 1st and the 2nd milk to make a cup for this preparation.
  • The Salt for this dish should be adjusted in such a way that the Rice should have Salt if eaten without any curries.
  • Cumin seeds in this dish can be substituted with Black Cumin seeds too.
  • I like this dish a lot with Salmon and hence too stubborn to try with others.


Make it, enjoy the deliciousness and 
serve it to your family with love…

Monday, October 3, 2011

Vegetable Biriyani

Recipe No: 267
A few months back, I made this for a party catering order as a vegetarian option along with Chicken Biriyani. When the vegetarians failed to appear for the so called 'Bachelor's party' in which most of the attendees are married, this Vegetable Biriyani was passed down to the female folks, may be as an appreciation for opening their apartment doors when they turn up way past midnight without waking up the neighbors! To my surprise it was a hit among them and so I decided to write it out in my blog… in case someone else want to try it out...
Ingredients                                         Serves 5
  • Vegetables.........................…..3 Cups (Cut into big cubes; I used Carrot, Beans, Potato, Cauliflower and Fresh Frozen Green Peas)
  • Fried Paneer cubes………...….200 Grams/4 oz
  • Oil…………………………….........2 Tablespoons
  • Turmeric Powder……….........1/2 Teaspoon
  • Salt………………………....….......1 Teaspoon
  • Curd…………………….……........1/4 Cup
  • Tomato sliced…………………...1 Large
  • Lemon Juice……………..……...1 1/2 Tablespoons
  • Coriander leaves /Cilantro...3 Tablespoons chopped
  • Mint leaves chopped………....2 Tablespoons
  • Garam Masala Powder……...3/4 Teaspoon (homemade preferred)

To Grind
  • Ginger Roughly chopped......2 Tablespoons
  • Garlic roughly chopped........6 big ones or 10 small ones
  • Indian Green Chilly…...........5 (chopped; adjust depending on your taste)
  • Onion roughly chopped…....2 Cups
  • Shallots……………………………5
To make the rice
  • Ghee………………………….......2 Tablespoons
  • Whole Garam Masala……..8 Cardamom, 12 Cloves, 1 one inch Cinnamon stick and 1 Star Anise broken into pieces
  • Rice…...................................2 Cups
  • Salt……………………...............1 ½ Teaspoons
  • Water………………………........3 ½ Cups (Boiling)
To Blend
  • Almonds………………..…........6 (not necessary to take off the skin)
  • Coconut Milk (thick)………..1 Tablespoon
  • Turmeric Powder…………....1/4 Teaspoon
  • Saffron…………………….........A Small pinch
  • Water……………………………..1/4 Cup
To Garnish
  • Cashew nuts…………….........4 tablespoons
  • Raisins……………………........2 Tablespoons
  • Fried Onion………...............3 Tablespoons
Method of Preparation
  1. Grind together all the ingredients (I used a food processor) given in the ‘to grind’ section into a course consistency and keep aside.
  2. Blend all the ingredients given in the ‘to blend’ section except two Tablespoons of Water  into a smooth consistency and keep aside. Use the left over Water to rinse the blender and mix it along with the blended ingredients.
  3. Wash and soak the rice in warm water for 20 minutes and drain.
To make the Vegetable Masala
  1. Heat the Oil in a pan and saute the ground Onion mixture together with Salt and Turmeric powder on a medium high heat till it is almost brown. Add more Oil if needed.
  2. Add the Vegetables and Curd along with 1/2 cup of water; lower the heat to medium low (once it is boiled); close the pan and  cook  for 8- 10 minutes.
  3. Once the Vegetable are almost cooked add the Paneer cubes, Tomato and Lemon juice; let the Vegetables finish cooking.
  4. Once cooked, add chopped Coriander Leaves, Mint leaves and Garam Masala Powder; mix well taking care not to break the Paneer cubes. Do a taste test and add more Salt if needed. (At this stage the Masala should be a bit on the sour side. Take care about the amount of Salt as it should not be less at this stage or it will affect the final taste of the Biriyani.)
  5. When almost dry switch off the flame and keep it aside till ready to be used.
To make the Rice
  1. Start to boil 3 ½ cups of water.
  2. To a wide pan on medium heat, add the Ghee and fry Cashew nuts followed by Raisins (for garnishing) till the Cashew nuts are slightly brown and the Raisins are plump. Take them off and keep aside till ready to be used.
  3. To the remaining Ghee on medium high heat add the whole Garam Masala and fry till fragrant.
  4. Add the soaked and drained Rice and fry it (constantly stirring is advised) until the Rice on the bottom of the pan starts to move on its own.
  5. Add the boiling water and 1 ½ Teaspoons of Salt; stir well; lower the flame to minimum; cover the pan and cook till all the Water is absorbed and the rice is cooked. Stir gently once or twice in between.
  6. Once cooked,  switch off the flame and keep the pan open till ready to be used.
To assemble and bake the Biriyani 
  • Preheat the oven to 350˚F/180˚C.
  • In an oven proof dish layer almost half of the rice evenly on the bottom. Sprinkle some almond-turmeric water on top and then layer the prepared Vegetable Masala. Layer the rest of the Rice on top.
  • Once layered, drizzle the rest of the almond- turmeric water and sprinkle fried Onions, Cashew nuts and Raisins.
  • Cover this with an Aluminum foil or a damp cloth.
  • Bake this for 30 minutes in the preheated oven and let it stand for at least 15 minutes before serving.
  • Serve it hot with Raita and Pappadam.
Notes:
  • It is very easy to fry Paneer with less amount of Oil if we cut it into slabs; shallow fry in a flat pan and then cut into pieces rather than deep frying Paneer cubes. This is shown in Mattar Paneer recipe.
  • While cooking the Masala, dont cook the Vegetables till it starts to fall down. It should be just cooked, so that it will withstand the final layering and baking without breaking. 
  • It is important that you salt the Rice while cooking as it is very essential to bring the flavor of the Rice. Since this is a Vegetable Biriyani, imparting as much flavor into the rice is very essential.
  • Drizzle the yellow Almond Water on top  so that it will give some of the Rice that signature yellow color of the Biriyani (without using any artificial color), while some others remain white.
  • If you don't have Saffron, please add a bit more of Turmeric, but take care not to skip this step because that additional moisture will prevent the Biriyani from drying out during baking,
  • If you don’t have an oven, you can make it on stove top itself. Assemble everything in a pan, cover with an airtight lid and put it on a minimum flame and cook for 30 minutes. Take care not to burn the bottom.You can also use a flat pan/ Thawa on the bottom of the Biriyani pan (Biriyani pan placed on the Thawa which is placed on the flame) to give that indirect heat while cooking on stove top.


Make it, enjoy the deliciousness and 
serve it to your family with love…

Thursday, May 5, 2011

Chicken n Veggie Rice/Pulav

Recipe No: 255
Most of us have that gene in us to rise to the occasion and do stuff when situation calls. On a normal day for Rice we have three sides… one Curry to pour into the Rice, one vegetable dish and one non vegetarian dish (Yes I accept... it is very difficult to run my household without that magic touch of Non-Vegetarian!!). What will you do if you have to make all these things in 45 minutes? Somehow I decided to cook all these things together and came up this wonderful recipe… Everyone except me at ours thought that the lunch was special that day and was very happy… I accepted all the comments, smiling, with a touch of regret for not telling the truth to them!!! Since then, it is one of my ‘thuruppu cheettu’ on busy days…
Ingredients                                        Serves 4
  • Chicken…………………………350 Grams (bone in, cut into small pieces)
  • Oil………………………………..2 Tablespoons
  • Onion sliced thin…………...1 Cup
  • Curry Leaves………………….1 Sprig
  • Ginger Garlic Paste………...2 Teaspoons
  • Indian Green Chilly………..3 (split into two)
  • Red Chilly Powder……….…1 Teaspoon
  • Coriander Powder………….1 ½ Teaspoons
  • Turmeric Powder……………1/2 Teaspoon
  • Garam Masala Powder…...1 Teaspoon
  • Pepper Powder…………..….1/2 Teaspoon
  • Tomato Sliced……………..…1/2 Large
  • Vegetables cubed…………...2 Cups (I used Carrot, Beans, Potato and Fresh Green Peas)
  • Ghee…………………………..…1 Tablespoon
  • Whole Spices…………………4 Cardamom, 8 Cloves, 1 inch Cinnamon and 1 Star Anise
  • Basmati Rice………………....1 ¼ Cup
  • Thick Coconut Milk………..1 Cup
  • Coriander Leaves......……..2 Tablespoons (chopped)
  • Kasoori Methi……………..…1 Tablespoon
  • Salt as needed
  • ¼ Teaspoon Garam Masala to sprinkle on top
Method of Preparation
  1. Wash Basmati Rice properly; soak in warm Water for 20 minutes; drain properly and keep aside till ready to be used. (Let this happen while you make Chicken.)
  2. Heat Oil in a pan on medium high heat and saute Onion, Curry Leaves, Ginger Garlic Paste and Green Chilly till they are wilted.
  3. Reduce the heat to medium low and add Red Chilly Powder, Coriander Powder, Turmeric Powder, Pepper Powder and Garam Masala Powder; saute for a minute or till the raw smell is gone.
  4. Add Tomato, Chicken, Salt and 1 cup Water; cook till half done for about 8 minutes after boiling.
  5. When it is half done, add the Veggies and cook completely for another 8-10 minutes.
  6. Mean while in another pan on medium heat, melt Ghee and fry the whole spices till fragrant.
  7. Add the drained Rice and fry really good till the Rice on the bottom of the pan starts to move on itself. Keep aside till ready to be used.
  8. Once the Chicken and Veggies are cooked, remove the pieces with a slotted spoon and keep aside.
  9. Measure the amount of liquid left in the pan after cooking Chicken and make it up to 1 ½ cups (use extra Water to make up.)
  10. Boil together the Water - gravy mixture, Coconut Milk, Rice and some Salt (for the Rice) on high heat till boiled; then lower the heat to minimum; cover the pan and let it cook.
  11. When the Water level reaches the level of the Rice, mix once; put the Chicken and the Veggies on top as a layer; sprinkle the Coriander Leaves and Kasoori Methi (Crush them between your palm before adding); close the lid and let it cook completely until all the Water is absorbed.
  12. Once the Rice is cooked and the Water is all absorbed, mix it gently; check for Salt; sprinkle ¼ Teaspoon Garam Masala Powder on top; off the heat; close the pan and let it stand for 30 minutes before serving it warm with Raita.
Notes:
  • If you are using dried Peas, do cook it before using. I used freshly frozen variety and hence added directly into the Curry.)
  • Be very careful while mixing the Rice to avoid mashing of the Rice. I use a flat ended spatula and start from the side, scrapping the bottom and just turn it over. Do this in all of the portions; otherwise the Rice at the bottom may cook too much with less cooked Rice on the top.
  • To prevent mashing and clumping of the rice, please do not try to mix this a lot while very hot.
  • The amount of Salt should be enough, so that the dish can be eaten on its own.
  • This dish is tastier the next day!


Make it, enjoy the deliciousness and 
serve it to your family with love…

Friday, April 22, 2011

Pal Kanji (Rice Gruel/ Conjee with Coconut Milk)

Recipe No: 243
Kanji, Payar (Green Gram stir fried with Coconut), Pappadam and Achar (Pickle) is the usual Good Friday lunch, that is mostly served in the Church itself, after the long Good Friday service. But in some churches they put freshly grated Coconut into the Kanji and sometimes even Coconut Milk. My Mother used to make Pal Kanji at times with either regular Cow’s Milk or with Coconut Milk and I am a great fan of the later. So here is Pal Kanji…. It’s delicious all by itself, great with a side of Pappadam, excellent with the addition of Payar and awesome if Chammanthi is included… It doesn’t have to be Good Friday… just any day is fine for this….
Ingredients                                                Serves 3
  • Matta Rice……………………1/2 Cup (Red Parboiled Rice)
  • Water…………………………..4 Cups
  • Freshly grated Coconut…1/2 Cup (Frozen is okay, but don’t use desiccated)
  • Thick Coconut Milk……...1 ½ Cup (Dilute with some Water if you are using really thick Milk from a can)
  • Salt as needed
Method of Preparation
  1. Wash the Rice thoroughly and cook it together with the Water in a Pressure cooker till done. (It took 3 whistles in my cooker.)
  2. Once the Pressure is gone, open the lid and let it boil on medium heat. (If there is no Water remaining at all, do add ½ cup Water.)
  3. Add Salt, grated Coconut and Coconut Milk; let it boil on medium low heat, stirring often, for 5-8 minutes or till it is reduced to a consistency you need.
  4. Add more Salt if needed; switch off the heat and let it sit covered for 10 minutes before serving it hot or warm with desired sides.
Notes:
  • You can use any Rice that you make regular Kanji, for this too. (White Par boiled Rice is fine.) But adjust the cooking time accordingly.
  • Don't cook the Rice to a mushy consistency in the cooker; the extend you cook the Rice to make regular boiled Rice is what we are looking for. It will finish cooking in the Coconut Milk.
  • Do give the resting period for Pal Kanji as mentioned in the recipe, for it is essential to cook the Rice to a 'Kanji' consistency.
  • Pal Kanji has a tendency to thicken as it sits. So if it becomes too thick by the time you serve, do add some hot Water to make it into the consistency you like.
  • The amount of Salt should be enough so that the Pal Kanji can be eaten as such without any sides.


Make it, enjoy the deliciousness and 
serve it to your family with love…

Thursday, December 16, 2010

Vegetable Stew Rice

Recipe No: 143
Yesterday, while I was talking to a friend of mine who successfully tried my Chicken Stew Rice recipe (for recipe click here), I mentioned about its vegetarian version. As she showed some interest in knowing the vegetarian version and as most of the Christians are going through the Lent season, I thought it was a good idea to post it. The procedure for both Chicken and Vegetable versions are the same but the amount of ingredients are modified to mask the absence of Chicken.
Ingredients                                                                Serves 5 adults
For the Stew
  • Vegetables cubed……………..3 ½ Cups (I used Carrots, Beans, Potatoes and Fresh Green Peas)  
  • Oil…………………………………..1  Tablespoon
  • Whole spices………………......3 Cardamom pods, 6 Cloves and 1 one inch Cinnamon piece)   
  • Onion chopped……………......1/2 cup
  • Ginger chopped…………….....1  Tablespoon
  • Garlic chopped……………......1  Tablespoon
  • Indian Green chilly………….4, split into halves (Depending on your taste. If you are using hotter verities use only less)
  • Tomato sliced…………………..1/2 large
  • Thin coconut milk……………3/4 cup (mix 1/4 cup canned thick coconut milk with ½ cup water)
  • Thick coconut milk…………...3/4 cup
  • Pepper powder………………....1/2 Teaspoon
  • Homemade Garam Masala…1/2 Teaspoon (powder)
  • Coriander leaves chopped…..3 Tablespoons
  • Salt as per taste
  • Oil…………………………………..1 Tablespoon
  • Shallot sliced…………………...1 Tablespoon
  • All purpose flour/ Maida……1 ½ Teaspoons
  • Water……………………………..1/4 cup
To make rice
  • Ghee………………………………..1 Tablespoons
  • Whole Garam Masala………..3 Cardamom pods, 6 Cloves, 1 one inch Cinnamon stick                                                   and a small piece of Star Anise) 
  • Rice ………………………………..1 1/2 cups
  • Boiling Water…………………...3 cups
  • Salt …………………………………1 Teaspoon
Method of Preparation
To make the Stew 
  1. To a shallow pan on medium heat, add 1 Tablespoons of Oil, add the crushed whole Garam Masala and saute till it is fragrant.
  2. Add chopped Onion, Ginger, Garlic and Green Chilly and saute till everything is wilted for about3 minutes.
  3. Add the Vegetables and saute for 1 minutes on high heat.
  4. Add thin Coconut Milk and Salt. Once this is boiled, reduce the heat to low and cook till the Vegetables are almost done.
  5. Add sliced Tomato and continue cooking.
  6. In another shallow pan add 1 Tablespoon of Oil and saute the Shallots till brown.
  7. Adjust the heat to medium and add 1 ½ teaspoons of Flour and saute till its raw smell is gone. This step takes time, so be patient.
  8. Add ¼ cup water and mix till everything is combined well with no lumps. Add this to the already cooked stew and mix well.
  9. After a minute of boiling, add the thick Coconut Milk, Pepper Powder and Garam Masala Powder. Check the seasonings.
  10. If there is extra gravy, let it dry. This stew should be thick. When it’s almost thick, add the Coriander leaves and switch off the flame. 
To make the Rice
    1. While the Stew is cooking, make the Rice.
    2. Wash and soak the Rice for 15 minutes. Then let it drain.
    3. On a pan on medium high heat, add the Ghee followed by whole Garam Masala. Saute it till fragrant.
    4. Add the rice and fry it good (till the grains on the bottom of the pan start to move on its own).
    5. Add boiling Water and Salt.
    6. Close the lid, lower the heat to minimum and let it cook till all the water is absorbed.
    7. Once done just fluff up the rice and keep it open till assembling the rice.
      Assembling the dish and baking
      1. Preheat the oven to 350˚F/180˚C
      2. I used a bunt pan. But you can use any oven proof dish. Apply a slight coating of ghee on the bottom and sides of the dish.
      3. Line the bottom of the pan with 1/3rd of the rice, followed by ½ of the Vegetable Stew, then another layer of Rice and the rest of the Stew.
      4. Put the rest of the rice into the pan in which you made the Stew and swirl it around so that it picks all the gravy left in the pan. This will add extra moisture and taste to the dish.
      5. Layer this on top of the baking dish. Push all the layers a bit so that the rice and the Vegetables will all stay compact.
      6. Cover the top with Aluminum foil and bake for 30 minutes. Let it cool down for 10 minutes.
      7. If you are using a bunt pan turn it over into a nice flat plate and serve it warm with a spicy pickle and Raita.
      Notes:
      • When the Stew is made, the Salt should be on the higher side, so that when mixed with the Rice it should be perfect.


        Make it enjoy the deliciousness and
        serve it to your family with love….

        Saturday, December 11, 2010

        Paneer Methi Pulav

        Recipe No: 140
        Last week, when I called my Mother in Law she mentioned about this recipe, which, I gave a try and... it definitely tasted very different and distinct. This is very versatile too as you can substitute Paneer with any sort of protein…say shredded cooked Chicken. With a slight taste of Kasoori Methi and Coriander leaves, this surely will tickle your taste buds…
        Ingredients                                               Serves 5-6
        • Basmati Rice………………………..2 Cups
        • Paneer cubed……………………….200 grams or 4 Oz
        To make the Masala
        • Oil………………………………………1 ½ Tablespoons
        • Ginger Garlic paste……………….1 Teaspoon
        • Red Chilly Powder………………..1 Teaspoon
        • Tomato Chopped………………….3 Medium
        • Kasoori Methi………………………1 Tablespoon
        • Chopped Coriander Leaves…….1/2 Cup
        • Salt……………………………………..1/2 Teaspoon
        To Saute
        • Oil………………………………………1 ½ Tablespoons
        • Whole Garam Masala……………4 Cardamom pods, 6 Cloves, 1 inch Cinnamon piece
        • Onion cubed………………………..1 ½ Cups
        • Indian Green Chilly slit………....2-3 no
        Method of Preparation
        1. Wash and soak the rice in warm water for 20 minutes.
        2. Boil at least 8 Cups of water in a deep pan on high heat. Once boiled, add the soaked Rice and cook till it is almost done.
        3. Drain it in a Colander for 5 minutes and dump it into a wide pan and let the Rice cool down.
        4. Heat 1 ½ tablespoons of Oil in a wide pan on medium high heat and saute Ginger Garlic paste till the raw smell is gone.
        5. Add Red Chilly Powder and fry for 30 seconds, stirring constantly.
        6. Add Tomato and cook till everything is mashed up nicely.
        7. Add Kasoori Methi, Salt and Coriander leaves and mix well. This should be of a pasty consistency.
        8. Take the mixture from the pan and keep it aside till ready to be used.
        9. In the same pan add 1 ½ Tablespoons of Oil and shallow fry the Paneer cubes.
        10. Once golden brown on all the sides, take it away with a slotted spoon, leaving all the Oil back in the pan itself and keep it aside till ready to be used.
        11. Into the remaining Oil add thoroughly crushed whole Garam Masalas and fry till fragrant.
        12.  Add Onion and Green Chilly and saute till the Onion cubes are translucent.
        13. Add Rice, the Tomato mixture, Fried Paneer and enough Salt and mix thoroughly taking care not to break the Rice.
        14. Lower the heat to minimum, cover the pan and let it heat for 5 minutes.
        15. Mix once more, switch off the flame and let it stand covered for 20 minutes before serving it warm.
        Notes:
        • Cooking rice will not take much time, so don’t walk away from it even though you don't have to baby sit it. Don't over cook or the Rice will get mashed while mixing. Very slightly undercooked Rice will be perfect.
        • Dumping the drained Rice into a big pan will prevent the Rice from the bottom of the Colander from getting over cooked (due to the heat from the upper layers) and mashed.
        • Onion should be cut as slightly large cubes. Sauteing this till translucent makes it sweet and biting into it now and then with the Rice, enhances the enjoyment of eating this dish.
        • There should be enough Salt in this dish so that it can be eaten alone with a Raita. I would say ¾ to 1 more Teaspoon of Salt (apart from the Salt that was added to make the tomato mixture) should be enough. But this depends entirely up to your taste.
        • This dish can be eaten by itself, but will be good with a spicy side dish too.


        Make it, enjoy the deliciousness and
        serve it to your family with love…

        Monday, November 15, 2010

        Mixed Chinese Fried Rice

        Recipe No: 122
        I had already posted two types of Fried Rice. Now this is entirely different in taste from both of them. I am writing this recipe as a mixed one containing Chicken, Beef, Shrimp, Sausage and Egg. But if you want to take any of these out, please feel free to do so and customize it according to your taste, it will be as perfect as this one. 
        As I always used to write in fried rice recipes, this dish will be easy to make if cold rice is used. And another thing that I have to mention is the Soy Sauce that I am using. It’s dark Soy which is essential in this recipe for both color and taste.

        Ingredients                                                          Serves 8
        • Jasmine Rice………………....2 ½ Cups (If Jasmine Rice is not available use Basmati)
        • Chicken…............................1 Cup (Cooked and shredded)
        • Shrimp…………………........…3/4 Cups (Sprinkle a pinch of Salt and Pepper; fry lightly)
        • Hot Dog Sausage……...........2 (Slice thinly and fry lightly)
        • Egg………………………........…3 (Beat and scramble)
        • Beef………………………..........1/4 Cup (Sliced thin and cook with Salt and Pepper)
        • Chopped vegetables…........1 ½ Cups (I used Carrots, Onion, Beans, Capsicum and fresh Green Peas)
        • Celery Chopped fine…........3 Tablespoons
        • Green Onions Chopped......5 (Separate Whites and Greens)
        • Oil……………………..………....4 Tablespoons
        • Ginger and Garlic chopped...1/3 cup together(Take equal quantities of both)
        • Dark Soy Sauce……………….2 Tablespoons (I used Ching’s Secret Dark Soy Sauce)
        • Pepper and Salt as per taste
        Method of Preparation
        To cook the Rice
        1. Wash and soak the Rice for 20 minutes.
        2. Boil at least 10 cups of water.
        3. Once the water is boiled add the Rice and cook till it is just cooked. Take care not to overcook.
        4. Drain, let cool and then chill in the refrigerator.
        To make the Fried Rice
        1. Keep all the ingredients specially the non vegetarian items  ready before you start cooking. Because once you start, everything goes into the pan within minutes.
        2. Heat Oil in a wide pan on high heat and add Ginger, Garlic, Spring Onion Whites and Celery and saute for 30 seconds.
        3. Add the Vegetables and continue sauteing for a minute. The Vegetables should be still crisp.
        4. Add Rice, all the non vegetarian items, Soy Sauce, Pepper and Spring Onion Greens and mix thoroughly.
        5. Do a taste test and add enough Salt.
        6. Mix thoroughly; switch off the flame and serve hot garnished with Spring Onion Greens.
        Notes:
        • As soon as the rice is drained well, spread it on a big tray. Or the Rice at the bottom will be mashed and become lumpy.
        • The Shrimp that I used were big, so I sliced them lengthwise along the slit that was put to remove the vein, into two. This will cook them fast too.
        • Add enough Salt so that you can eat the Rice by itself.
        • It’s necessary to use dark Soy Sauce in this recipe and Ching’s Secret Dark Soy Sauce is available in almost all Indian stores.


        Make it, enjoy the deliciousness and
        serve it to your family with love...

        Wednesday, November 3, 2010

        Coriander Mint Chicken Biriyani

        Recipe No: 112
        In one of my earlier post I gave the recipe for Mint-Coriander Chicken. Every time I make it, it is a big hit in my house. So I decided to make it into a Biriyani form. It really came out well and the flavors are truly great and I am sure that all those who like the Chicken version will like this one too. The flavors are really great and have a very distinct and different taste from regular Biriyani. Here is the recipe...
        Ingredients                                      Serves 6
        • Mint- Coriander Chicken….1 batch (for recipe Click here)
        • Ghee………………………………1 Tablespoon
        • Whole Garam Masala……...4 Cardamoms, 6 Cloves, 1 Star Anise, 3 1 inch Cinnamon)
        • Rice…………………………….....2 Cups
        • Water………………………….....3 ½ Cups
        • Salt…………………………...…..1 Teaspoon
        • Fried Onion………………..…..2 Tablespoons
        Method of Preparation
        1. Make one batch of Mint-Coriander Chicken.
        2. Wash the Rice and soak it in warm Water for 20 minutes. Drain and keep it ready till ready to be used.
        3. Boil 3 ½ cups of Water.
        4. Heat Ghee in a pan on medium high heat and fry the Whole Garam Masala until fragrant.
        5. Add the Rice and fry till the rice on the bottom of the pan starts to move on its own. Add boiling Water and Salt; lower the heat to minimum and let the Rice cook until all the water is absorbed. Mix once or twice in between.
        6. Once cooked, fluff the Rice gently without mashing the Rice.
        7. Preheat the oven to 350˚F/180˚C.
        8. In an oven proof dish add 1/3rd of the Rice and layer the Chicken on top.
        9. Spread the rest of the Rice on top of the Chicken followed by the fried Onion.
        10. Cover with an Aluminum foil and bake for 40 minutes.
        11. Serve hot with Raita.
        Notes:
        • If you like, add Cashew Nuts and Raisins fried in Ghee before you serve this dish.
        • If Aluminum foil is not available spread a damp kitchen towel on top of the rice before baking. This will prevent the rice from drying out.


        Make it, enjoy the deliciousness and
        serve it to your family with love…

        Sunday, October 24, 2010

        Brown Rice

        Recipe No: 103
        This is a very simple rice dish which has the flavor of Cumin. It’s easy to make but at the same time different from regular white rice with a slight flavor of Caramel and Cumin. This is a recipe from my Mother in Laws kitchen and is perfect for parties.
        Ingredients                            Serves 5
        • Basmati Rice………….2 Cups
        • Water…………………...4 Cups
        • Oil…………………….....2 Tablespoons
        • Cumin Seeds………....1/2 Teaspoon
        • Sugar……………………3 Tablespoons
        • Salt……………………...3/4 Teaspoon or as per taste
        • Fried Onion……….....1/3 Cup (loosely packed)
        Method of Preparation
        1. Wash the Rice and soak it in warm water for 20 minutes. Drain and keep aside till ready to be used.
        2. Keep 4 Cups of water to boil while we do the other things.
        3. Heat Oil in a pan on medium high heat and add the Cumin Seeds; let it start to sizzle.
        4. Add Sugar and let it caramelize into amber colored Caramel.
        5. Add the Rice and stir for one minute.
        6. Add the boiled Water and Salt; mix well; close the pan and let it cook on minimum heat.
        7. When the Water level equals the Rice level spread the fried Onions on top. Close the pan and let it cook till the Rice is done and all the water is absorbed.
        8. Once cooked, mix well without breaking the Rice and serve hot.
        Notes:
        • To fry Onions, slice them and mix with a bit of Corn Starch (Just before frying) and deep fry in hot Oil till light brown. This will attain some more color as it cools.
        • If you don't like the taste of Cumin reduce its amount or just avoid it. Either way you will get a dish that taste good but slightly different.


        Make it, enjoy the deliciousness and 
        serve it to your family with love…

        Monday, September 20, 2010

        Soy Chunks Pulav

        Recipe No: 80
        Soy chunks are processed Soy beans (what left after extracting soy bean oil and hence fat free) which is a very good source of protein for vegetarians. When combined it with rice, this becomes so good and flavorful. Adding a salad and a pickle makes it a meal.
        Ingredients                                         Serves 8
        • Dry Soy Chunks………...…………………..1 Cup
        • Basmati Rice………………………………....3 Cups
        • Ghee…………………………………………….1 Tablespoon
        • Whole Garam Masala…………………….4 Cardamom pods, 2 one inch Cinnamon and 8 Cloves
        • Veggies cut into cubes…………………….1 Cup (I used Carrot, Beans and Peas)
        • Onion chopped……………………………...1/2 Big
        • Vegetable Oil………………………………....2 Tablespoons
        • Ginger-Garlic paste……………………......1 Tablespoon
        • Store Bought Garam Masala Powder…2 Teaspoons
        • Boiling Water…………………………………6 Cups
        • Coriander leaves…………………………....2-3 Tablespoons
        • Salt………………………………………….......as per taste
        Method of Preparation
        1. Boil 8 cups of water in a pot. Once boiled, add the Soy chunks and let it boil for a minute and off the flame. Cover it and let it sit for 5 minutes. Drain the Soy chunks and put it in cold water. Squeeze and take the chunks out. Repeat it for 3 times. This will take that ‘processed’ taste out of Soy Chunks and make it rehydrate properly.
        2. Wash the Basmati rice really good and soak in warm water for 20 minutes. Drain and keep till ready to be used.
        3. Heat Ghee in a pan and add the whole Garam Masala and fry till it is fragrant.
        4. Add the rice and fry till the rice on the bottom of the pan starts to move on its own. Switch off the flame, take the rice out and keep aside.
        5. In the same pan heat the Oil and saute the Onion. Add Ginger-Garlic paste and saute till the raw smell is gone.
        6. Add the Veggies and saute for two minutes.
        7. Mix in the prepared Soy chunks followed by Garam Masala Powder and fry together for 2 or 3 minutes.
        8. Mix in the rice to the Veggie mixture followed by boiling water and enough salt.
        9. Mix once and close the pan and let cook on a very low flame till the water is absorbed and the rice is nicely cooked. Mix the rice once or twice along the way gently, taking care not to break the rice.
        10. Once cooked keep the lid open for a few minutes, sprinkle the coriander leaves and serve hot.
        Notes:
        • I happen to like store bought Garam Masala for this particular dish as it contains a bit of Coriander, Cumin and Chilly powder (My homemade Garam Masala is different) which is very essential for this dish.
        • Soy Chunks are available in most of the Indian stores.


        Make it, enjoy the deliciousness and 
        serve it to your family with love…


        Wednesday, July 14, 2010

        Indian Style Chicken Fried Rice

        Recipe No:60
        Many a times I used to get this doubt from my friends regarding the difference between Vegetable Pulav and Vegetable Fried Rice. Let me try to make it clear.
        Vegetable Pulav is an Indian dish while Fried rice has a Chinese influence. Hence I consider them  different. I fry the rice before cooking Pulav and will never fry after cooking. For Fried rice I cook the rice in a regular manner in lots of water, drain and then fry the already cooked rice. Thus Fried Rice is excellent to use the left over rice. Technically speaking for Fried Rice because of its Chinese origin I try to avoid all Indian spices like Cardamom, Cinnamon, Cloves, Bay leaves etc:- and also Raisins and Cashew nuts and even Fried Onions.  In Pulav I add all these things.
        So for me these two are really different and if you follow this, I am sure you will also be able to taste the difference. But cooking is all about your preferences and your taste buds…so go ahead and make it the way you like….This is how I make it
        Ingredients                                   Serves 6-8 adults
        • Basmati Rice………………....2 Cups
        • Vegetable oil…………….......4 Tablespoons
        • Vegetables……………….......1 Cup (Includes Carrot, Beans, Peas and Green Capsicum)
        • Celery………………………......3 Tablespoons (Finely Chopped)
        • Onion………………………......1/4 Cup (Thin long slices)
        • Ginger-Garlic crushed…...2 Tablespoons (together)
        • Egg………………………………2
        • Cooked Shredded Chicken…1/2 Cup
        • Spring Onion Chopped………4 (Separate White and Green portions)
        • Soy Sauce………………………..1 Teaspoon
        • Pepper…………………………….3/4 -1 Teaspoon
        • Salt as per taste
        Method of Preparation
        1. Wash and soak the rice in warm water for 20 minutes. Drain and keep aside.
        2. Boil at least 12 cups of water. When boiled add the rice and cook till almost done. Take care not to overcook the rice.
        3. Drain and spread it on a large plate to cool. If possible refrigerate before doing the rest. 
        4. In a large pan or wok on high heat add the oil.
        5. To it add Ginger-Garlic, Celery and Spring Onion whites. Saute for a minute.
        6. Add the Onion followed by the Vegetables and stir for 2 minutes. Don’t brown the veggies. It should be crisp.
        7. Move all the vegetables to a side of the pan and crack the eggs into the pan. Stir fast to scramble it.
        8. Once scrambled mix everything together add the chicken pieces, Soy sauce, Pepper powder and a bit of salt.
        9. Now mix the rice in two additions. Add salt according to taste. Stir till the rice is reheated.
        10. Finish by sprinkling spring onion greens on top. Serve hot.
        Notes:
        • It is very important to start with cold rice. Otherwise there are chances for the rice to break or to form clumps.
        • The whole process of making the rice is on high heat so keep everything ready to go before starting.
        • It is good to use white Pepper powder, that way the rice will remain white. As you can see I used black and the specks are visible.
        • Never avoid Green/Spring Onions/  Scallions. They give a signature taste to the Fried rice.
        • If you want you can add a pinch of Aginomotto (Mono sodium Glutamate/ MSG) to get that authentic taste. But I decided not to use.
        • You can avoid Chicken and Egg to make it a Vegetable fried rice and add Fried Shrimp to make a Shrimp fried Rice.


        Make it, enjoy the deliciousness and
        serve it to your family with love...

        Thursday, July 8, 2010

        Fish/ Salmon Biriyani

        Recipe No: 54

        Even though there are a lot of steps for this like most of the other Biriyani recipes, you can definitely multitask and make this in a much lesser time. Another thing is that the Fish Masala, fried onions, the almond paste and even the rice can be made ahead of time ( the day before) and assemble and bake on the day you are going to serve it. This makes it easier and a very good main dish for parties.
        Ingredients                                   Serves 8-10 Adults
        To Marinate
        • Salmon pieces……………...2lb
        • Salt…………………………....1/2 Teaspoon
        • Chilly Powder……………...1/2 Teaspoon
        • Turmeric Powder………...1/2 Teaspoon
        • Lemon Juice………………...1 Tablespoon
        To Grind
        • Ginger Roughly chopped...1/4 Cup
        • Garlic roughly chopped.....1/4 Cup
        • Green chilly chopped…......1/4 Cup (Use as much as you want depending on your taste)
        • Onion Chopped……………...3 Cups
        To Saute
        • Oil……………………………........4 Tablespoons
        • Turmeric Powder………........1/2 Teaspoon
        • Salt………………………....…......1 Teaspoon
        • Curd…………………….…….......1/2 Cup
        • Tomato sliced…………………..1 Large
        • Coriander leaves /Cilantro...1/2 cup chopped
        • Mint leaves chopped………...1/4 Cup
        • Garam Masala Powder……..3/4 Teaspoon
        • Lemon Juice……………..……..2 Tablespoons
        To make the rice
        • Ghee…………………………......2 Tablespoons
        • Whole Garam Masala……….7 Cardamom, 10 Cloves, 3 one inch Cinnamon sticks
        • Rice………………...……….........3 Cups
        • Water………………………........5 ½ Cups
        To Blend
        • Almonds ………………..…........8 (Put it in boiling water and take the skin off)
        • Coconut Milk………………......1/4 Cup
        • Turmeric Powder………….....1/4 Teaspoon
        • Saffron……………………..........A Small pinch
        To Garnish
        • Cashew nuts and Raisins…....4 Tablespoons each
        • Sliced Onion to fry……….....…1 Cup
        Method of Preparation
        1. Marinate the fish with the ingredients given in the marinade section and keep aside for ½ hour.
        2. Grind together (or chop finely) all the ingredients given in that section to a course consistency and keep aside.
        3. Blend all the ingredients given in that section into a smooth consistency and keep aside. Use 2-3 Tablespoons of water if needed.
        4. Wash and soak the rice in warm water for 20 minutes and drain.
        5. Deep fry or saute thinly sliced onions for garnishing.
        To make the Fish Masala
        1. In a deep pan heat some oil and fry the fish for a minute on each side and keep it aside. Use the rest of the oil to make the masala. Frying will  give the fish some strength to withstand the cooking without disintegrating.
        2. In the same oil saute the Onion mixture together with Salt and Turmeric powder on a medium high heat till it is almost brown. Add more Oil if needed.
        3. Add the fried Fish, Curd, Tomato and ¼ cup of water, close the pan and  cook it on a medium heat for 8- 10 minutes.
        4. When it is cooked add chopped Coriander and Mint leaves, Garam Masala Powder and Lemon Juice and mix well taking care not to break the fish pieces. When almost dry switch off the flame and keep it aside till ready to be used.
        To make the Rice
        1. Start to boil 5 ½ cups of water.
        2. To a pan add the Ghee and fry Cashew nuts followed by Raisins (for garnishing) .Take them off and keep aside.
        3. To the remaining Ghee add the whole Garam Masala and fry till fragrant.
        4. Add the rice and fry till the rice on the bottom of the pan starts to move on its own.
        5. Add the boiling water, lower the flame to minimum, cover the pan and cook it till all the water is evaporated and the rice is almost cooked. You can do this while the fish is cooking.
        To assemble and bake the Biriyani
        1. Preheat the oven to 350˚F/180˚C
        2. In an oven proof dish layer 1/3rd of the rice evenly. Sprinkle some almond-turmeric water on top and then layer half of the Fish Masala. Layer another 1/3rd of the rice followed by the rest of the Fish Masala and end the layering with the remaining rice.
        3. On top add the rest of the almond- turmeric water and sprinkle fried Onions, Cashew nuts and Raisins.
        4. Cover this with an Aluminum foil or a damp cloth.
        5. Bake this for 30-45 minutes in the preheated oven and let it stand for at least 15 minutes before serving.
        Notes: If you don’t have an oven, you can make it on stove top itself. Assemble everything in a pan, cover with an airtight lid and put it on a minimum flame and cook for 30 minutes. Take care not to burn the bottom.


        Make it, enjoy the deliciousness and 
        serve it to your family with love...

        Sunday, June 27, 2010

        Ghee Rice/ Neychor

        Recipe No: 45
        Growing up this used to be ‘the rice’ my mother used to make for all the special occasions. We all at home totally adored this. I love to eat this without any sides and I should say, it tastes better the next day. 
        Ingredients                                             Serves 6 Adults
        • Basmati rice……………………..3 cups
        • Whole Spices……………………10 Cardamom, 10 Cloves, 2 Star Anise and 4 1" Cinnamon sticks
        • Water……………………………….6 cups
        • Ghee………………………………..4 Tablespoons
        • Salt…………………………………..3/4-1 Tablespoons (according to your taste)
        • Cashew nuts and Raisins ….4 Tablespoons each
        • Thinly Sliced Onion…………..1 Cup
        • Oil for deep frying Onions (at least 1 cup)
        Method of Preparation
        1. Wash and drain the Basmati rice properly.
        2. In a hot pan add two tablespoons of Ghee and fry the Cashew nuts, when it starts to brown on the edges add the raisins and fry till it is plumped. Remove this and keep aside for later use.
        3. To the remaining Ghee, add Whole Garam Masala and fry till fragrant.
        4. Add the rice and mix for a minute and add water. (Use water at room temperature.)
        5. Add the salt, cover it and let it boil. Once boiled, lower the temperature to minimum and let it cook.
        6. In the mean time in another pan heat the oil and deep fry the onions.  ( I mix the Onions with 1/2 teaspoon of cornflour just before dropping it in the oil. This will reduce the amount of oil absorbed by the onions…I learned this from vahrehvah.com.) When golden brown remove this and drain the excess oil by keeping it on a paper towel. Instead of deep fried Onions you can also use sauteed onions.
        7. When the level of the water in the rice is reduced to the level of the rice, add fried Onions, Cashew nuts, Raisins and the rest of the Ghee on top of the rice, cover it again and let it cook until all the water is absorbed.
        8. When the water is absorbed, switch off the flame, fluff it once and keep the rice covered for 30 minutes before serving.


        Make it, enjoy the deliciousness and 
        serve it to your family with love…

        Sunday, June 20, 2010

        Vegetable Pulav

        Recipe No: 38                                                                        
        This is a recipe without any Onion. So this Pulav will stay good at room temperature for quite a long time, making it excellent to pack for picnics as well as for trips. I have to say it tastes better the next day, stays good in the freezer for at least two weeks, thaws well and best of all if seasoned properly, it can be eaten just like that with Raita. Enjoy...
        Ingredients                                                           Serves 6 adults
        • Basmati rice……………………...3 cups
        • Ghee (Clarified Butter)..……..2 tablespoons
        • Whole Garam Masala…….....6 Cardamoms, 8 Cloves, 2 two inch Cinnamon piece and 2 Star Anise
        • Water……………………………...5 ½ cups
        • Chopped vegetables………....1 cup (I like to use a combination of Carrot, Beans and Peas)
        • Crushed Ginger and Garlic…2 Tablespoons (I use paste at times too)
        • Tomato chopped………………1 medium
        • Curd………………………………...1/2 cup
        • Oil……………………………………1 Tablespoon
        • Salt…………………………………..as per taste (I use at least a tablespoon)
        For Garnishing
        • Fried Onions………………………1/4 cup
        • Cashew nuts and Raisins…….3 Tablespoons each
        Method of Preparation
        1. Wash the rice properly and let it soak in warm water for 20 minutes and drain.
        2. Start boiling 5 ½ cups of water in a pan.
        3. Heat Ghee in a wide deep pan on medium high heat and fry the Cashew nuts for 30 seconds followed by Raisins. When the Raisins plump up remove it from the pan and keep aside for garnishing.
        4. To the rest of the ghee add whole Garam Masala and fry till fragrant.
        5. Add the Rice and fry really well. I used to fry till the rice grains on the bottom of the pan start to move on its own. Remove the rice and keep it aside for later use.
        6. In the same pan add a tablespoon of Oil and add Ginger and Garlic.
        7.  When the raw smell is gone add chopped Tomato followed by the Vegetables. Saute for a minute and add the curd. Mix well and let it cook for a minute.
        8. Add the fried Basmati rice, boiling water and Salt, mix once, close the pan and let it cook on the lowest flame till all the water is absorbed.
        9. When all the water is absorbed open the pan, mix once and let it cool down for 30 minutes.
        10. Fluff up the rice without breaking the grains, add the garnishes on top and serve warm.


           Make it, enjoy the deliciousness and
          serve it to your family with love…

          Monday, June 14, 2010

          Thai Fried Rice

          Recipe No: 33
          Ingredients                                                                       Serves 6
          • Raw Jasmine rice………………...2 cups
          • Boneless, skinless chicken…....1 cup (cut into thin strips)
          • Red Curry Paste…………………1/2 Teaspoon
          • Salt…………………………………...1/2 Teaspoon
          • Vegetable Oil……………………...5 Tablespoons
          • Sesame Oil…………………………1 Tablespoon
          • Ginger-Garlic paste……………..2 Teaspoon
          • Red Chilly Paste………………….1 Teaspoon (I used Sambal Oelek)
          • Veggies cut into thin strips…...1 ½ Cups (I used Carrots, Beans, Celery and Onion)
          • Egg……………………………………..2
          • White Sesame seeds (Ellu)……2 Tablespoons(optional)
          • Fish Sauce…………………………….2 Tablespoons
          • Salt as per taste
          Method of Preparation
          1. Marinate the Chicken pieces with the Red Curry paste and ½ teaspoon of Salt and keep aside till it is ready to be used.
          2. Wash rice and soak it in warm water for 20 minutes.
          3. Boil at least 8 cups of water. When boiled, add the rice and cook it till almost done. Don’t cook it fully as that might become very sticky.
          4. Drain and let it cool completely before making the rice. If you are in a hurry dump the strained rice on to a large sheet pan or plate and let it cool.
          5. Heat a large pan or wok on high. When heated properly add a Tablespoon of oil and fry the marinated Chicken pieces till done. Drain and keep aside.
          6. Heat the rest of the Vegetable and Sesame Oil on high heat and fry Sambal Oelek or Red Chilly paste and Ginger-garlic paste for 30 seconds.
          7. Add the Veggies and saute for 2 minutes. Don’t cook it through as it should be crunchy at the end.
          8. Push all the veggies to the side of the pan and crack the eggs to the middle of the pan. Quickly scramble the eggs with a spatula. Once cooked through, mix the egg with other veggies.
          9. Add the cooked rice, fried Chicken, Sesame seeds and Fish sauce and mix and fry for 2-3 minutes. Adjust the salt level and serve hot.
          Notes: Jasmine rice is a type of Thai rice which has a fragrance similar to that of Basmati. It is sticky when cooked, making this dish sticky, just like most of the Thai rices.
          Adding Sesame seeds is strictly optional. This is more common with Japanese Cusine but some how I like it in this recipe.
          As fish sauce is extremely salty, add extra salt if needed only towards the end after mixing the fish sauce in.
          Fish sauce, Sambal Oelek and Red Curry Paste are available in most of the  grocery stores in the Sauce or the Thai section.


          Make it, enjoy the deliciousness and 
          serve it to your family with love…

          Tuesday, May 25, 2010

          Stew Rice

          Recipe No: 13
          This is one of the very unique dishes that I had seen my mother in law cook. I never asked her for her recipe….as she doesn’t have one…She just cooks... no spoons or measuring cups. It comes naturally for her……  But having spend a lot of time with her in her kitchen watching her cook, helped me recreate this awesome tasting, very unique dish. I don't know whether it came out as good as hers, but still it is finger licking good.

          Ingredients                                                                Serves 6 adults
          For the stew
          • Chicken………………………....1/2kg (Remove the skin, cut into small pieces, wash and drain.
          • Oil………………………………….1 ½ Tablespoons
          • Whole spices………………......4 Cardamom pods, 8 Cloves and 1 one inch Cinnamon piece)
          • Onion chopped…………….......3/4 cup
          • Ginger chopped……………......1 ½ Tablespoons
          • Garlic chopped……………........1 ½ Tablespoons
          • Indian Green chilly………….... 7-8 split into halves (Depending on your taste. If you                                                              are using hotter varieties, use less)
          • Tomato sliced…………………....1/2 large
          • Thin coconut milk……………...3/4 cup (mix 1/4 cup canned thick Coconut Milk with ½ cup Water)
          • Thick coconut milk………….....3/4 cup
          • Pepper powder……………….....1/2 Teaspoon
          • Homemade Garam Masala…..3/4 Teaspoon (powder)
          • Coriander leaves chopped…....3 Tablespoons
          • Salt as per taste
          • Oil……………………………………...1 Tablespoon
          • Shallot sliced…………………....….1 Tablespoon
          • All purpose flour……………........1 Teaspoon
          • Water………………………………....1/4 cup
          To make rice
          • Ghee…………………………………..2 Tablespoons
          • Whole Garam Masala…………...4 Cardamom pods, 8 Cloves, 1 one inch Cinnamon stick                                                     and a small piece of Star Anise) 
          • Rice ……………………………………2 cups
          • Boiling Water……………………..4 cups
          • Salt …………………………………….as per taste
          Method of Preparation
          To make the Stew
          1. To a shallow pan add 1 ½ Tablespoons of oil and add the crushed whole Garam Masala and saute till it’s fragrant
          2. Add chopped Onion, Ginger, Garlic and Green chilly and saute till everything is wilted for about3 minutes.
          3. Add the chicken and saute for 3 minutes on high heat.
          4. Add thin coconut milk, salt and half teaspoon of Garam Masala and cook till the chicken is done.
          5. Add sliced tomato when the chicken is 3/4th done.
          6. In another shallow pan add 1 Tablespoon of oil and saute the shallots till brown.
          7. Adjust the heat to medium and add 1 teaspoon of flour and saute till its raw smell is gone. This takes time, so be patient.
          8. Add ¼ cup water and mix till everything is combined well with no lumps. Add this to the already cooked stew and mix well.
          9. After a minute of boiling, add the thick coconut milk and pepper powder. Check the seasonings. Salt should be slightly higher than usual as it have to be mixed with the rice.
          10. If there is extra gravy, let it dry. This stew should be thick. When it’s almost thick, add the rest of the Garam Masala and the coriander leaves. Switch off the flame.

          To make the Rice
          1. While the stew is cooking let’s make the rice.
          2. Wash and soak the rice for 15 minutes. Then let it drain.
          3. On a pan on medium high heat, add the Ghee followed by whole Garam Masala. Saute it till fragrant.
          4. Add the rice and fry it good (till the grains on the bottom of the pan start to move on its own).
          5. Add boiled water and salt (I use at least one teaspoon)
          6. Close the lid, lower the heat to minimum and let it cook till all the water is absorbed.
          7. Once done just fluff up the rice. And keep it open till assembling the rice.
          Assembling the dish and baking
          1. Preheat the oven to 350˚F/180˚C
          2. I used a bunt pan. But you can use any oven proof dish. Apply a slight coating of ghee on the bottom.
          3. Line the bottom of the pan with 1/3rd of the rice, followed by whole of the chicken and then 1/3rd of the rice.
          4. Put the rest of the rice into the pan in which you made the stew and swirl it around so that it picks all the gravy left in the pan. This will add extra moisture and taste to the dish.
          5. Layer this on top of the baking dish. Push all the layers a bit so that the rice and the chicken will all stay compact.
          6. Cover the top with Aluminum foil and bake for 30 minutes.
          7. If you are using a bunt pan turn it over into a nice flat plate and serve it warm with spicy pickle.


          Make it enjoy the deliciousness and
          serve it to your family with love….