Creating a blog was out of the question for a long time for me, as measuring everything in the kitchen was like biting into an eggshell. I enjoy cooking and don’t want to waste even a slightest bit of enjoyment in that small world of mine. But little did I know that everything will change, when my husband came home with the Oscar nominated film ‘Julie and Julia’( a real life story) where Julie Powell (part played by Amy Adams) challenged herself to make all the 524 recipes from Julia Child's cook book ‘Mastering the Art of French Cooking’ and blogging all her experiences (The Julie/Julia Project). It was an inspiring movie. A few days later when we were discussing this casually with a friend of ours over tea…everything changed dramatically…..” How about you making at least half of it in one year? Not French but your own. 262 recipes that will inspire others and present it as a blog?” For a minute my mind traveled faster than light… With an experience as a helper in my mother in laws kitchen for 6 years followed by a three year everyday struggle to satisfy the palate of my foodie husband, if I cannot do it then why should I cook? But on the other side with an experience in English literature extending no more than expanding outline stories in English grammar class when I was 18 and two small kids that come in handy at times, will a commitment for the next one year work? Anyway my ‘cook's ego’ didn’t allow me to say no...

So my friends …here I am opening my recipe book, trying to perfect and present 262 recipes in the coming 365 days….A Challenge that will of course tastes good. Come.. Have a walk with me along my journey.. Cheering and inspiring….Forgiving and tolerating…Testing and tasting….for ‘A Tasty Challenge’

Search This Blog

Friday, July 30, 2010

Meen Pollichathu (Banana leaf broiled Fish)

Recipe No: 70
This is a variant of the traditional Karimeen a.k.a. Pearl spot pollichathu. When we went to Kerala for a vacation last year, we traveled around 60 kilometers, only to get this Karimeen Pollichathu from a Toddy shop in Changanacherry- Alapuzha Highway. This is my take on that incredible preparation using an available  local fish.  As Pearl spot is very rare in the area where we are staying, I decided to go with Tilapia which is available in most of the places.  The result is very good, even though it cannot be compared with the taste our own  Karimeen. Other than the Fish, there are two other important ingredients too in this dish. Banana leaves and lots and lots of Curry leaves. When the smell of Banana leaves mingles with the other flavors of dish while broiling, the outcome is simply enticing. Hope you all will enjoy it as much as I.
Ingredients                                          Serves 4
  • Tilapia fillets……........4
  • Coconut Oil………….4 Tablespoons
  • Banana Leaves……..4 big Pieces
    To grind
    • Green Chilly…….........2-3 (I seeded it since I want only the flavor and not the heat as we are using red chilly powder and Pepper powder)
    • Shallots…………...........2 Big
    • Ginger-Garlic paste…2 Teaspoon
    • Red Chilly Powder…..1 Tablespoon
    • Turmeric Powder……1/2 Teaspoon
    • Pepper Powder……….1/2 Teaspoon
    • Lemon Juice……………2 Tablespoons
    • Salt………………………..1 Teaspoon
    • Oil………………………….1 Tablespoon
    To Saute
    • Coconut Oil……………..2 Tablespoons
    • Onion Sliced……………2 Cups
    • Shallots Sliced…………1 Cup
    • Curry leaves……………5-6 Sprigs
    Method of Preparation
    1. Put all the ingredients in the ‘to grind’ section in a food processor or a blender and grind into a course paste.
    2. Marinate the Fish with half of the ground paste and keep aside for half hour. Keep the other half of the paste for later use.
    3. In a shallow pan heat 3 Tablespoons of oil on high heat and shallow fry the fish for a minute on each side. Fish shouldn’t be cooked all the way through or browned. Remove the fish and keep aside till ready to be used.
    4. To the remaining oil in the same pan, add a tablespoon of Coconut oil and add the sliced Onion, Shallots and Curry Leaves and saute till golden brown.
    5. Once browned, add the left over of ground marinade and saute till the raw smell is gone for about 3 minutes on medium high heat. Switch off the heat.
    6. Arrange the Banana leaves and spread a tablespoon of the sauteed onion  mixture on each leaf.
    7. On top of the Onion place a Tilapia fillet.
    8. Spread the remaining Onion mixture equally on the top of all the fishes.
    9. Fold the leaves on all sides so that the fish is secure inside.
    10. Place the fishes seam side down on a baking pan and broil on high for 6 minutes on each side on the second rack from the top of the oven. If you don’t have a broiler it is easy to make in a pan on the stove top. Add a teaspoon of oil into a pan on medium high heat and place the fish wrapped in banana leaf, cover the pan and cook for 5 minutes on each side or till the Banana leaf is all charred and the fish is cooked through.
    11. Serve hot with plain boiled rice.
    Notes: 
    • Lining the baking pan with an Aluminum foil before placing the fish will make clean up very easy.
    • Banana leaves are available in the frozen section of most Indian stores and some other food specialty stores. In some places fresh Banana leaves are also available.
    • If you are using fresh Banana leaves, it is good to show it on the flame for a few seconds to make it more pliable.


      Make it, enjoy the deliciousness and 
      serve it to your family with love...

      Tuesday, July 27, 2010

      Jam Tart

      Recipe No: 69
      Ingredients                                                 Makes 2- 9 inch tarts
      For the Shell
      • All Purpose Flour/Maida…2 cups
      • Butter…………………………..1/2 Cup/ 1 stick
      • Egg Yolk……………………….1
      • Sugar………………………...…1/2 Cup
      • Baking soda…………………..1/4 teaspoon
      • Salt………………………………1/4 Teaspoon
      • Cold Water…………………….2-4 Tablespoons / as needed
      For the filling
      • Jam……………………………...As needed (I used homemade Strawberry preserve but you can use your own favorite jam)
      Method of Preparation
      1. Preheat the oven to 375˚F/190˚C
      2. Sift together Flour, Salt and Baking powder.
      3. Mix sugar and butter till creamy.
      4. Add egg yolk and mix till combined.
      5. Add the flour mixture and knead into a soft dough. Use some cold water if needed. But take care not to add too much water. Use only enough water to make soft dough.
      6. Sprinkle some flour on a work surface and roll out the dough into ¼ inch thickness. Transfer this to a tart tin. For a 9 inch tart pan, you will need only half of this dough. So take the amount of dough needed according to the size of your tart pan. If you don’t have a tart pan, cut it into small circles and do the same thing in a muffin tin. Take care not to stretch the dough. If you stretch, it will shrink right back in while baking.
      7. With the help of a fork, prick the bottom of the tart dough. This is to prevent the dough from raising too much.
      8. Put the jam in the middle of the tart as much or as less as you like. (I don’t like it too sweet, so I spread only 1/4 cup of jam in the middle of the Tart). If you don't like pieces of fruit in the preserve you are using, pulse it in a food processor/ blender for 10 seconds.
      9. Put it in the lowest rack of the oven for 10 minutes and then shift it to the middle rack and bake till the sides and the bottom of the tart is slightly browned, for about another 10 -15 minutes.
      10. Serve warm.


      Make it, enjoy the deliciousness and
      serve it to your family with love…

      Battura

      Recipe No: 68
      Even though I love Battura, thinking of the guilty feeling that I am going to have after eating them often kept me away from making it. So after some trials and a lot of greasy Batturas, I came up with this non greasy variety of Battura. The secret is much in the consistency of the dough. If the dough is too soft, it will absorb a lot of oil. If it is too hard, the end product will be hard. So take care in making the dough to the just right consistency.
      Ingredients                                                  Makes 16 small ones
      • All Purpose flour/ Maida….2 cups
      • Yeast…………………………….1 Teaspoon
      • Sugar…………………………….1 tablespoon
      • Salt……………………………….3/4 Teaspoon
      • Yogurt………………………..…3 Tablespoons
      • Lukewarm water……………1/2 Cup
      • Oil for deep frying
      Method of Preparation
      1. Dissolve Sugar and Yeast in lukewarm water. Cover this with a foil and keep aside for 5 minutes. This is to activate the yeast and it should be foamy by this time.
      2. Mix Flour, Salt and Yogurt and knead it into a soft dough using the Yeast water. It should not be too sticky. Use more water if needed.
      3. Place this in a big bowl, cover with a kitchen towel and keep it in a warm place till it is doubled in size.
      4. Once doubled, punch it down, and let it rise once more time for 1 hour. This time also cover it with a towel and keep in a warm place.
      5. Divide this into 16 equal portions and roll them into 3 inch circles. This should not be very thin otherwise it will not puff up.
      6. Heat the oil for deep frying on high flame. There should be at least 2 inches of oil.
      7. Deep fry the Batturas on both sides till they are cooked and nicely browned on both sides. With the back side of a  slotted spoon, push the Batturas into the oil till it is puffed.
      8. Once fried, take it out of the oil and drain the excess oil on a paper towel.
      9. Serve hot with Channa Masala.
      Notes: 
      • The Oil should be really hot while frying, otherwise it will absorb a lot of oil.
      • Put yeast only in lukewarm water. Hot water might kill the yeast and cold water might not activate the yeast. If the water in which the yeast is dissolved is not frothy in 5-10 minutes, then either you have killed the Yeast or its too old. In both cases start over again.
      • I like to make small Batturas than the traditional big ones, as its easy to be fried. But that's only a personal preference. 


        Make it, enjoy the deliciousness and
        serve it to your family with love…

        Monday, July 26, 2010

        Channa Masala

        Recipe No: 67
        ‘Channa’ or Chick Peas or Garbanzo is a protein rich source for vegetarians. This is a delightful side dish for Poori and Battura. Two very unusual ingredients in this preparation are Chaat Masala and Kasoori Methi. Apart from Poori and Battura, it goes well with Puttu and Uppuma.
        Ingredients                                        Serves 8-10 adults
        To Pressure Cook
        • Whole dry Chick Peas…......2 Cups (Soak at least 8 hours, overnight is the best)
        • Turmeric Powder………......1/2 Teaspoon
        • Salt…………………………….....1 Teaspoon
        To Saute
        • Oil……………………………......….2 Tablespoons
        • Onion chopped……………........2 Cups
        • Ginger-Garlic Paste…….........1 ½ Tablespoons
        • Curry Leaves……………….......2-3 sprigs
        • Red Chilly Powder………........1 Tablespoon
        • Coriander Powder………........2 ½ Tablespoons
        • Turmeric Powder………........1/2 Teaspoon
        • Garam Masala Powder…......1 Teaspoon
        • Chaat Masala Powder…........1/2Teaspoon
        • Kasoori Methi……………….....1 Teaspoon
        • Tomato Roughly Chopped…1 Cup
        • Chopped Coriander Leaves…3 Tablespoons
        Method of Preparation
        1. Pressure cook soaked Channa, Turmeric Powder, Salt and 3 cups of water (or water needed to cook the Channa) till the Channa is soft but not mushy.  (In my Cooker it takes around 20 minutes after the first whistle.) Keep aside.
        2. Heat 2 tablespoons of Oil in a pan and saute chopped Onion and Curry leaves till it starts to brown on the edges.
        3. Add Ginger-Garlic paste and saute till everything is brown in color.
        4. Add Chilly Powder, Coriander powder. Turmeric Powder, Garam Masala Powder and Chaat Masala Powder and saute till the raw smell is gone.
        5. Add chopped Tomato and saute till it is really mashed.
        6. Add the cooked Channa together with the remaining liquid (Add more water if needed) and mix well. Close the pan, reduce the heat to medium and let it simmer for 20 minutes or till the Channa absorb all the flavors and the gravy is reduced to the desired consistency. Add salt if needed.
        7. Take Kasoori methi in your palm and crush it with the other palm and add.
        8. Mix in the chopped Coriander leaves and switch off the flame. Serve hot.
        Notes:
        • Instead of using dry Channa, you can use 3 cans of Chick Peas/ Grabanzo Beans. This will save time as it is previously cooked.


          Make it, enjoy the deliciousness and
          serve it to your family with love…

          Saturday, July 24, 2010

          Freezing Strawberries and Strawberry Milkshake

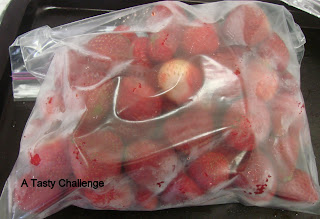
          As the Strawberry season is coming to an end, it is really good to freeze some for the coming months, especially considering the price of frozen Strawberries in the Grocery stores. So when I got my hands on some, I bought and made it into frozen ones. The procedure is very simple and can be done easily if you follow these steps. This is what I did.
          Method of Preparation
          1. Select Strawberries without any bruises or cuts.
          2. Wash and pat them dry. Remove the leaves and stems.
          3. Place them on a baking sheet without touching each other. Cover it with a foil or plastic wrap.
          4. Keep it in the fridge for one hour and then transfer it into the freezer. This will give the effect of freezing Strawberries individually.
          5. Once frozen, put all of them together in a zip lock bag and store it in the freezer till ready to be used.
          6. These berries will stay good for a long time and can be used for making desserts, smoothies and milkshakes.
          7. These frozen berries will not hold their shapes if thawed.
          8. Freezing individually first is very important, otherwise  in the end the berries will stay is one huge mass.


            Enjoy...


            Recipe No: 66                                   
             Ingredients                                           Makes 2 Medium glasses
            • Cold Milk…………………..1 ½ cups
            • Frozen Strawberries…..10 medium ones
            • Sugar………………………..3 tablespoons or as needed
            • Strawberry Ice cream...1/2 Cup
              Method of Preparation
              1. Blend all the ingredients together in a blender until smooth but still thick.
              2. Pour it into glasses, decorate with Strawberries and serve cold.


              Make it, enjoy the deliciousness and
              serve it to your family with love…

              Friday, July 23, 2010

              Diamond Cuts

              Recipe No: 65
              When I posted the recipe for Mixture, I mentioned about my mother making a variety of snacks during the vacation. This is one among those delicious treats. But now I have one more incident to remember when I think about Diamond cuts. Last year when we went for a vacation one of our friends asked me to bring some Diamond cuts from Kerala. But unfortunately, I was not able to bring them. By telling this, he bullied me for a long time even though his lovely wife tried to  scare him with her angry face many times!!! So the first thing I made after settling down from vacation was to make some Diamond cuts and give him. But after one year, he still says “anyway you didn’t bring Diamond Cuts from Kerala”. So this post is dedicated to my friend and his dear wife.
              Ingredients
              For the dough
              • All Purpose flour...4 Cups (or Maida)
              • Egg……………………1
              • Salt…………………...1/4 Teaspoon
              • Water………………..1-1 ¼ Cups or as needed
              For the sugar syrup
              • Sugar………………..1 ½ Cups
              • Water……………….1/2 Cup

              • Oil for deep frying
              Method of Preparation
              1. Mix Flour, Egg and Salt and make a soft dough with water (at room temperature). Start with 1 cup of water and then use more if needed. Let it rest for 5 minutes.
              2. Heat at least 3 inches of oil in a deep pan on a medium heat until hot.
              3. Divide the dough into 10 equal pieces.
              4. Roll each of them into 8 inch circles and cut them into diamond shapes.
              5. Drop the pieces in hot oil and fry till it is crispy and attains a light brown color. This will take at least 6-8 minutes per batch. Don't overcrowd the pan.
              6. Repeat this process for all the other pieces. You can easily roll and cut the next piece while frying one batch . Keep this aside till it is ready to be used.
              7. In a large pan on high heat, add sugar and water, boil and wait till it reaches a one thread consistency.
              8. Put all the fried Diamond cuts together into the sugar syrup and mix well till each of them are coated with the syrup evenly.
              9. Switch off the flame as soon as all the syrup is stuck to the Diamond cuts and no syrup is left behind.
              10. Once cooled store it in an airtight container and use when needed.
              Notes:
              • The oil for frying shouldn't be on high heat. Otherwise the dough will become brown fast but will not be crispy. So it is better to maintain a medium heat (or slightly above depends on your stove) and fry them till crispy. This will take a few minutes. So please be patient.
              • To check the one thread consistency touch the syrup with your index finger and press and separate it between the index finger and the thump. If the syrup forms one thread in between, it is ready. In the above given measurements this stage will be reached immediately after the sugar is melted.


              Make it, enjoy the deliciousness and
              serve it to your family with love…

              Wednesday, July 21, 2010

              Ginger-Lime Squash

              Recipe No: 64
              This is a perfect way to quench your thirst in the overwhelming heat of the summer with flavors that are very near to your heart and your palate. This is a concentrate that can be stored for a long time in the refrigerator and can be diluted when needed. To describe the taste…well you will taste the lime at first followed by a faint ginger taste at the end, in your throat, which for me feels very comforting. Above all we can feed our kids knowing what goes into it.
              Ingredients to make the concentrate
              • Lime juice………………….1 ½ Cups
              • Ginger Juice………………1/2 Cup
              • Sugar………………………..7 Cups
              • Water……………………….1 ½ Cups
              • Citric acid………………….1 ½ Teaspoon
              • Lemon/ Lime Extract...1 Teaspoon (optional)
              Method of Preparation
              1. Combine Water and Sugar in a pan and boil till it is of one thread consistency. (230˚F/110˚C on Candy Thermometer)
              2. While this is happening set up a double boiler by heating an inch of water in a small pan and put a bowl on top in such a way that the bottom of the bowl does not touch the water in the pan.
              3. Add Lime juice and Ginger juice into the bowl and heat slowly till warm.
              4. Once the sugar has reached the one thread consistency, switch off the heat and add the warm juices and Citric Acid. Mix well and let it cool. Skim off the foam that forms on top of this.
              5. Once cooled slightly add the Lemon/Lime extract (if using) and mix. 
              6. After cooling thoroughly, bottle this concentrate and keep in the refrigerator until ready to be used.
              To Prepare the Squash
              • Ginger-Lime Squash Concentrate...3-4 Tablespoons or as needed
              • Water………………………………………..1 Cup
              • Ice cubes……………………………….…..3-4
              Method of Preparation
              1. Mix everything together and enjoy.
              Notes:
              • Citric acid is available in most of the Indian stores. This gives the sourness which is essential for the squash. So please don’t avoid it.
              • To check the one thread consistency touch the syrup with your index finger and press and separate it between the index finger and the thump. If the syrup forms one thread in between, it is ready. In the above given measurements this stage will be reached immediately after the sugar is melted.


              Make it, enjoy the deliciousness and 
              serve it to your family with love…

              Mattar Paneer (Paneer with Green Peas)

              Recipe No: 63
              A few days before, I posted what I call a ‘Multi Purpose Gravy’. This is another recipe  in which I use that Gravy as a base. In that post I mentioned that it is possible to freeze the gravy and thaw when necessary. (For the recipe click here) If you have some of that in your freezer then this is a breeze… easy yet delicious. I like the gravy on a thick side, but it is perfectly okay if you make it a bit more thin by adding some water, specially if you want to serve it with Naan.
              Ingredients                                Serves 6
              • Multi Purpose gravy….1 batch
              • Oil……………………………1 Tablespoon
              • Paneer……………………..7 oz (around 200 grams)
              • Frozen Peas…..………....1 ½ cups (Precook the Peas if you are using dried Peas)
              • Cream……………………...1/2 cup
              • Kasoori methi…………...1/2 Teaspoon
              • Coriander leaves……….3 Tablespoons
              • Salt to taste
              Method of Preparation
              1. Cut the Paneer into thin flat slabs and fry on both sides using a tablespoon of oil. This way you can reduce the oil consumption. (when compared to the traditional practice of frying Paneer after making cubes.)
              2. Once fried, remove it from the pan and drain the excess oil on a paper towel. Cut it into small bite size cubes and keep aside for later use.
              3. To a deep pan on medium heat add the gravy, cover the pan and let it simmer till the gravy is cooked, for about 5-8 minutes. (The foam that may appear on top of the gravy is a sign that it is not yet cooked properly and will be gone once cooked.) Stir occasionally, as the Cashew in the gravy has a tendency to  stick to the bottom of the pan.
              4. Once the gravy is cooked add Peas, Paneer, 1/2 cup water  and Salt  (if needed) and mix well. Close the pan and let it cook for 10 minutes on medium heat.
              5. If you want more gravy add some water at this point and let it to boil for a minute.
              6. Once boiled add Cream, Kasoori Methi and Coriander leaves and allow it to boil along the edges.
              7. Serve hot with Naan, Chappathi or hot boiled Basmati rice.
              Notes: 
              • Kasoori Methi is dried Fenugreek leaves that are available in most of the Indian stores.
              • You can substitute Cream with evaporated low fat milk (here I used that) or if you want regular milk.


                Make it, enjoy the deliciousness and
                serve it to your family with love…

                Monday, July 19, 2010

                Spicy Murukku

                Recipe No: 62
                This is an excellent snack item that can be made and stored for at least a month. It is easy to make and I am sure this will be your kid’s favorite. You can control the spiciness by increasing or decreasing the amount of Chilly Powder.
                Ingredients
                • Oil for deep frying
                To make the Murukku
                • Rice Flour……………….2 Cups
                • Urad Dal flour…………1 Cup
                • Red Chilly Powder…..2-3 Tablespoon
                • Cumin Seeds…………..1 Teaspoon
                • Sesame Seeds…………1 Teaspoon
                • Salt………………….…….1 Teaspoon or as per your taste
                • Water…………………….1 ¼ -1 ½ Cups or enough to make a soft dough
                Special equipment needed
                • Idiyappam maker
                Method of Preparation
                1.  Combine Rice  flour and Urad Dal flour in a pan on medium heat and fry till it is really hot and toasted. Don't forget to stir it continuously. Let it cool.
                2. Combine the flours with all the other ingredients  to make the Murukku and knead to make soft dough. Start with 1 ¼ cup water and then use as needed.
                3. Fill the Idiyappam maker fitted with the attachment with big holes. Wet your hands slightly to ensure easy handling of the dough.
                4. Press the Idiyappam maker to release the dough into the hot oil with a circular motion to make thick strings and let it cook on one side. Take care not to overcrowd the pan.
                5. When one side is done, turn it over and let the other side also cook. When cooked, the bubbles will reduce considerably. The frying will take only 3-4 minutes together. Don't leave it in the oil for too long as that will make the Murukku hard
                6. Once fried, take it out of the oil and place on a paper napkin to drain the excess oil. Once almost cooled press on the sides to break it into small pieces.
                7. Store it in an airtight container when cooled.


                Make it, enjoy the deliciousness and 
                serve it to your family with love...


                  Friday, July 16, 2010

                  Chicken Noodle Soup

                  Recipe No: 61
                  Ingredients                                           Serves 3
                  • Butter………………...........1 Teaspoon
                  • Noodles….........................3 oz or 1 packet (I used Top Ramen, but you can use any. Discard the taste maker)
                  • Carrot………………….…...1 Small (Cut into thin long pieces)
                  • Beans…………………….....5-6 (Cut into thin long pieces)
                  • Onion…………………….....1/2 Small (Cut into thin long pieces)
                  • Chicken………………….....1/2 Cup (cooked and shredded)
                  • Chicken Stock…………….4 Cups
                  • Soy sauce……………….....1/2 – 1 Teaspoon (Optional)
                  • Spring Onion……………...1 (Sliced)
                  • Salt and Pepper to taste
                  Method of Preparation
                  1. Heat butter in a deep pan and add Onion, Carrots and Beans and saute for a minute.
                  2. Add the Chicken stock, close the pan and let it boil.
                  3. Add the Noodles and let it cook.
                  4. Once cooked add Chicken, Spring Onion, Soy Sauce, Salt (If needed) and Pepper. Let it boil one more time.
                  5. Serve hot after a sprinkle of freshly chopped spring/ green onion.


                  Make it, taste the deliciousness and
                  serve it to your family with love…

                  Chicken Stock

                  If you have a habit of buying the whole Chicken, you can use the less meaty portions like neck, Ribs, Backbone and the tip of the wings to make your own Chicken stock. The benefits… No preservatives, No MSG (Mono Sodium Glutamate) or other artificial ingredients, you can control the amount of salt, more economical and above all this much more delicious than store bought ones. Collect the extra parts of the Chicken and store in the freezer and when it’s adequate, make the stock. Once made, you can freeze the stock and just thaw whenever you need. What else can you ask from the pieces that are normally neglected and  simply go to the garbage!!!
                  Ingredients                                   Yields around 4 Cups
                  • Chopped Chicken bones…........3 cups or more (Use neck, end of the wings, backbones, ribs etc :-)
                  • Red Onion Chopped roughly…1 Small (Wash and use the skin too as it gives a nice color to the stock)
                  • Carrot chopped roughly……….1 medium (Don’t peel. Just wash)
                  • Celery chopped roughly……….1 stalk
                  • Beans chopped roughly…….....5-8
                  • Garlic large………………………..4-6 (Cut each into two)
                  • Crushed black pepper………...1/2 Teaspoon or as per your taste (use less if you are using powder)
                  • Water………………………………..4 ½ Cups
                  • Salt as per taste
                  Method of Preparation
                  1. Put all the ingredients together in a pressure cooker and wait till one whistle.
                  2. Lower the flame to medium and let it cook slowly for 1 hour.
                  3. Switch off the flame and let it sit for 30 minutes.
                  4. Open and strain through a sieve. Press the solids gently. Don’t press too hard.
                  5. Discard the solids and use the liquid soon or keep in the refrigerator for up to 4 days or keep in the freezer for at least 2 months.
                  Enjoy...

                    Wednesday, July 14, 2010

                    Indian Style Chicken Fried Rice

                    Recipe No:60
                    Many a times I used to get this doubt from my friends regarding the difference between Vegetable Pulav and Vegetable Fried Rice. Let me try to make it clear.
                    Vegetable Pulav is an Indian dish while Fried rice has a Chinese influence. Hence I consider them  different. I fry the rice before cooking Pulav and will never fry after cooking. For Fried rice I cook the rice in a regular manner in lots of water, drain and then fry the already cooked rice. Thus Fried Rice is excellent to use the left over rice. Technically speaking for Fried Rice because of its Chinese origin I try to avoid all Indian spices like Cardamom, Cinnamon, Cloves, Bay leaves etc:- and also Raisins and Cashew nuts and even Fried Onions.  In Pulav I add all these things.
                    So for me these two are really different and if you follow this, I am sure you will also be able to taste the difference. But cooking is all about your preferences and your taste buds…so go ahead and make it the way you like….This is how I make it
                    Ingredients                                   Serves 6-8 adults
                    • Basmati Rice………………....2 Cups
                    • Vegetable oil…………….......4 Tablespoons
                    • Vegetables……………….......1 Cup (Includes Carrot, Beans, Peas and Green Capsicum)
                    • Celery………………………......3 Tablespoons (Finely Chopped)
                    • Onion………………………......1/4 Cup (Thin long slices)
                    • Ginger-Garlic crushed…...2 Tablespoons (together)
                    • Egg………………………………2
                    • Cooked Shredded Chicken…1/2 Cup
                    • Spring Onion Chopped………4 (Separate White and Green portions)
                    • Soy Sauce………………………..1 Teaspoon
                    • Pepper…………………………….3/4 -1 Teaspoon
                    • Salt as per taste
                    Method of Preparation
                    1. Wash and soak the rice in warm water for 20 minutes. Drain and keep aside.
                    2. Boil at least 12 cups of water. When boiled add the rice and cook till almost done. Take care not to overcook the rice.
                    3. Drain and spread it on a large plate to cool. If possible refrigerate before doing the rest. 
                    4. In a large pan or wok on high heat add the oil.
                    5. To it add Ginger-Garlic, Celery and Spring Onion whites. Saute for a minute.
                    6. Add the Onion followed by the Vegetables and stir for 2 minutes. Don’t brown the veggies. It should be crisp.
                    7. Move all the vegetables to a side of the pan and crack the eggs into the pan. Stir fast to scramble it.
                    8. Once scrambled mix everything together add the chicken pieces, Soy sauce, Pepper powder and a bit of salt.
                    9. Now mix the rice in two additions. Add salt according to taste. Stir till the rice is reheated.
                    10. Finish by sprinkling spring onion greens on top. Serve hot.
                    Notes:
                    • It is very important to start with cold rice. Otherwise there are chances for the rice to break or to form clumps.
                    • The whole process of making the rice is on high heat so keep everything ready to go before starting.
                    • It is good to use white Pepper powder, that way the rice will remain white. As you can see I used black and the specks are visible.
                    • Never avoid Green/Spring Onions/  Scallions. They give a signature taste to the Fried rice.
                    • If you want you can add a pinch of Aginomotto (Mono sodium Glutamate/ MSG) to get that authentic taste. But I decided not to use.
                    • You can avoid Chicken and Egg to make it a Vegetable fried rice and add Fried Shrimp to make a Shrimp fried Rice.


                    Make it, enjoy the deliciousness and
                    serve it to your family with love...

                    Tuesday, July 13, 2010

                    ‘Multi Purpose’ Gravy and Butter Chicken

                    This is a type of gravy that I use as a base for a lot of dishes. You can make this ahead of time and can store in the fridge for up to 3 days or can be kept frozen up to 3 weeks in the freezer, making it very versatile.
                    Ingredients for the gravy
                    • Oil…………………………….1 Tablespoon
                    • Whole Garam Masala…4 Cardamom, 8 Cloves, 2 1inch Cinnamon pieces and 1 Teaspoon Fennel Seeds)
                    • Onion ……………………….1 Cup (roughly chopped)
                    • Garlic………………………..4 big or 10 small roughly chopped
                    • Ginger……………………….1 inch piece roughly chopped
                    • Chilly Powder…………….1 Teaspoon
                    • Coriander Powder……...1 ½ Teaspoons
                    • Turmeric Powder……….1/4 Teaspoon
                    • Whole Cashew Nuts…....12
                    • Tomato………………………1 Cup roughly chopped
                    • Kasoori Methi……………..1 Teaspoon
                    Method of Preparation
                    1. In a pan heat Oil and add the whole Garam Masala and saute till fragrant.
                    2. Add Chopped Onion, Garlic and Ginger and saute till translucent.
                    3. Add Cashew nuts and saute till the Onions starts to brown on the sides.
                    4. Add Chilly, Coriander and Turmeric powder and saute till the raw smell is gone.
                    5. Add Tomato and Kasoori Methi and mix for two minutes and switch off the heat.
                    6. Grind this mixture well using just enough water to blend in a blender until smooth.
                    Notes:
                    • Onion, Ginger and Garlic don’t have to be finely chopped. Just cut it into big slices.
                    • Take care while blending a hot mixture. Leave a small space open on the top of the blender to let the vapor escape. To prevent liquid from flowing out, cover the space with a folded kitchen towel.
                    • I use this gravy base for a lot of other dishes like Paneer, Meatball curry etc: 
                           
                    Butter Chicken

                    Recipe No: 59

                     Ingredients                                                 Serves 5-6 adults
                    • Chicken…………………………1/2 kg
                    • Turmeric powder…………..1/4 Teaspoon
                    • Salt……………………………....1/2 Teaspoon
                    • Multipurpose gravy………..1 batch
                    • Butter………………………..…2 Tablespoons
                    • Heavy Cream………………..1/2 Cup
                    • Coriander Leaves…………..4 Tablespoons
                    • Kasoori Methi……………..…1 Teaspoon
                      Method of Preparation
                      1. Cook the Chicken with Turmeric powder, Salt and 1 Cup of water till ¾th done. Remove the chicken pieces and keep the liquid for later use.
                      2. In another pan, melt Butter and add the Chicken pieces and fry for 2 minutes.
                      3. Add the gravy and the reserved cooking liquid mix well, close the pan and let the chicken finish cooking. Small oil droplets can be found floating on top at this stage. Do stir at times as Cashew has a tendency to stick to the bottom of the pan.
                      4. Take Kasoori Methi in your palm and crush as much as possible with the other palm before adding.
                      5. Add Cream and Coriander leaves and let it boil along the sides and switch off the flame and serve hot.
                      Notes:
                      •   Kasoori Methi is dried Methi or Fenugreek leaf. This is available in most of the Indian stores. This gives the signature taste of Butter Chicken. so don't avoid this.
                      • Heavy Cream can be substituted with half and half or evaporated milk or even regular milk. In all these cases the amount varies, so use according to your taste.
                      • When I make this just for us, I substitute Butter with regular Oil. Even though, it cannot be called ‘Butter Chicken’ it tastes awesome too.
                      • Usually in restaurants this dish is reddish in color due to added food color. If you want you can add that too but I prefer this without the color.


                      Make it enjoy the deliciousness and
                      serve it to your family with love…

                      Monday, July 12, 2010

                      Vellayappam/ Rice Pancakes with Coconut (Theenga Aracha Appam)

                      Recipe No: 58                                                         Makes 20-22
                       

                       Ingredients 
                      • Raw long grain rice……………..2 Cups
                      • Freshly grated Coconut………3/4 Cup (Use 1 cup if you are using frozen)
                      • Cooked Rice………………………1/4 Cup (Any kind will do)
                      • Instant Yeast…………………....1 Teaspoon
                      • Sugar……………………………….5 Teaspoons or as per needed
                      • Salt as per taste
                        Method of Preparation
                        1. Wash and soak the rice in water for 5 to 6 hours. Drain and reserve the soaking liquid.
                        2. Grind together the soaked rice, cooked rice and the coconut in a grinder or blender with just enough water(the remaining soaking liquid)  to grind till almost smooth.
                        3. In a large bowl add the yeast, 2 teaspoons of sugar and pour the rice batter.
                        4. Mix well and let it sit in a warm place till it is at least doubled. This will take only 3-4 hours if the yeast is really good.
                        5. Once raised, add salt and the rest of the sugar mix well and let rise again for the second time.
                        6. Heat a flat pan on medium heat and grease the surface with a bit of oil and pour a little less than ¼ cup of batter at a time. Spread a bit with the help of the back of the spatula and let it cook.
                        7. Once bubbles start to come on top and the sides are cooked, turn it over and let the other side cook.
                        8. Once both sides are cooked this Appam is ready to be served.
                        Notes: As salt suppress the Yeast use it only after the first rising period.
                        The second raising as mentioned is important as it will make Appam softer.
                        If the batter is too thick add some water and bring it to the required consistency.


                        Make it, enjoy the deliciousness and 
                        serve it to your family with love....

                        Sunday, July 11, 2010

                        Custard Plantains

                        Recipe No: 57
                        This is a totally make ahead, quick and easy dessert which can be presented according to your own imaginations. The best way to make this is with yellow ripe Plantains that are not mushy. It is a very good Dessert when you crave something other than a heavy pudding or other sweets after a summer meal.
                        Ingredients                                                Serves 6-8
                        • Ripe Plantain sliced………………..3
                        • Sugar……………………………………4 Tablespoons
                        • Lemon/Lime Juice…………………2 Tablespoons
                        • Water……………………………………1/4 Cup
                        To make the Custard
                        • Milk………………………………..2 Cups
                        • Sugar………………………………1/2 Cup
                        • Egg………………………………….3
                        • Corn Starch……………………...2 Teaspoons (Mix it with 4 Tablespoons of water)
                        • Vanilla Extract/Essence….....1 Teaspoon
                        For Presentation
                        • Toasted and Crushed Pistachios…2 Tablespoons or as needed
                        • Strawberry Syrup……………….......1 Tablespoon (Optional)
                        Method of Preparation
                        1. In a saucepan cook together Plantain slices, Sugar, Lemon Juice and ¼ cup of water on a medium heat till the plantain slices are soft.
                        2. Switch off the heat and when cooled, chill in the refrigerator till ready to serve. Keep any remaining liquid with the cooked Plantains.
                        To make the Custard
                        1. Heat the milk and sugar in a saucepan on medium high heat.
                        2. In the mean time, whisk egg till the yolk and white is mixed well.
                        3. When the milk is hot add 1/4th of the milk to the egg, mix well and then add that egg into the milk in the sauce pan. (This process is called tempering. If egg is added directly into the milk, the egg will scramble. So by adding some milk to the egg, the temperature of the egg will be raised slightly and it will no longer scramble when it hits the hot milk in the pan.)
                        4. Let the milk- egg mixture comes to a boil stirring constantly.
                        5. Meanwhile mix cornstarch with water.
                        6. When the milk-egg mixture is really hot (Just before boiling) mix the diluted cornstarch and let it cook on a medium flame until thickened, stirring constantly.
                        7. Once boiled and thickened, switch off the flame and place that saucepan in a pot of cold water. This is to cool the Custard as fast as possible. Keep on stirring.
                        8. When slightly cooled, add the Vanilla essence and mix.
                        9. When cooled keep it in a container and refrigerator till ready to be served.
                        To Serve
                        1. In a bowl, ladle some custard and on top of it pour Strawberry syrup (if using) to make pretty patterns.
                        2. On top of it put two or three slices of cooked Plantain. Don’t forget to add some of that plantain cooking liquid on top of the plantains.
                        3. Decorate with crushed toasted Pistachios and serve.
                        Notes: To Toast, put the shelled Pistachios on a dry pan on medium heat. Toss it often until a toasted aroma comes.
                        If you don't mix while cooking the Custard, there are chances for it to curdle.
                        If you don't mix it while cooling down, then there are chances for the skin to form on the top of the custard. After adding the Vanilla extract, the skin formation can be prevented by covering it with a piece of plastic wrap in such a way that the wrap touches the top of the Custard.


                        Make it, enjoy the deliciousness and 
                        serve it to your family with love…

                        Saturday, July 10, 2010

                        Triple Chocolate Cup Cake

                        Recipe No: 56
                        This recipe uses three types of Chocolate. Chocolate powder, Semisweet chocolate chips and 'Hershey's Kisses' and hence the name. As it is summer vacation, this is a great 'tasty' project to do with your kids.
                        Ingredients                                     Makes 18 Cup Cake
                        • All Purpose Flour…………………..1 1/3 Cup
                        • Baking Powder………………………2 Teaspoon
                        • Salt……………………………………...1/4 teaspoon
                        • Butter………………………………….1/2 Cup or 1 Stick
                        • Sugar…………………………………..1 Cup
                        • Eggs……………………………………2 Large
                        • Vanilla Essence…………………….2 Teaspoon
                        • Hot water……………………………1 Cup
                        • Cocoa Powder……………………...1/2 Cup
                        • Instant Coffee Powder…………..3/4 Teaspoon
                        • Semisweet Chocolate Chips…...1/2 Cup
                        • Cup Cake Liners…………………..18
                        • Hershey’s kisses peeled………...18
                        Method of Preparation
                        1. Preheat the oven to 375˚F/180˚C.
                        2. Line a Muffin tin with cupcake liners and spray it with cooking spray.
                        3. Dissolve Chocolate and Coffee powder in hot water and let it cool down to a room temperature.
                        4. Sift together Flour, Baking Powder and Salt well and keep aside.
                        5. Beat Butter and Sugar till light and fluffy.
                        6. Add eggs one at a time and mix properly, followed by Vanilla Essence.
                        7. Add Flour and Chocolate water alternating with each other, starting and ending with Flour.
                        8. Once everything is mixed well add Chocolate Chips and mix.
                        9. Pour the batter equally into 18 cupcake liners and bake it for 15 to 18 minutes or till an inserted toothpick comes out clean.
                        10. Once out of the oven insert one of the Kisses Chocolate into the middle of the each Cupcake. The heat from the Cupcakes will soften the chocolate.
                        11. Cool the Cup cakes on a wire rack and eat it warm or at room temperature.
                        Notes: 
                        • Instead of Chocolate Chips you can use broken Chocolate pieces too.
                        • The quality of the Chocolate powder is very important in this recipe. So try to use the best ones available. I used a Dutch processed Cocoa powder.
                        • Instead of the cooking spray you can slightly grease the cup cake liners with butter.
                        • Using an Ice cream scoop to fill the cups will ensure equal amount of batter in each cupcake.
                        • It is better to use all the ingredients at room temperature.
                        • Don’t mix too much after adding the flour. It will make the cupcakes hard.


                        Make it, enjoy the deliciousness and 
                        serve it to your family with love…

                        Thursday, July 8, 2010

                        Beef Curry

                        Recipe No: 55
                        Ingredients                                                  Serves 6
                        To pressure cook
                        • Beef…………………………..1 lb (Cut into small cubes)
                        • Turmeric Powder……….1/4 Teaspoon
                        • Pepper powder…………..1/2 Teaspoon
                        • Salt……………………………1/2 Teaspoon
                        To saute
                        • Oil……………………………...2 Tablespoons
                        • Mustard seeds…………....1/2 Teaspoon
                        • Onion Chopped…………...1 Cup
                        • Curry Leaves………………2 Sprigs
                        • Ginger-Garlic Paste……..2 Teaspoon
                        • Chilly Powder……………...1 Teaspoon
                        • Coriander Powder……......2 ½ Teaspoon
                        • Turmeric Powder……......1/4 Teaspoon
                        • Garam Masala Powder…1 Teaspoon
                        • Tomato sliced………………1 Small
                        • Potatoes Cubed…………….2 Small
                        • Coconut Milk………………..3/4 Cup
                        Method of Preparation
                        1. Mix all the ingredients to pressure cook and cook for 4 whistles or till almost cooked.
                        2. Heat Oil in a pan and splutter the Mustard seeds.
                        3. Add the Onion and saute till wilted.
                        4. Add Curry leaves and Ginger-Garlic paste and saute till golden brown.
                        5. Add Chilly, Coriander, Turmeric and Garam Masala powder and saute till the raw smell is gone for about 2 minutes.
                        6. Add sliced tomatoes followed by the cooked beef including the remaining liquid and let it boil and reduce.
                        7. Add the cubed Potatoes, close with a lid and lower the flame and let it simmer till the potatoes are just cooked.
                        8. When the potatoes are cooked and the water is reduced considerably add the coconut milk and let it boil along the edges.
                        9. Switch off the flame and serve hot with Rice or Chappathis.


                        Make it, enjoy the deliciousness and 
                        serve it to your family with love…

                        Fish/ Salmon Biriyani

                        Recipe No: 54

                        Even though there are a lot of steps for this like most of the other Biriyani recipes, you can definitely multitask and make this in a much lesser time. Another thing is that the Fish Masala, fried onions, the almond paste and even the rice can be made ahead of time ( the day before) and assemble and bake on the day you are going to serve it. This makes it easier and a very good main dish for parties.
                        Ingredients                                   Serves 8-10 Adults
                        To Marinate
                        • Salmon pieces……………...2lb
                        • Salt…………………………....1/2 Teaspoon
                        • Chilly Powder……………...1/2 Teaspoon
                        • Turmeric Powder………...1/2 Teaspoon
                        • Lemon Juice………………...1 Tablespoon
                        To Grind
                        • Ginger Roughly chopped...1/4 Cup
                        • Garlic roughly chopped.....1/4 Cup
                        • Green chilly chopped…......1/4 Cup (Use as much as you want depending on your taste)
                        • Onion Chopped……………...3 Cups
                        To Saute
                        • Oil……………………………........4 Tablespoons
                        • Turmeric Powder………........1/2 Teaspoon
                        • Salt………………………....…......1 Teaspoon
                        • Curd…………………….…….......1/2 Cup
                        • Tomato sliced…………………..1 Large
                        • Coriander leaves /Cilantro...1/2 cup chopped
                        • Mint leaves chopped………...1/4 Cup
                        • Garam Masala Powder……..3/4 Teaspoon
                        • Lemon Juice……………..……..2 Tablespoons
                        To make the rice
                        • Ghee…………………………......2 Tablespoons
                        • Whole Garam Masala……….7 Cardamom, 10 Cloves, 3 one inch Cinnamon sticks
                        • Rice………………...……….........3 Cups
                        • Water………………………........5 ½ Cups
                        To Blend
                        • Almonds ………………..…........8 (Put it in boiling water and take the skin off)
                        • Coconut Milk………………......1/4 Cup
                        • Turmeric Powder………….....1/4 Teaspoon
                        • Saffron……………………..........A Small pinch
                        To Garnish
                        • Cashew nuts and Raisins…....4 Tablespoons each
                        • Sliced Onion to fry……….....…1 Cup
                        Method of Preparation
                        1. Marinate the fish with the ingredients given in the marinade section and keep aside for ½ hour.
                        2. Grind together (or chop finely) all the ingredients given in that section to a course consistency and keep aside.
                        3. Blend all the ingredients given in that section into a smooth consistency and keep aside. Use 2-3 Tablespoons of water if needed.
                        4. Wash and soak the rice in warm water for 20 minutes and drain.
                        5. Deep fry or saute thinly sliced onions for garnishing.
                        To make the Fish Masala
                        1. In a deep pan heat some oil and fry the fish for a minute on each side and keep it aside. Use the rest of the oil to make the masala. Frying will  give the fish some strength to withstand the cooking without disintegrating.
                        2. In the same oil saute the Onion mixture together with Salt and Turmeric powder on a medium high heat till it is almost brown. Add more Oil if needed.
                        3. Add the fried Fish, Curd, Tomato and ¼ cup of water, close the pan and  cook it on a medium heat for 8- 10 minutes.
                        4. When it is cooked add chopped Coriander and Mint leaves, Garam Masala Powder and Lemon Juice and mix well taking care not to break the fish pieces. When almost dry switch off the flame and keep it aside till ready to be used.
                        To make the Rice
                        1. Start to boil 5 ½ cups of water.
                        2. To a pan add the Ghee and fry Cashew nuts followed by Raisins (for garnishing) .Take them off and keep aside.
                        3. To the remaining Ghee add the whole Garam Masala and fry till fragrant.
                        4. Add the rice and fry till the rice on the bottom of the pan starts to move on its own.
                        5. Add the boiling water, lower the flame to minimum, cover the pan and cook it till all the water is evaporated and the rice is almost cooked. You can do this while the fish is cooking.
                        To assemble and bake the Biriyani
                        1. Preheat the oven to 350˚F/180˚C
                        2. In an oven proof dish layer 1/3rd of the rice evenly. Sprinkle some almond-turmeric water on top and then layer half of the Fish Masala. Layer another 1/3rd of the rice followed by the rest of the Fish Masala and end the layering with the remaining rice.
                        3. On top add the rest of the almond- turmeric water and sprinkle fried Onions, Cashew nuts and Raisins.
                        4. Cover this with an Aluminum foil or a damp cloth.
                        5. Bake this for 30-45 minutes in the preheated oven and let it stand for at least 15 minutes before serving.
                        Notes: If you don’t have an oven, you can make it on stove top itself. Assemble everything in a pan, cover with an airtight lid and put it on a minimum flame and cook for 30 minutes. Take care not to burn the bottom.


                        Make it, enjoy the deliciousness and 
                        serve it to your family with love...